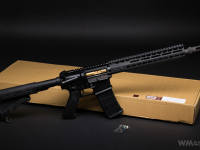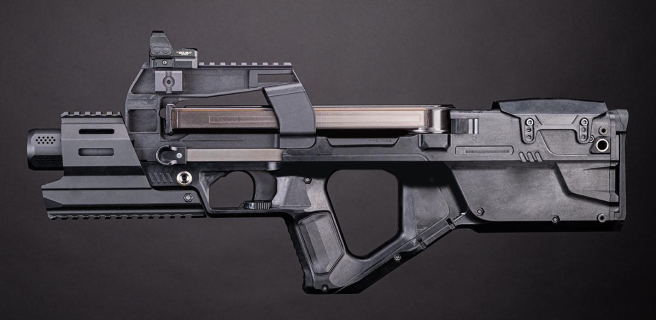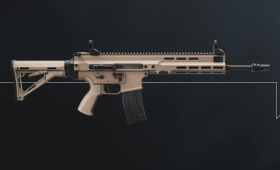

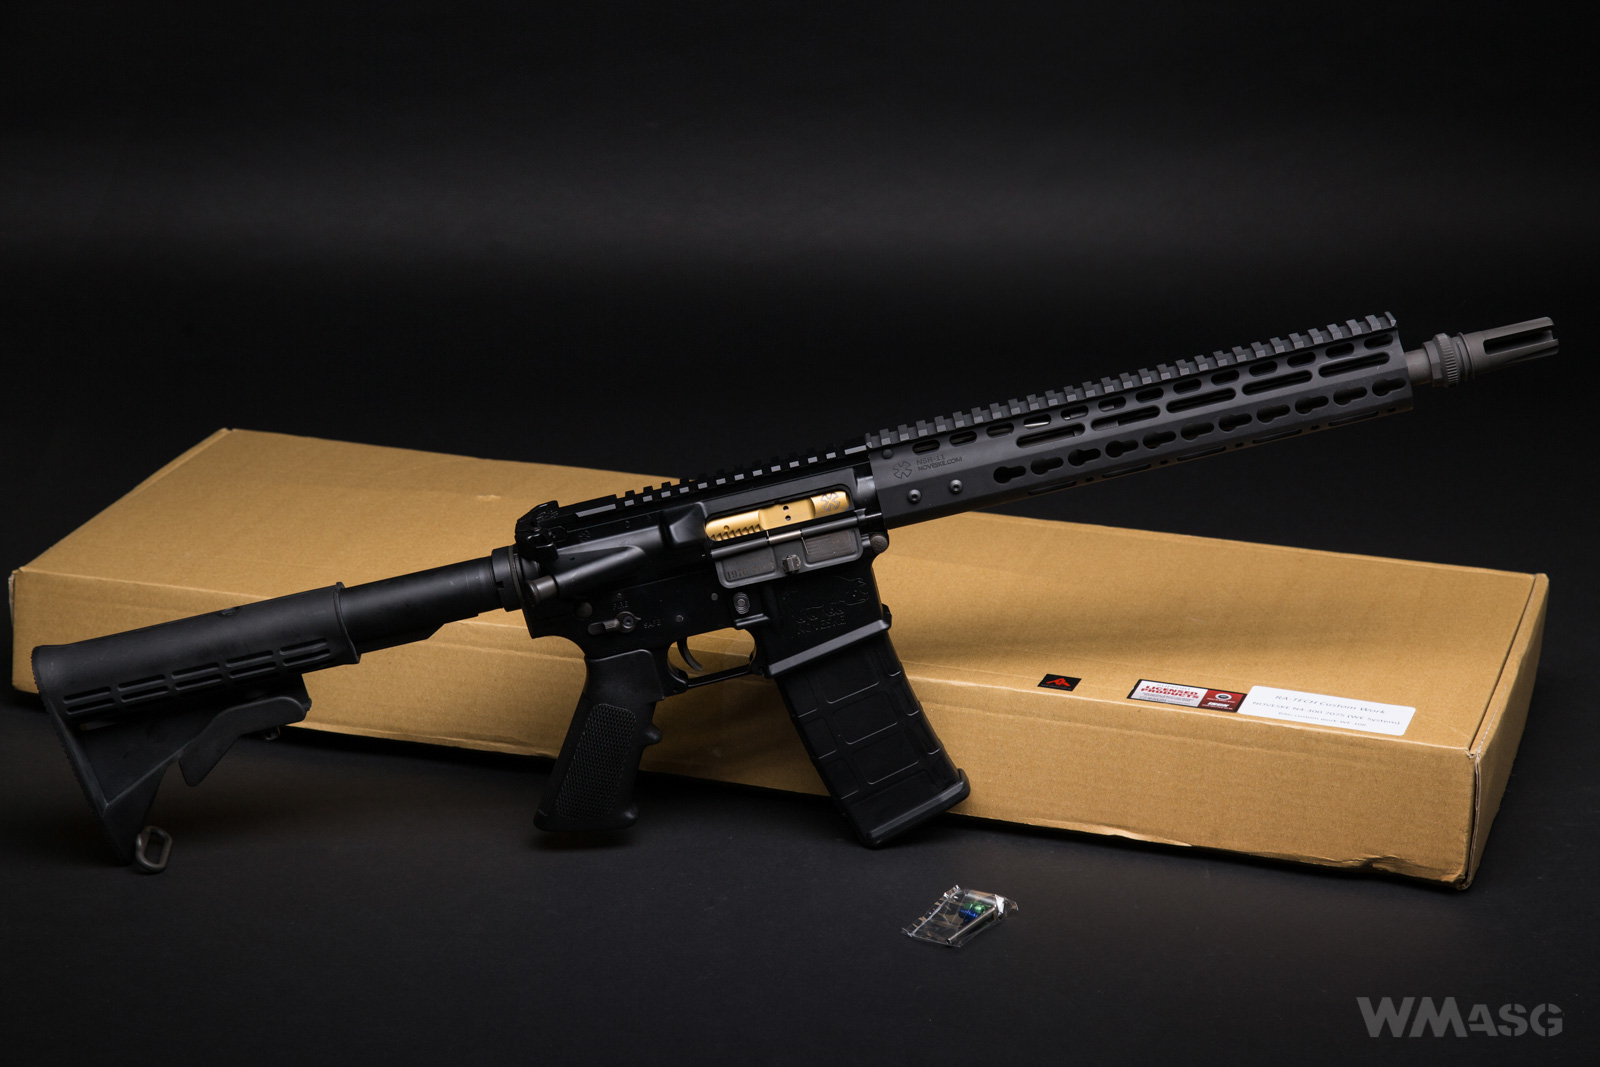
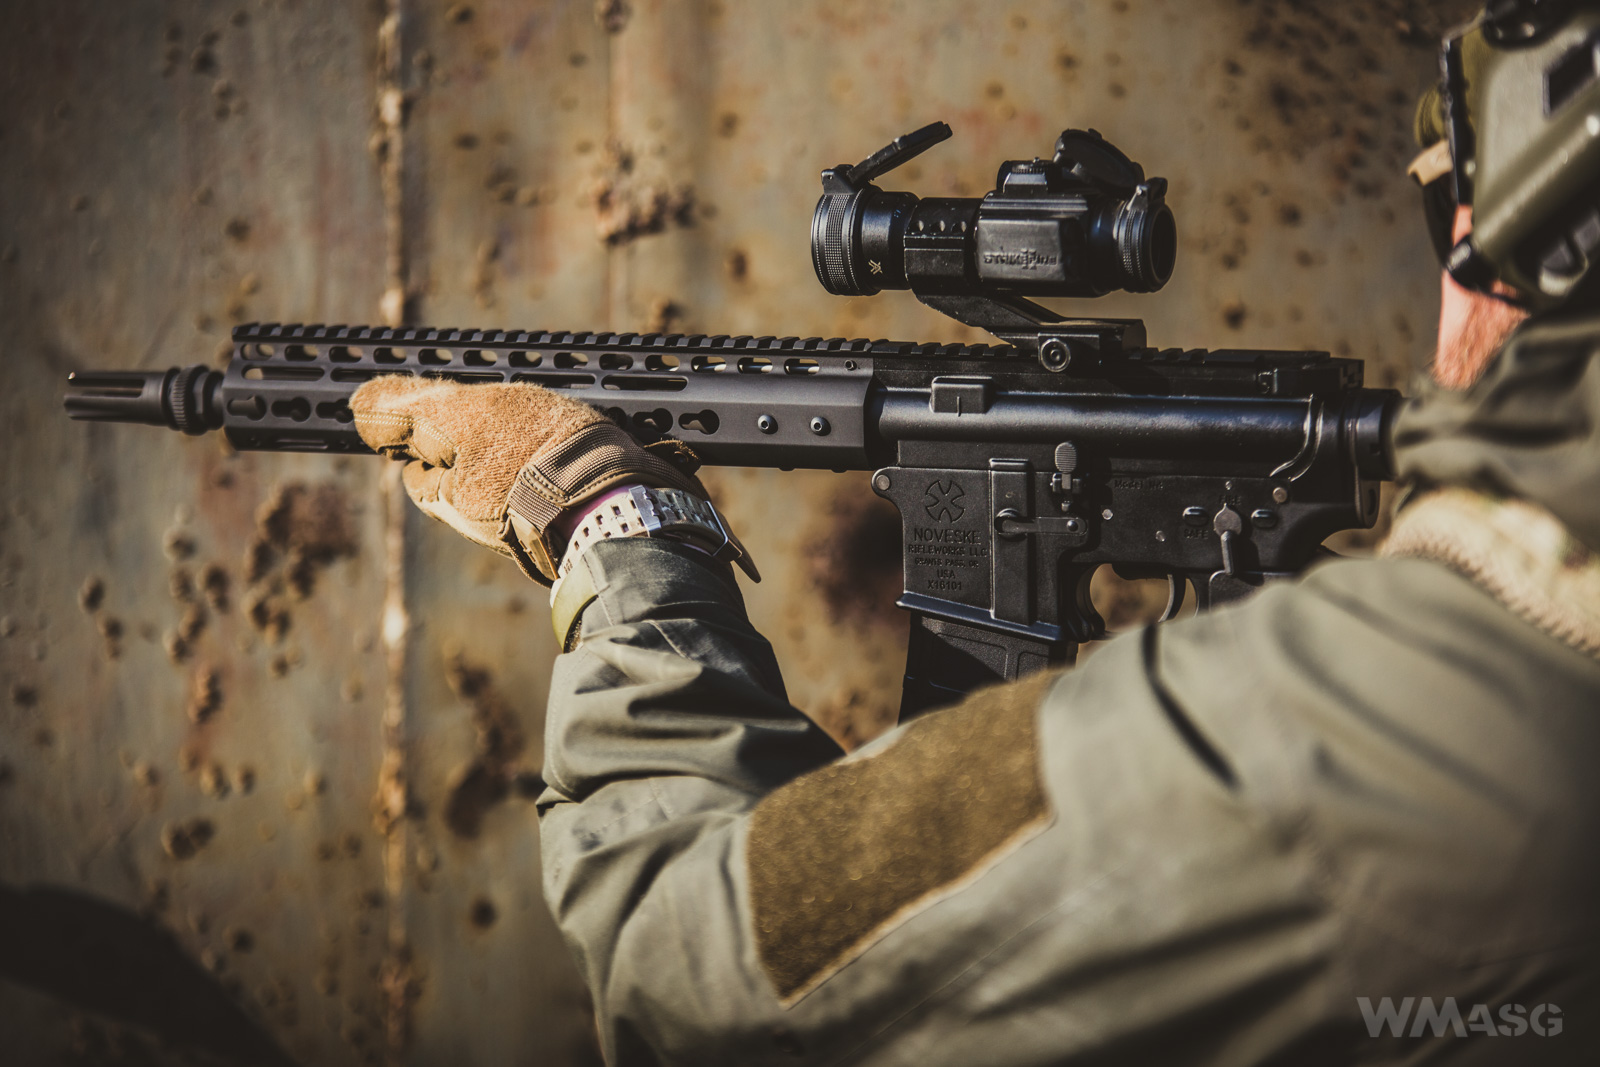
A replica with the code marking RAG-Custom Work-WE-108 - the more expensive from two very similar versions bearing the licensed Noveske designations. Its more expensive, because it has a receiver made of 7075 aluminum alloy.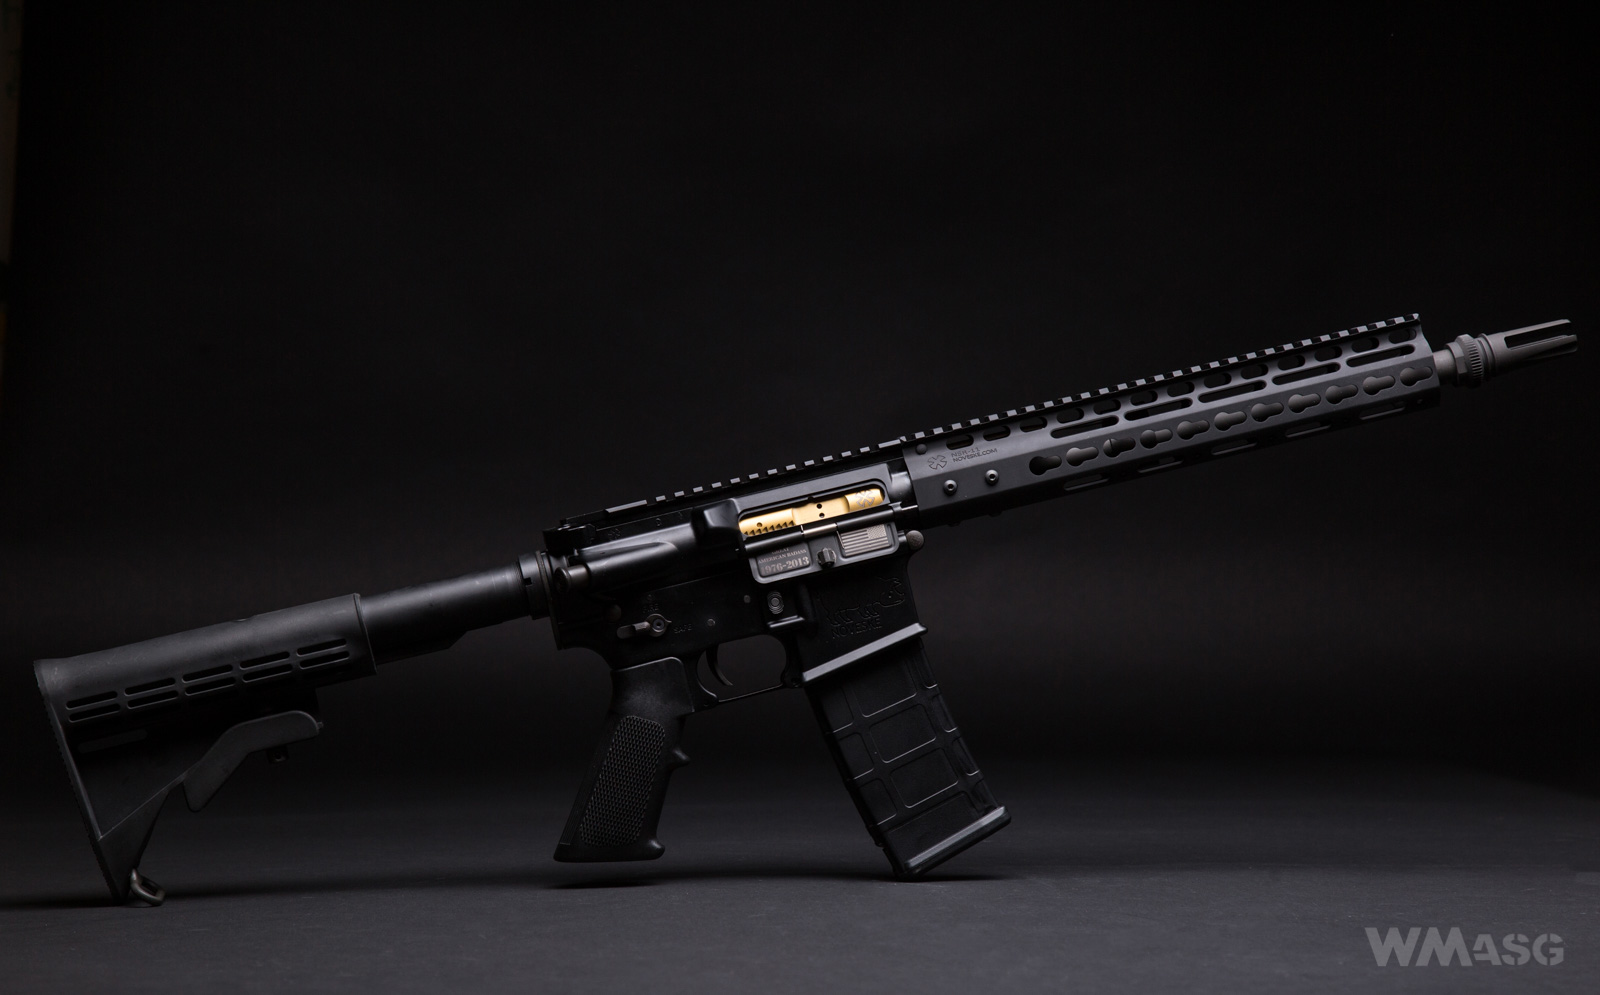
Full specyfication
precision steel barrel with an inner diameter of 6.01 mm and a length of 300 mm (RA);
steel HopUp chamber (New-Age);
steel 12.5-inch external barrel with a dummy gas block and tube (RA);
steel parts of the trigger assembly (RA), machined using computerized numerical control machines (CNC);
steel bolt catch (RA);
steel flash hider (Svoboda);
steel safety selector switch (New-Age);
steel ejector port cover (New-Age);
upper and lower receiver made from 7075 aluminum alloy, made using CNC machines (RA);
steel-aluminum bolt carrier with exchangeable nozzles - Magnetic Locking NPAS (RA);
aluminum buffer (RA);
aluminum, double-sided charging handle;
5-position adjustable buttstock (New-Age);
licensed copy of the 11-inch front in the KeyMod system - Noveske NSR (Madbull).
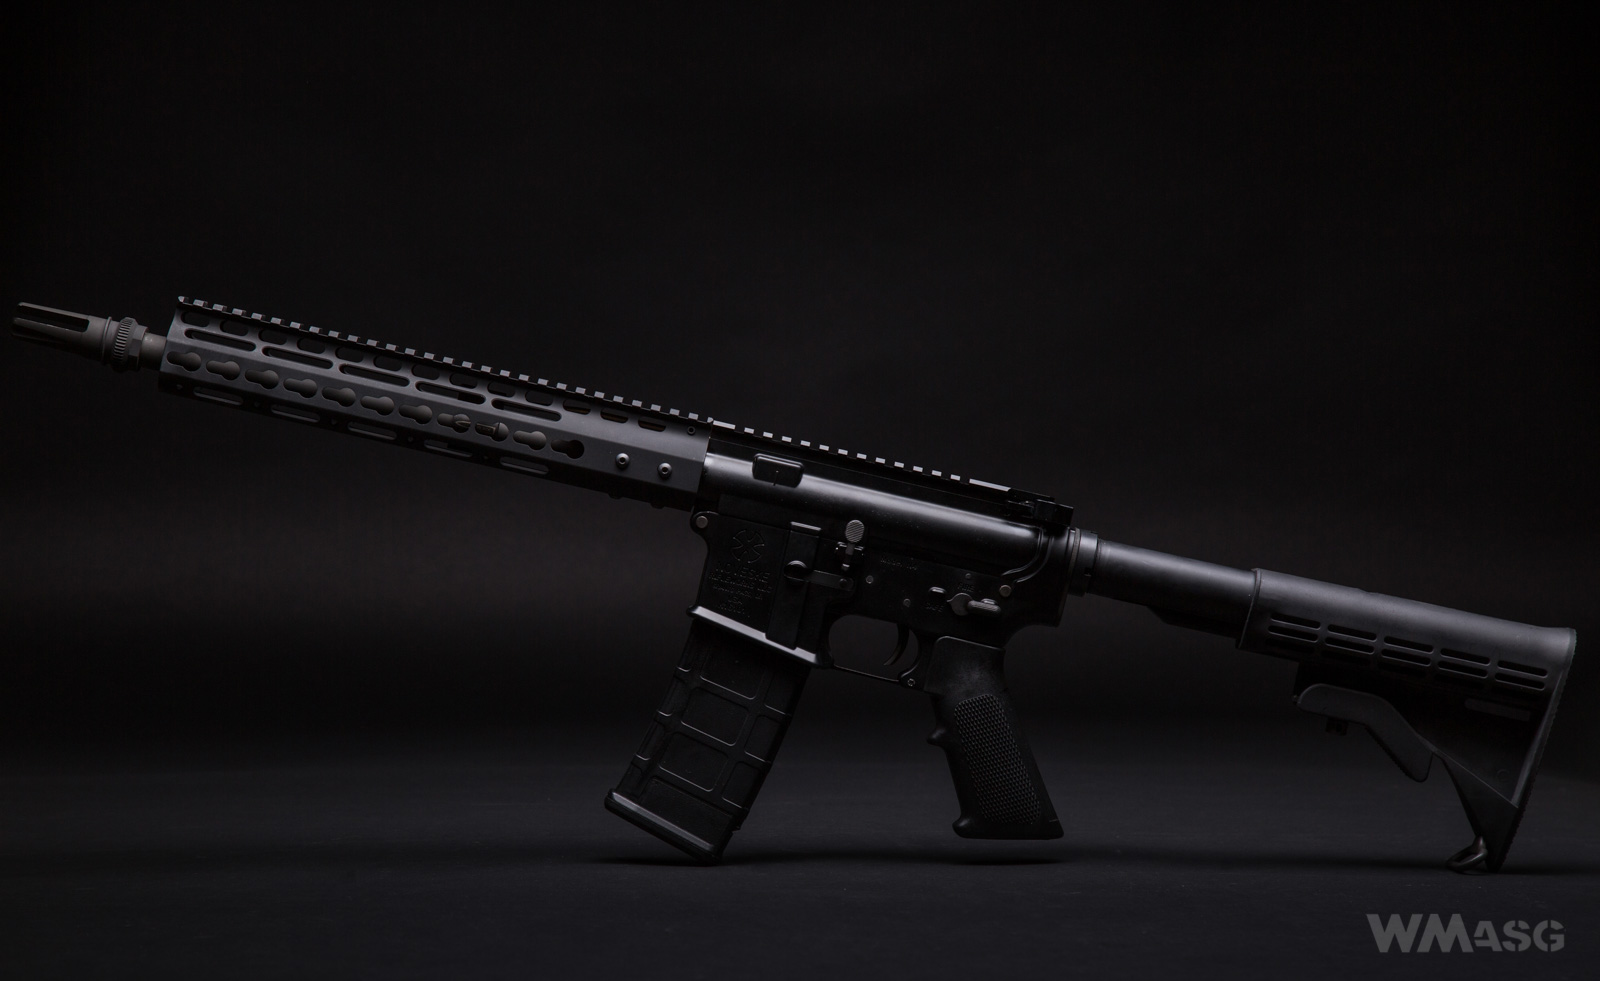
The length of the replica (folded/unfolded buttstock): 735/820 mm.
Weight without the magazine: 2515 g.
Muzzle velocity (using 0.2 g BBs and Green Gas): 300-440 fps (depending on the nozzle used).
The set![]()
Compared to many other replicas, the packaging and its contents are rather average. The box is made of ordinary laminated cardboard and is free of any imprints. Only three stickers were stuck on it. From the left: 1. RA-TECH logo, 2. information about the product's legality and a slightly moralizing statement that by buying licensed products you support their hard-working designers (quote: "Your support features, the original designers and their hard work"), 3. the address label with the manufacturer's name and product code printed on a laser printer (!).
Inside the box is filled with rigid foam, in which there are slots for the parts of the set were cut out. Despite the poor impression, the packaging fulfills its role sufficiently during storage and transportation to the customer.
Along with the replica we get a magazine holding 30 BBs, two additional nozzles of the NPAS system and a two-sided key used to exchange the nozzles.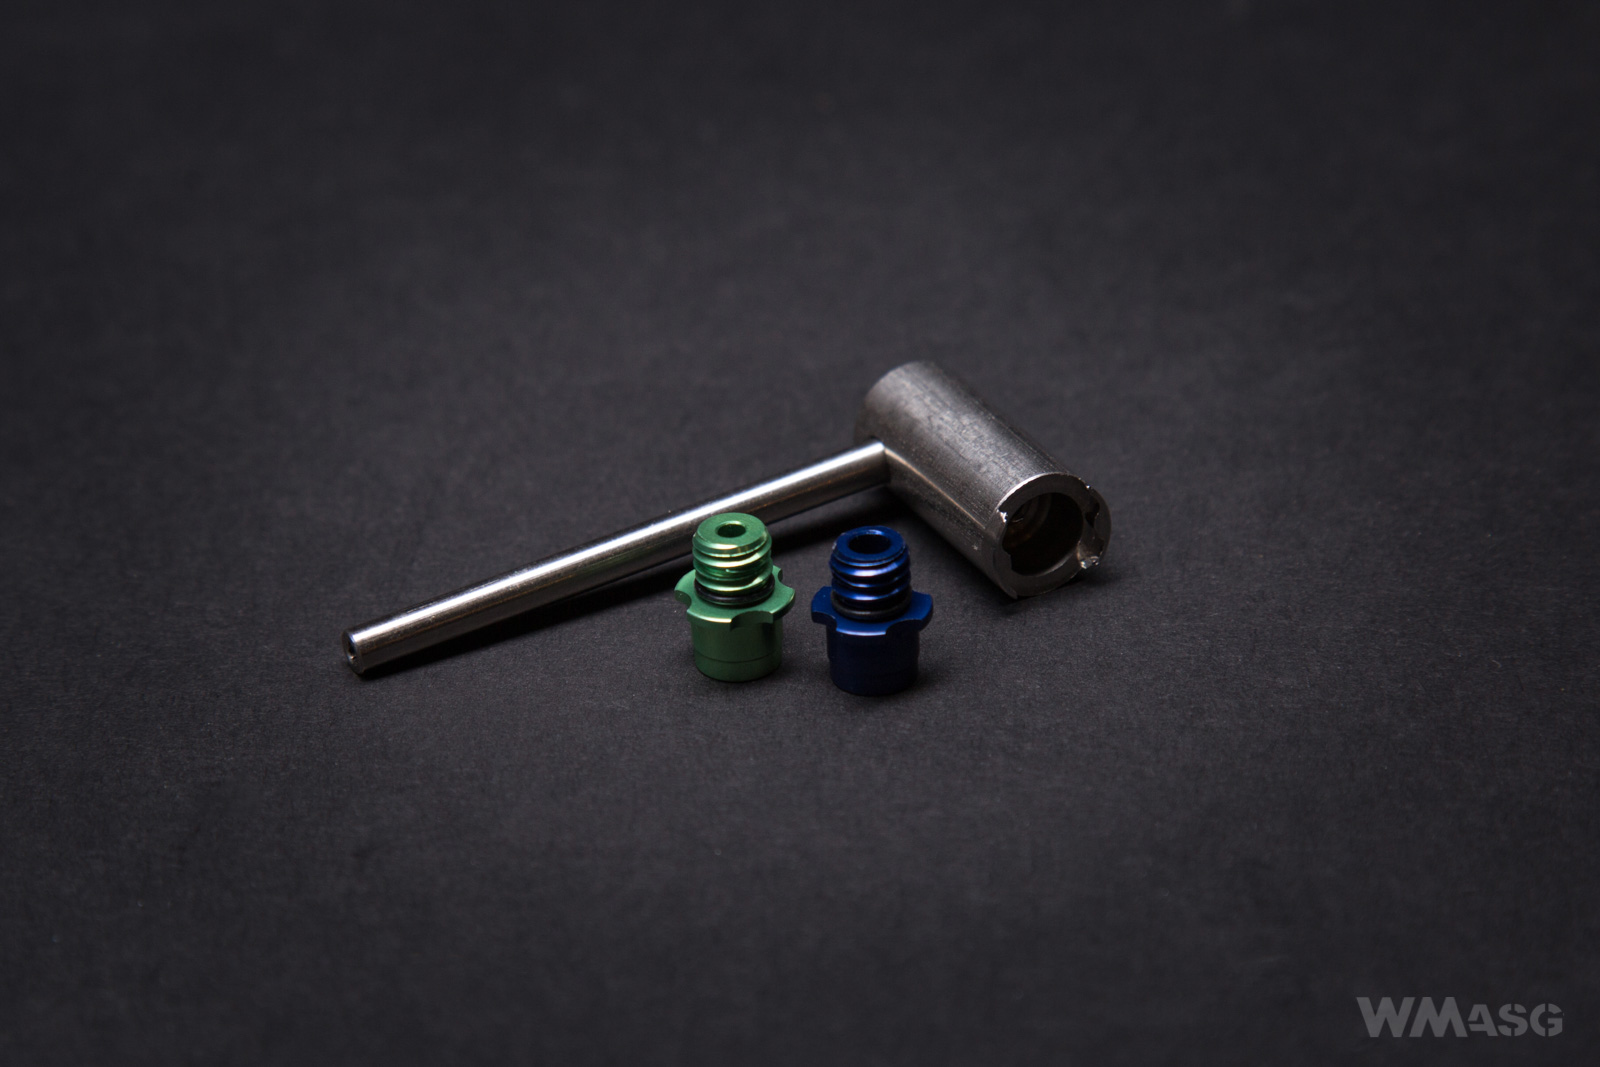
The lack of aiming devices and some kind of tool for adjusting the HopUp system are noteworthy omissions.
Presentation and external design
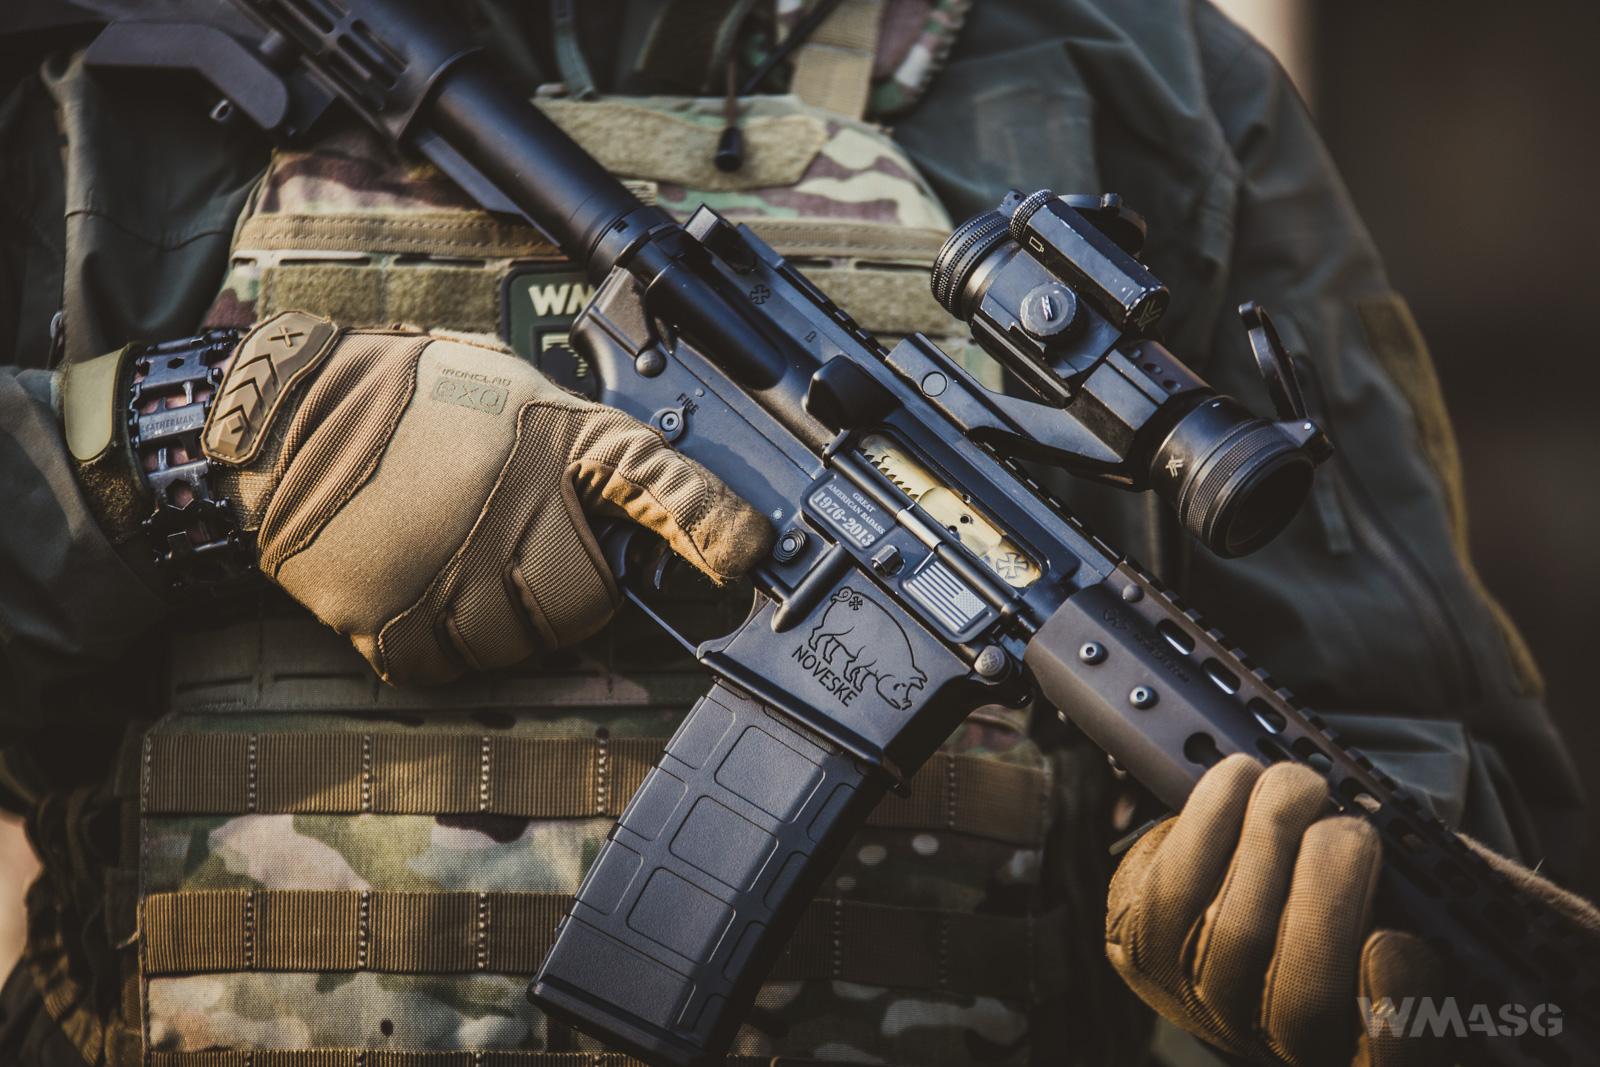
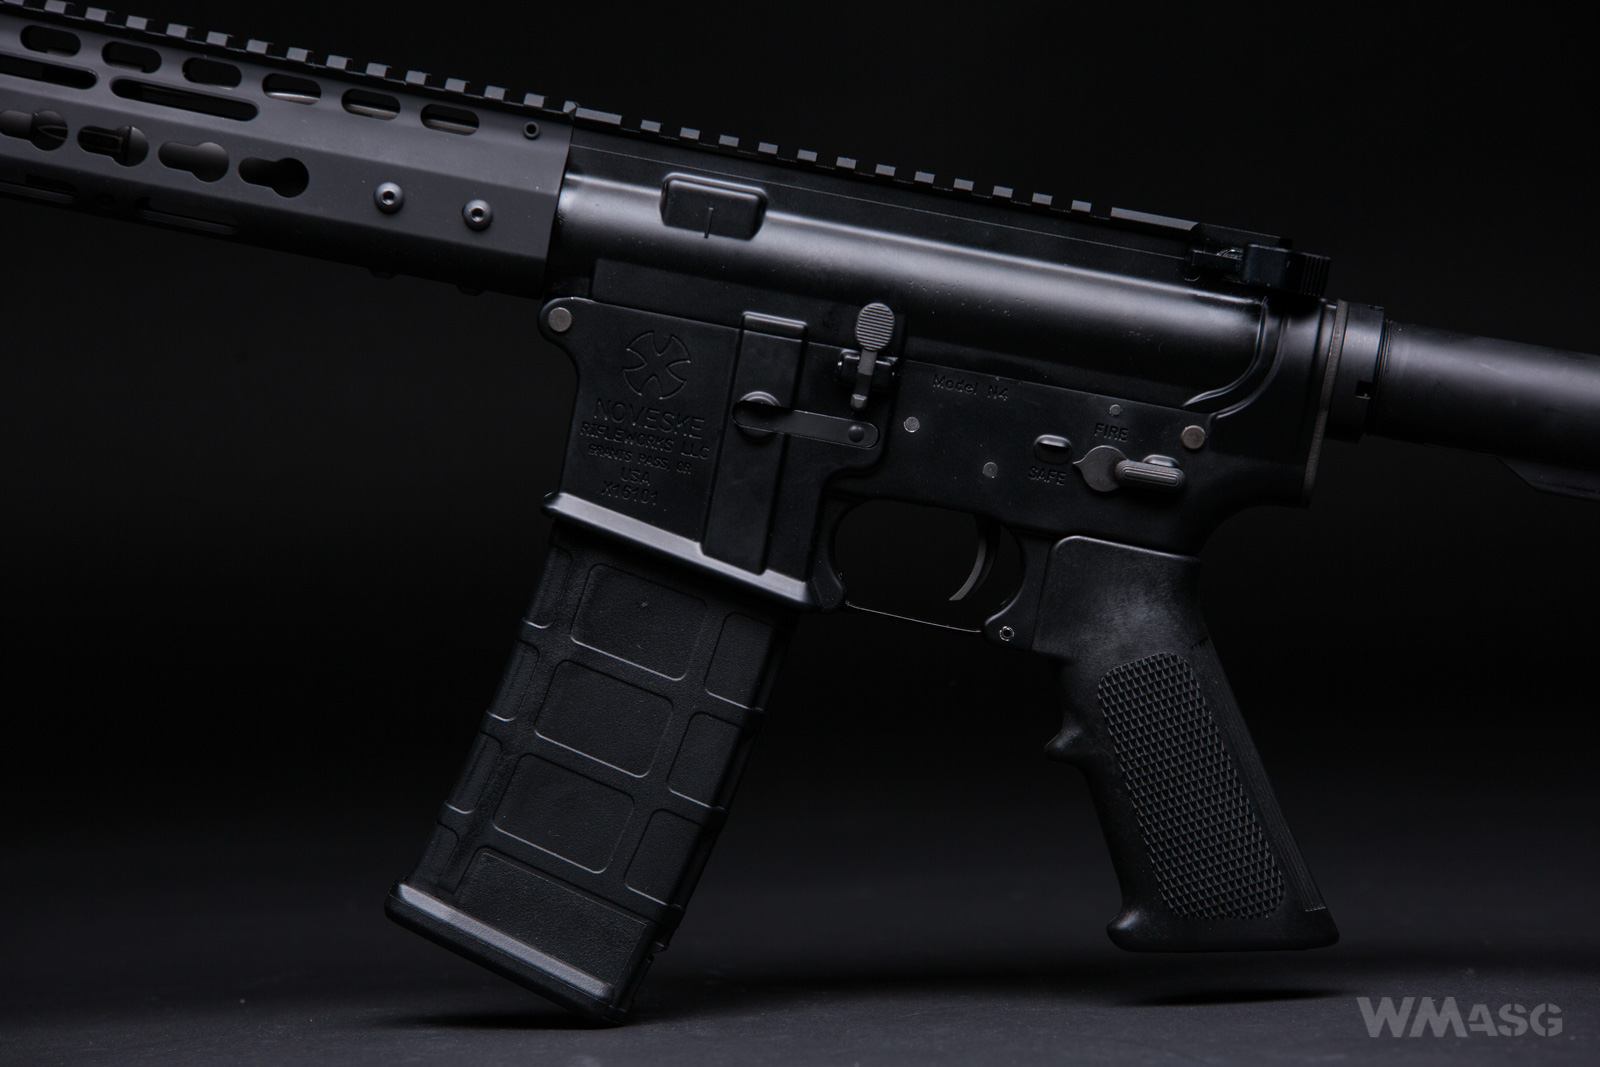
The replica has a standard AR-15 rifle receiver, without any spectacular solutions that reduce its weight or improve its ergonomics. The workmanship is careful and the fitting of all parts does not raise any objections. Unlike many Vipertech SR-16 electric or gas powered replicas, which I have recently been dealing with, the upper and the lower receiver are connected rigidly, without any play and a characteristic "clatter" that comes with it. The minimum clearance, which I would describe as a specific for this design can be found in the buttstock and the magazine, which, however, firmly sits in the magwell.
Visually, the carbine looks just as good, which is certainly facilitated by the color diversity of the parts. The receiver itself is semi-matte black. The trigger, safety selector switch, the pins connecting the receiver parts, the bolt catch, the magazine latch or the plate closing the lower receiver are gray. The front, the external barrel and flash hider as well as the ejector port cover are also gray, but clearly brighter. Parts made of plastic, for obvious reasons, have a different shade and surface texture.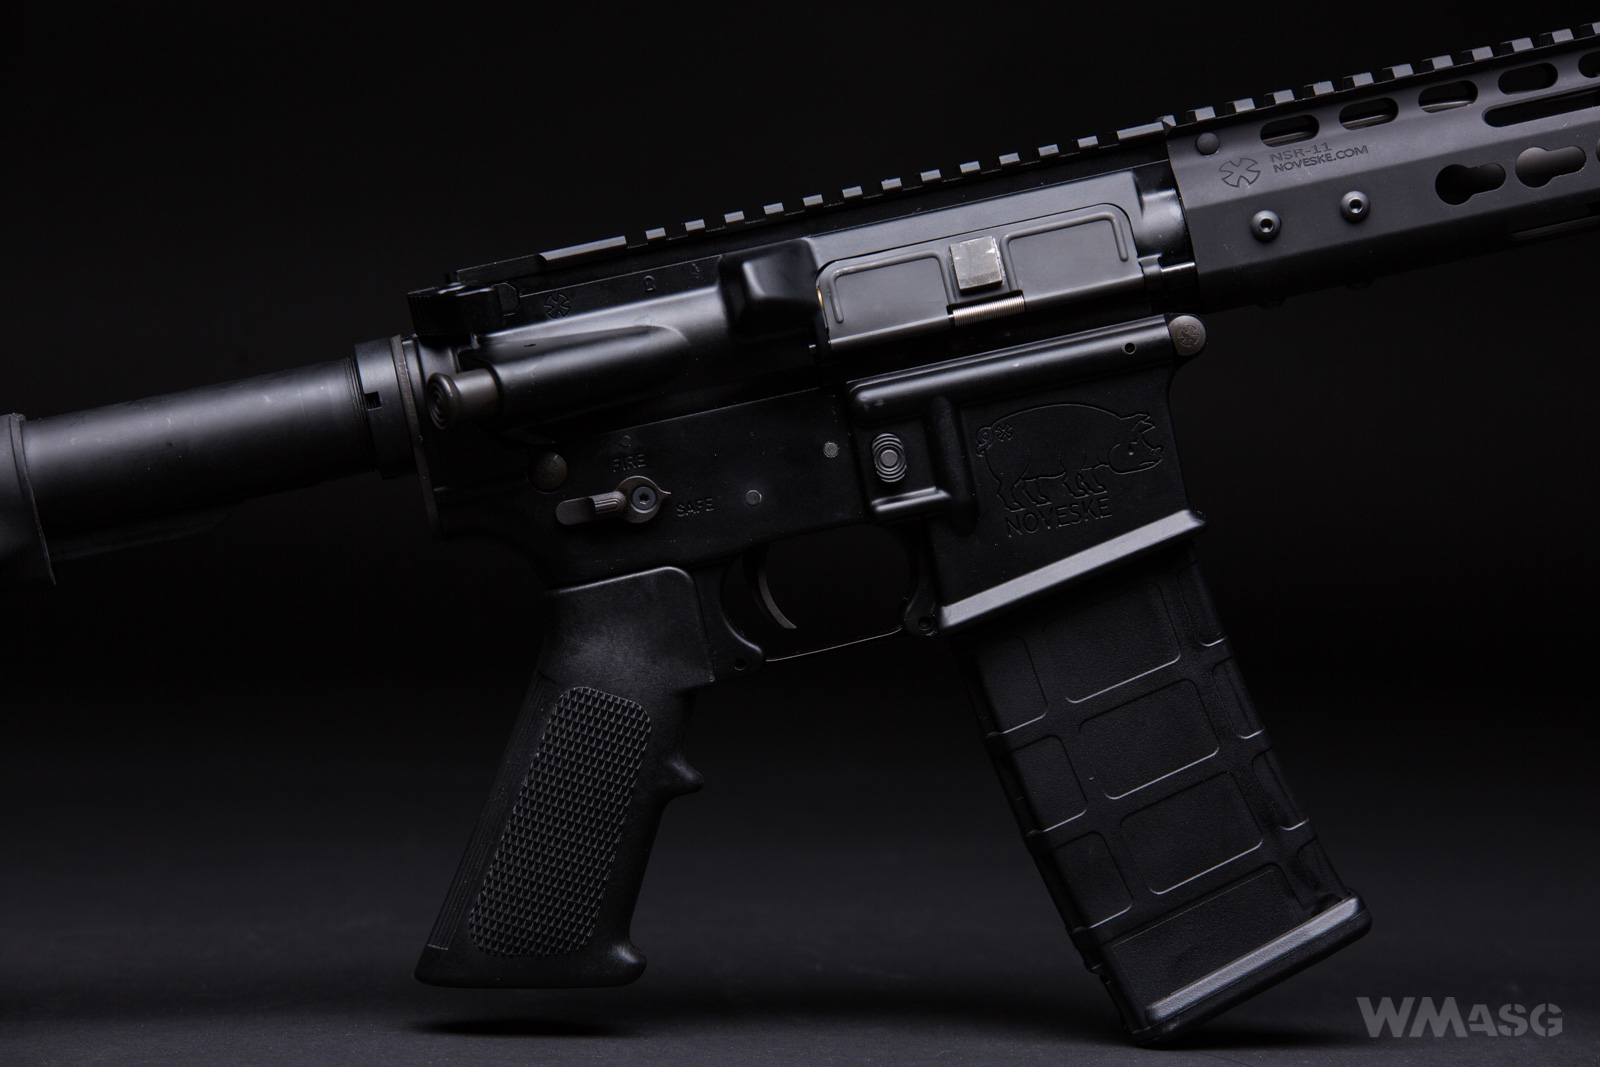
 I do not think that someone would take any particular notice of the color scheme of the replica, but it looks as it looks. I mean, in my opinion, it looks very neatly. The worse part is the material imperfections of the upper receiver. Well, "the forged 7075 aluminum alloy machined using CNC technology" has flaws visible to the naked eye.
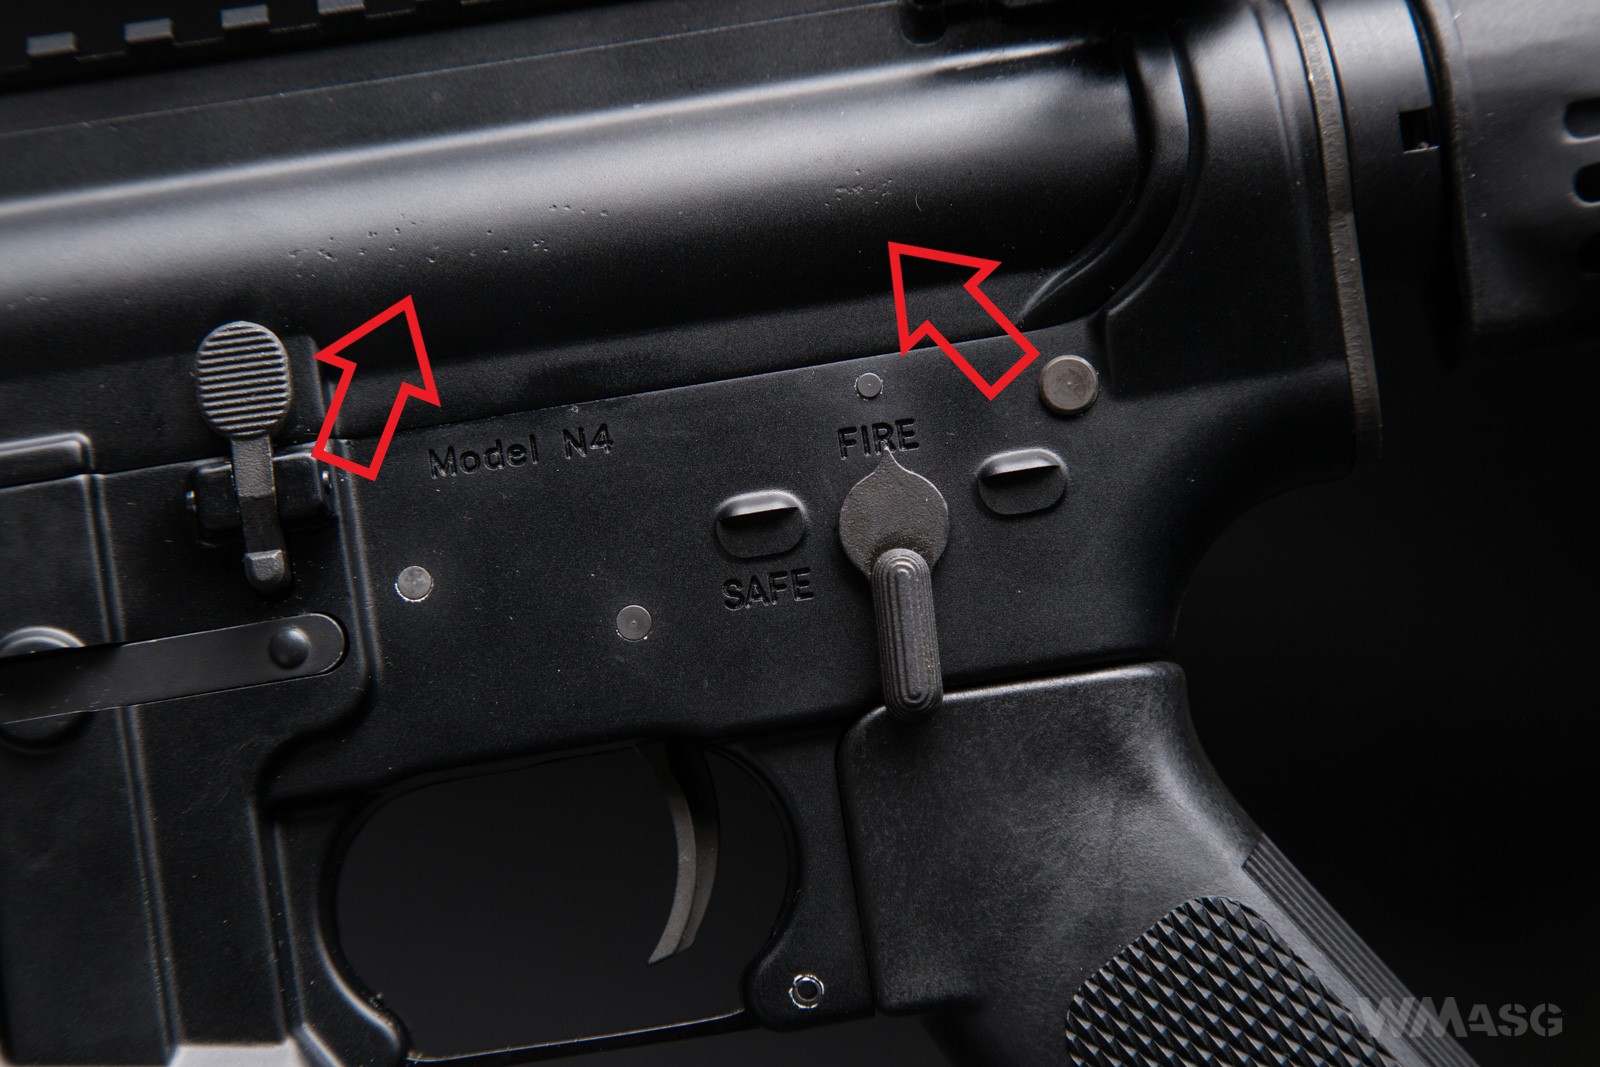 Probably not all units have such flaws, but unfortunately the described one has. On the positive note, the lower receiver and the remaining parts are free of them.
The receiver
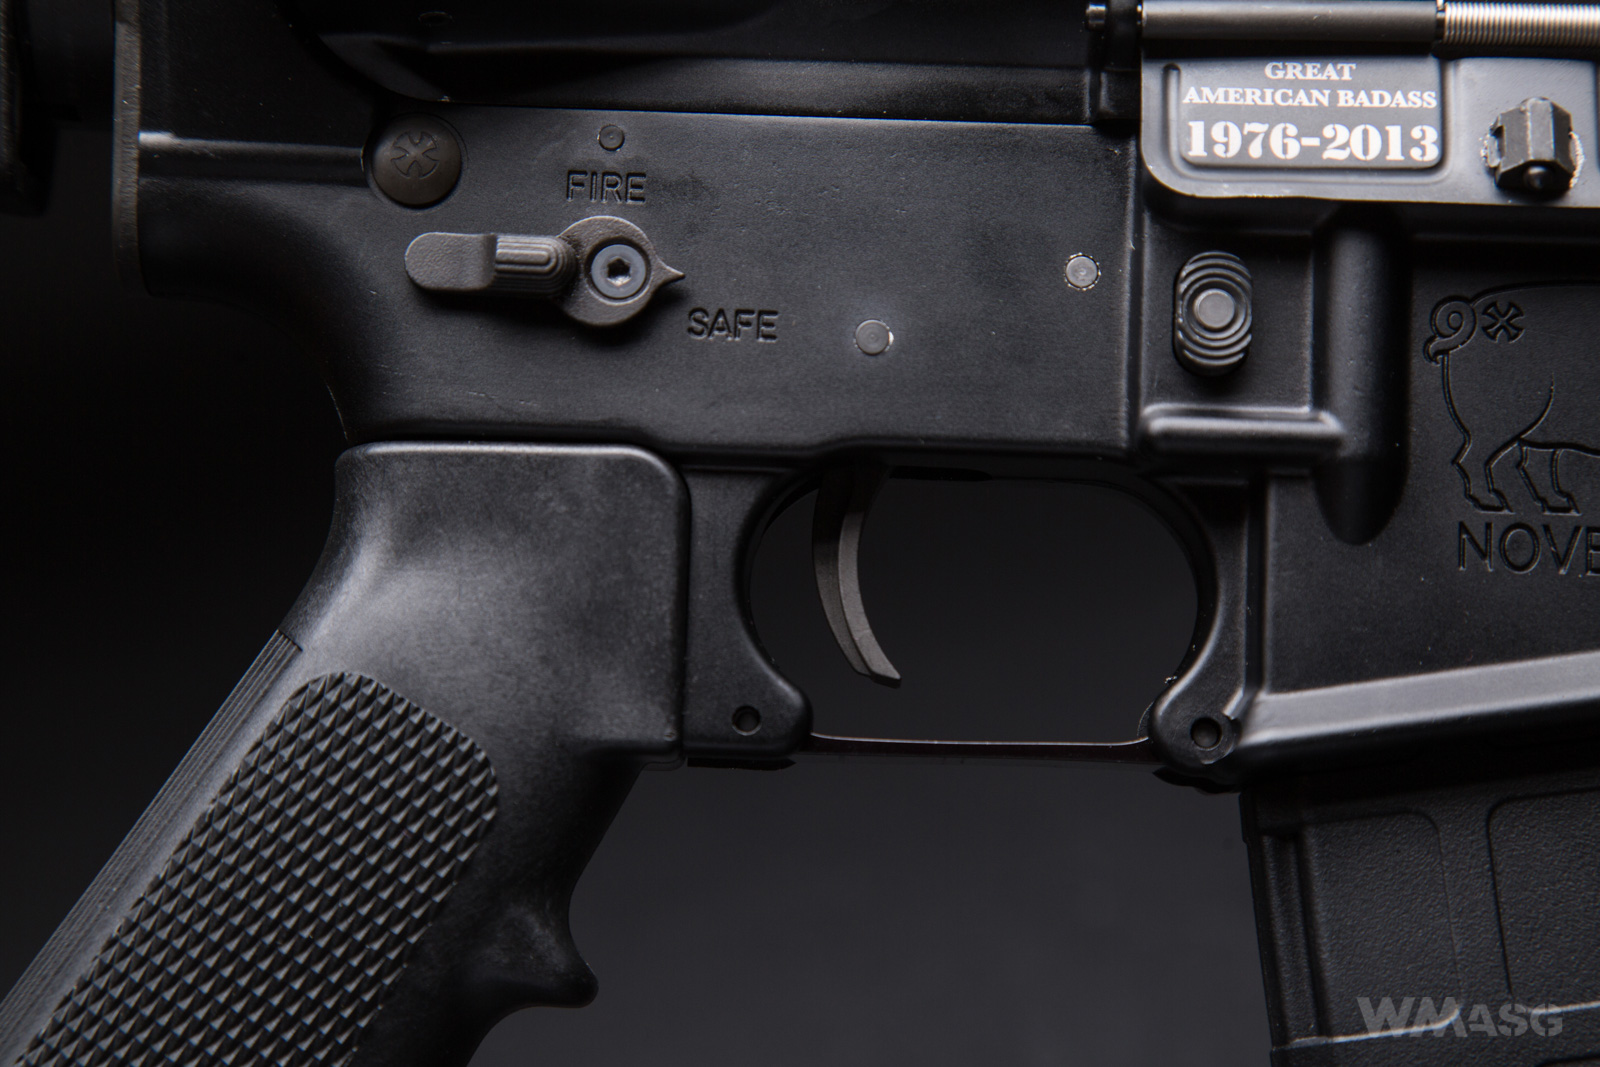
I wrote earlier that the receiver of the rifle was made without any improvements or quirks. The only "deviation" is the use of a double-sided safety selector switch. The one on the left has a typical shape, which is clearly seen in the picture above. The right one looks a bit different.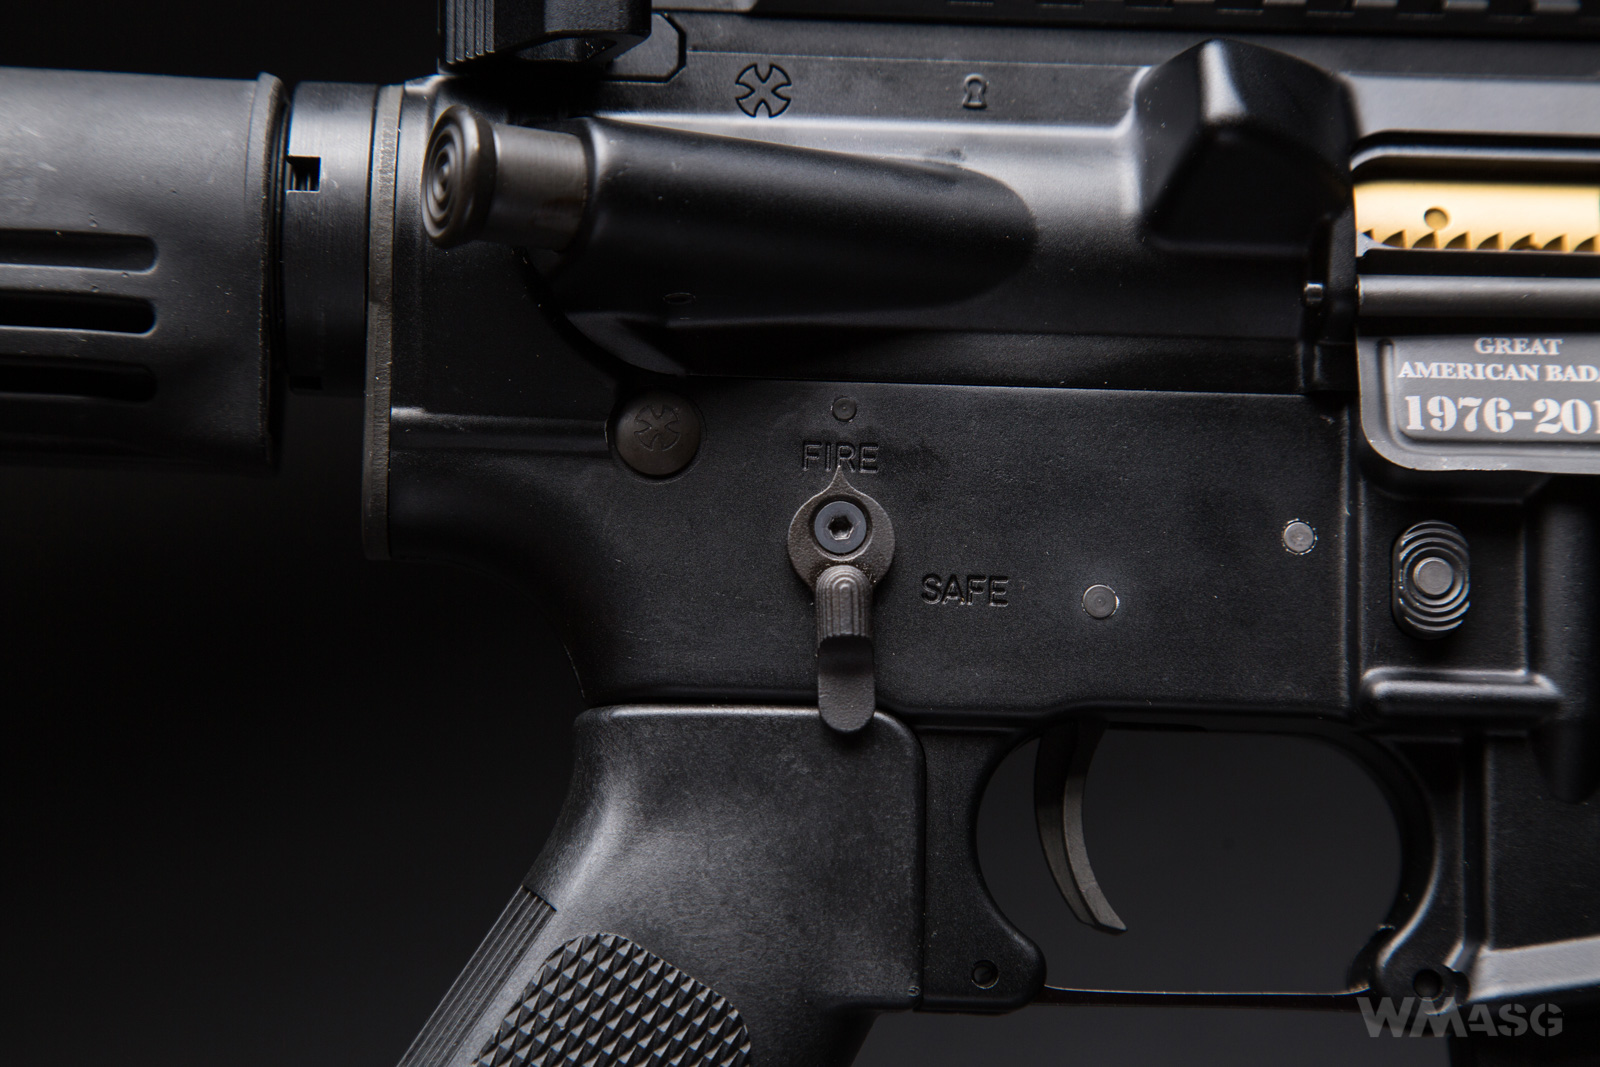
Noteworthy are the well-made, licensed Noveske markings. In both photos above, you can see the safety markings (there are no markings for the full-auto mode, but the replica also shoots with continuous fire).
The left side of the receiver in all its glory: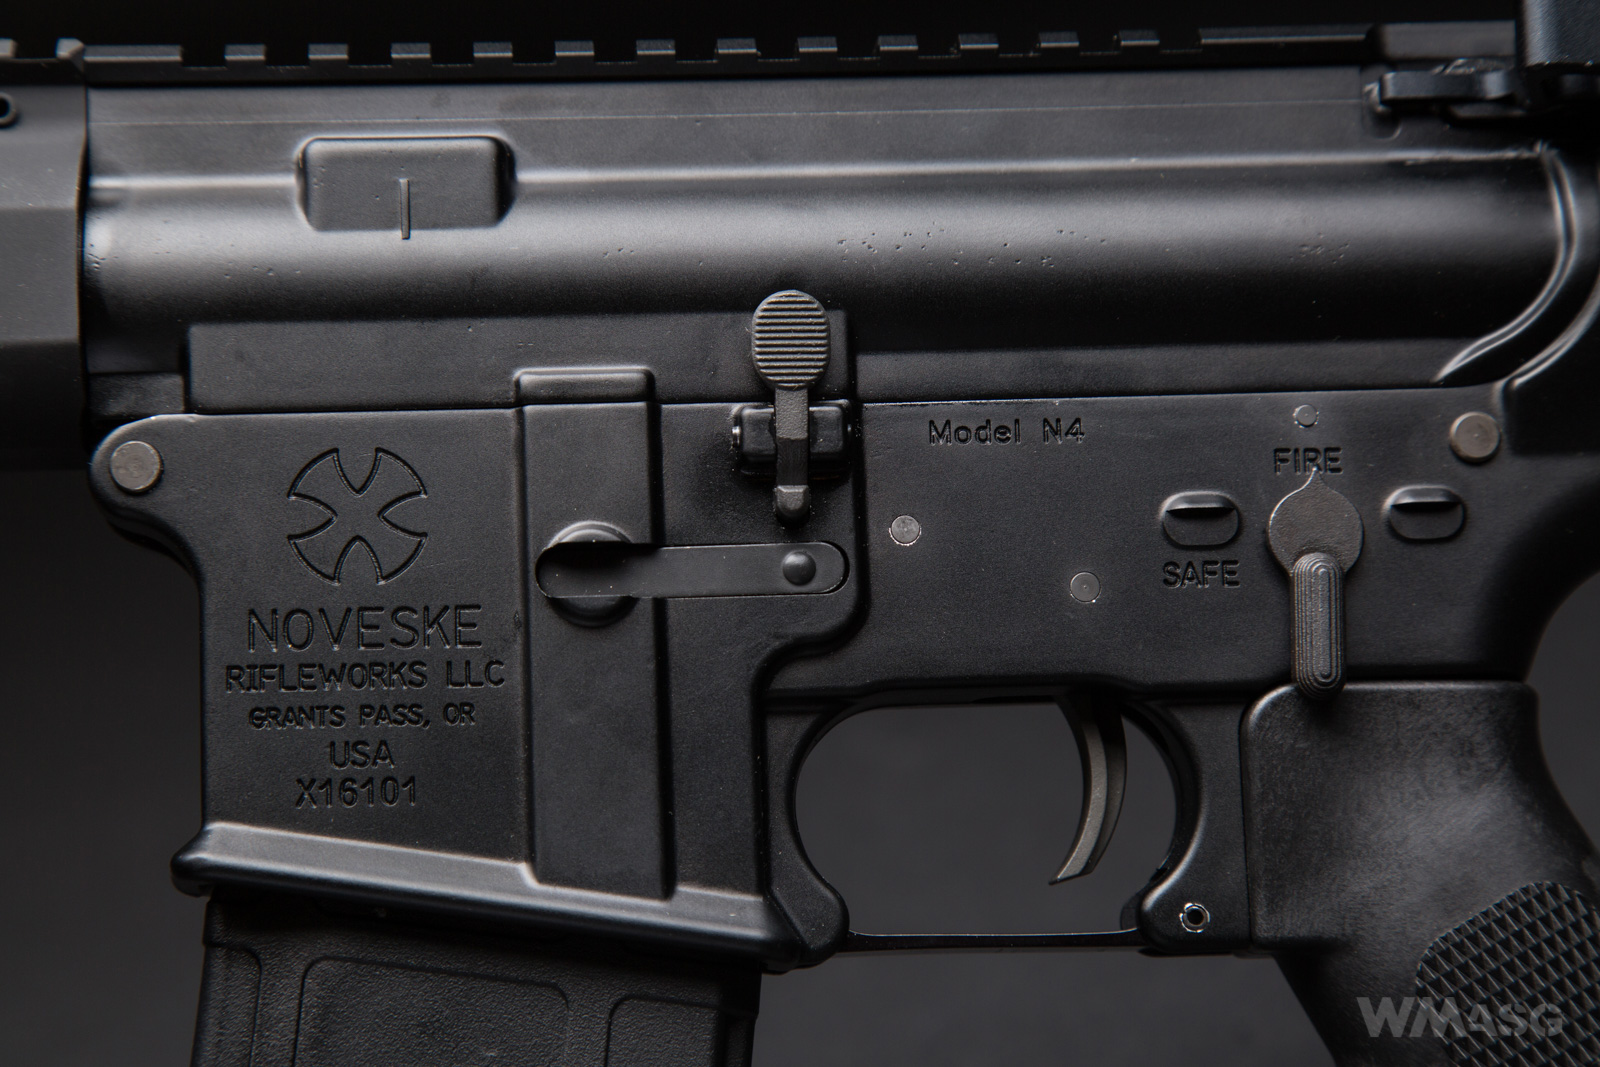
And the right one: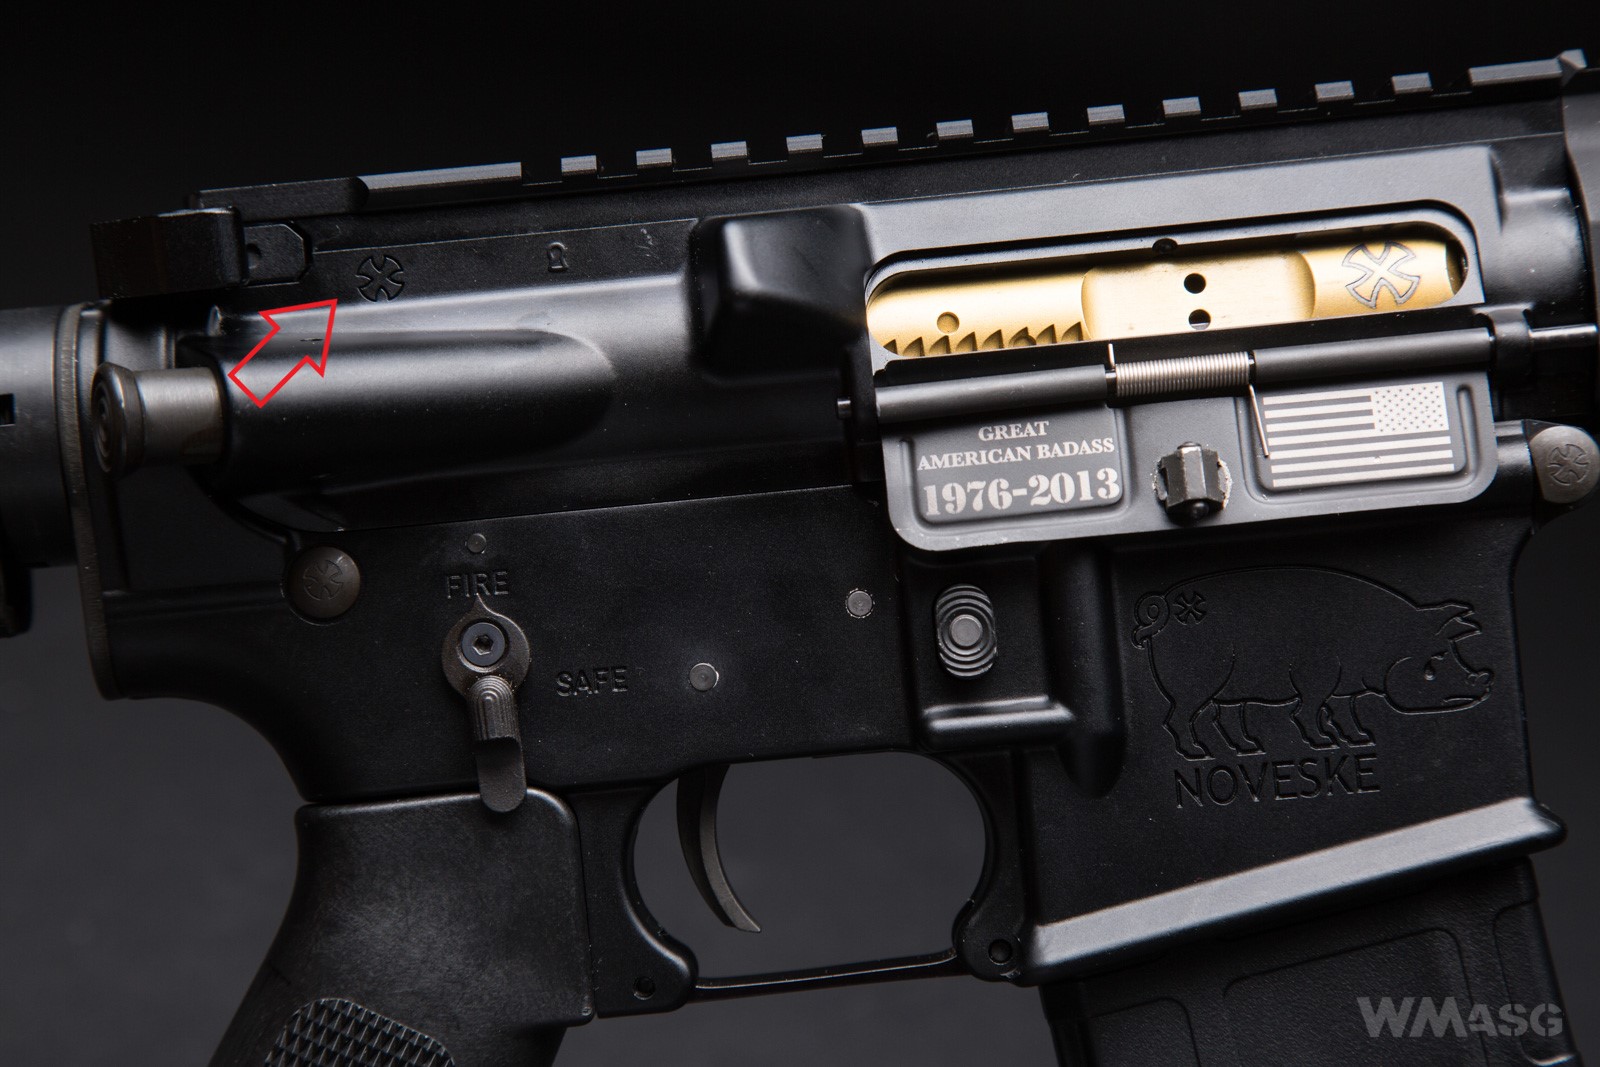
The arrow above shows the infrequently found marking on the upper receiver. And, by the way, because certainly not everyone knows it - Noveske calls this one"Iron X". The pig on the magazine well has it on its a ham.
Here are two parts of the photos above but enlarged. The first (the front):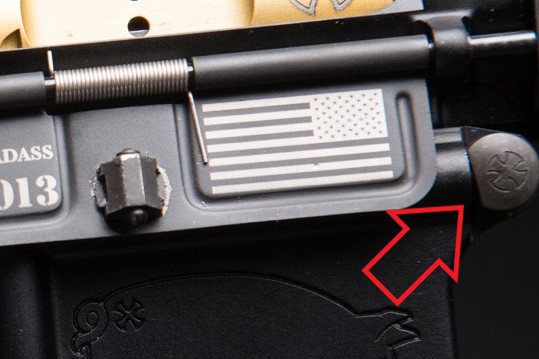
And the second (the back):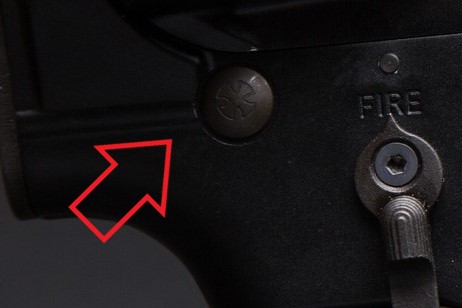
The front and the external barrel
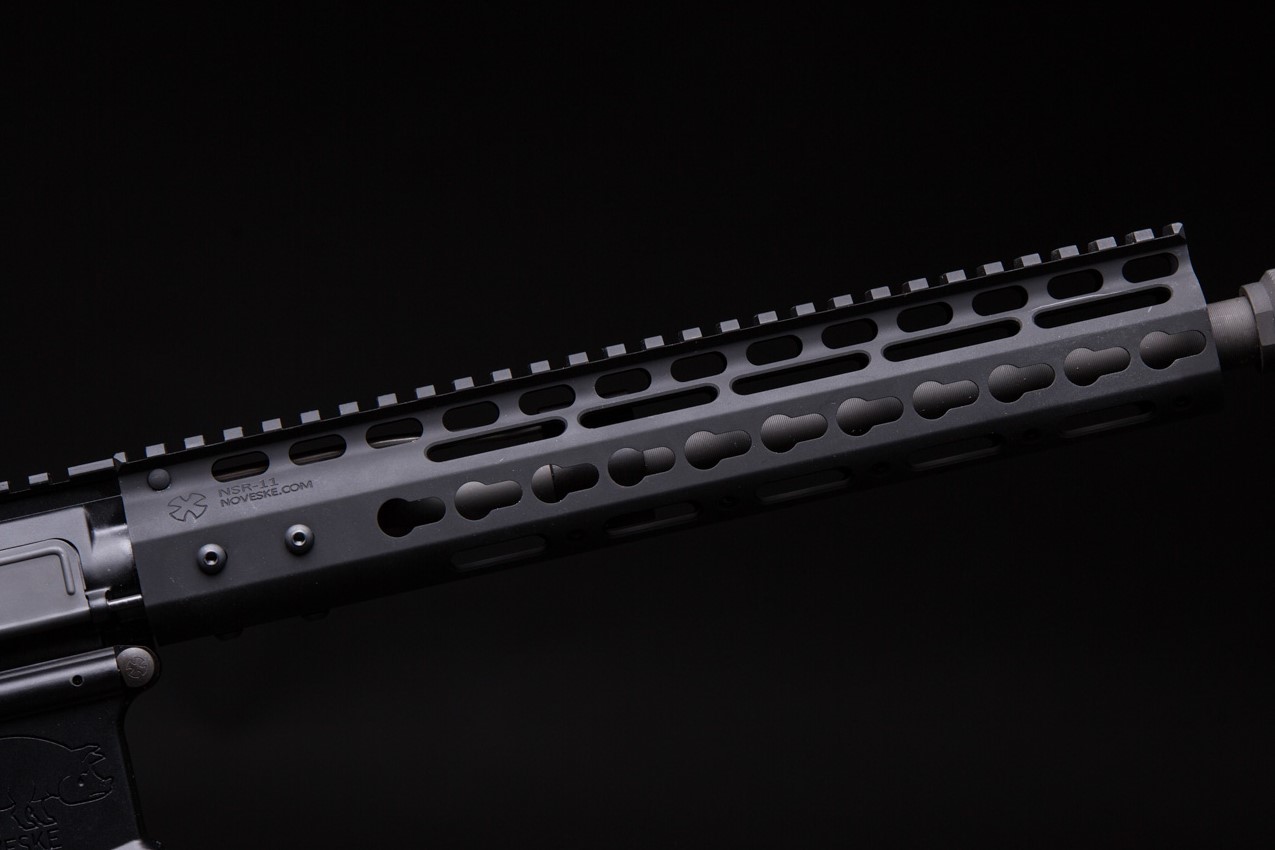
The front is produced by Madbull and is a licensed copy of the Noveske NSR front made in the KeyMod system in the 11-inch version.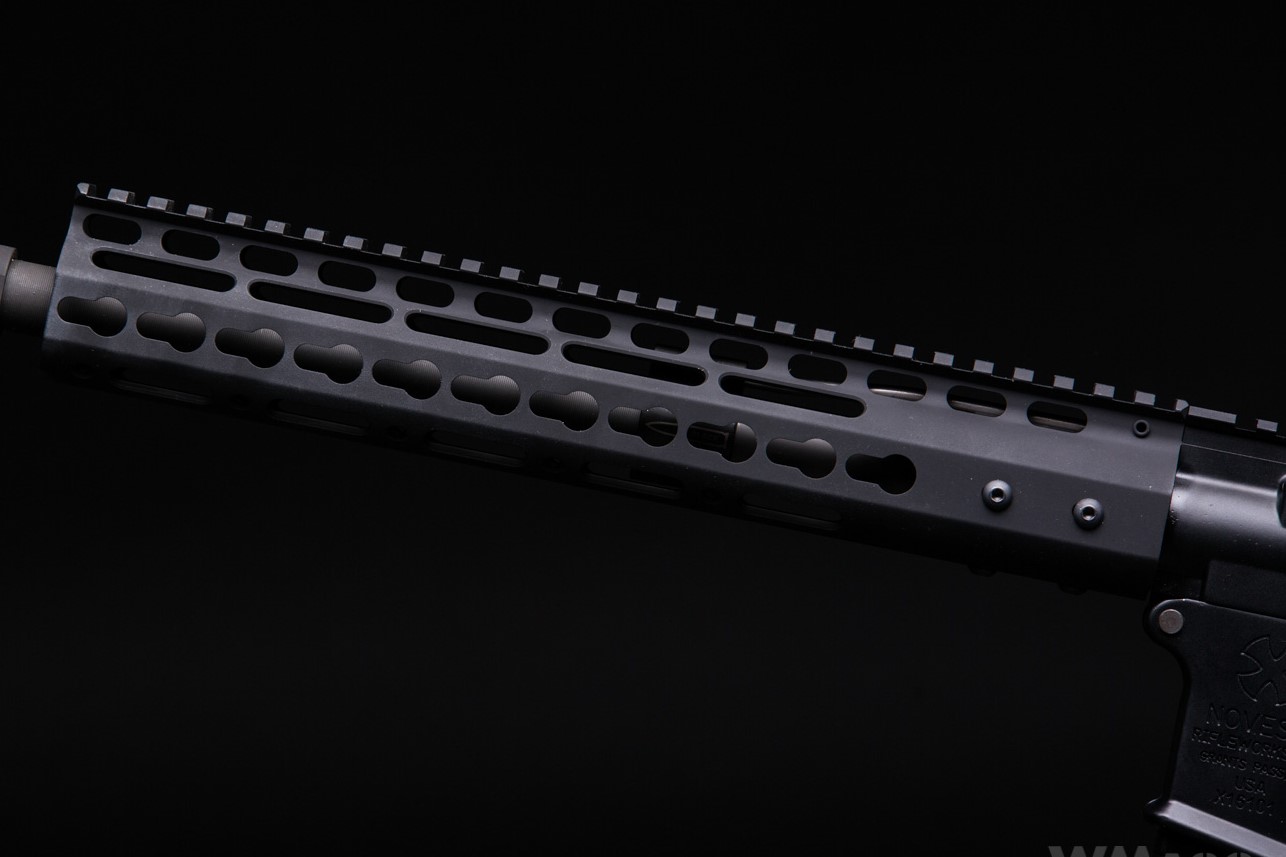 Of course we pay attention to the marking shown below as carefully as on the receiver of the replica.
 The front is basically the main tribute to modernity, lightness and ergonomics in this replica, because the NSR fronts were designed as extremely lightweight and narrow. And in fact, our hands on tests confirm, in my opinion, its exceptional maneuverability. The maximum height (vertical) is 50.5 mm, while the width is just under 38 mm.
On the sides and the bottom eleven KeyMod sockets were placed. A standard Picatinny rail runs on the top. Unfortunately, its fitting with the rail that covers the top of the upper receiver is not so good. A distinct misalignment is clearly visible.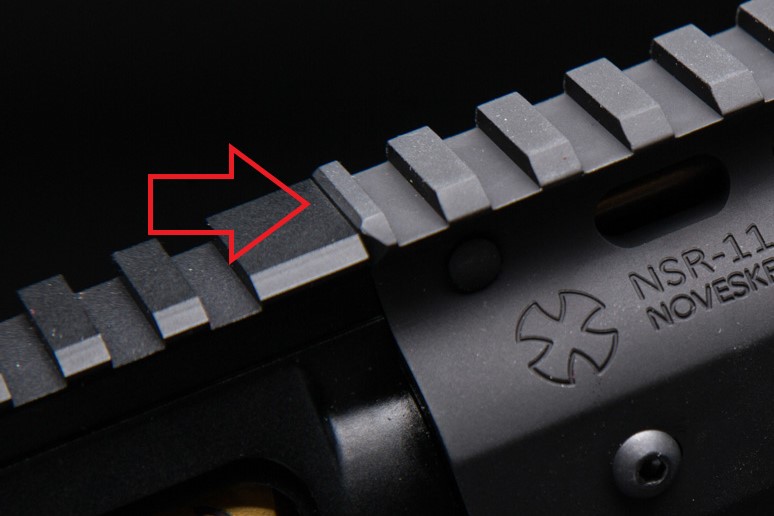
The front is fixed with six screws to an aluminum mounting ring.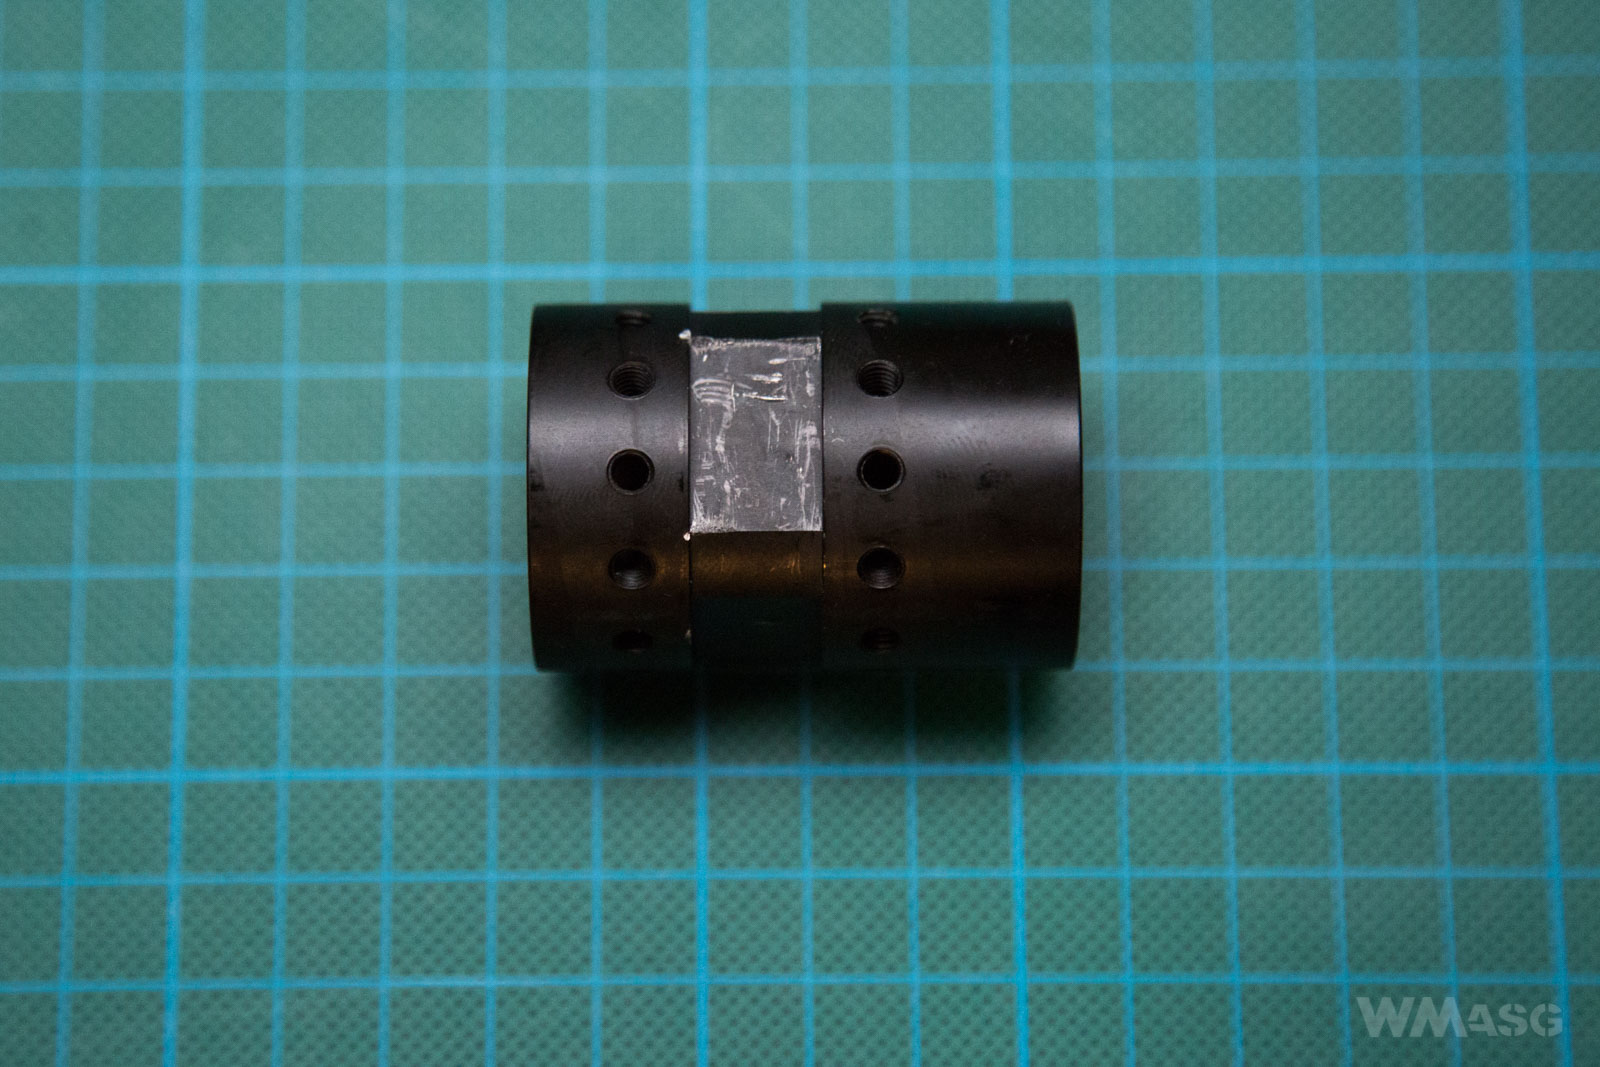 The same type of ring used in a real rifle seen at Noveske website.
 Its compatibility with the original is so great that it requires a dedicated key to unscrew. The magic keys seen below did not work.
A dedicated Noveske key is required: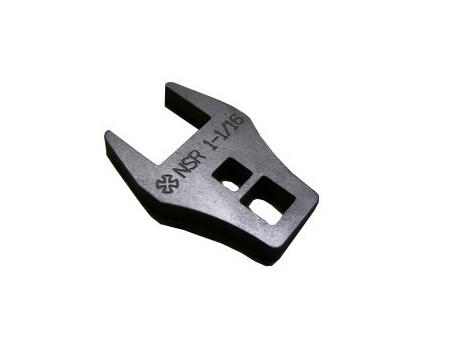
Its spacing 1 and 1/6 inch or 2.96 cm. Of course, you can deal with it in a less civilized way, but the side effects of doing so can be seen in the above presented photo of the unscrewed ring.
A completely disassemble upper receiver. The only things that are not in the photos the bolt carrier and charging handle.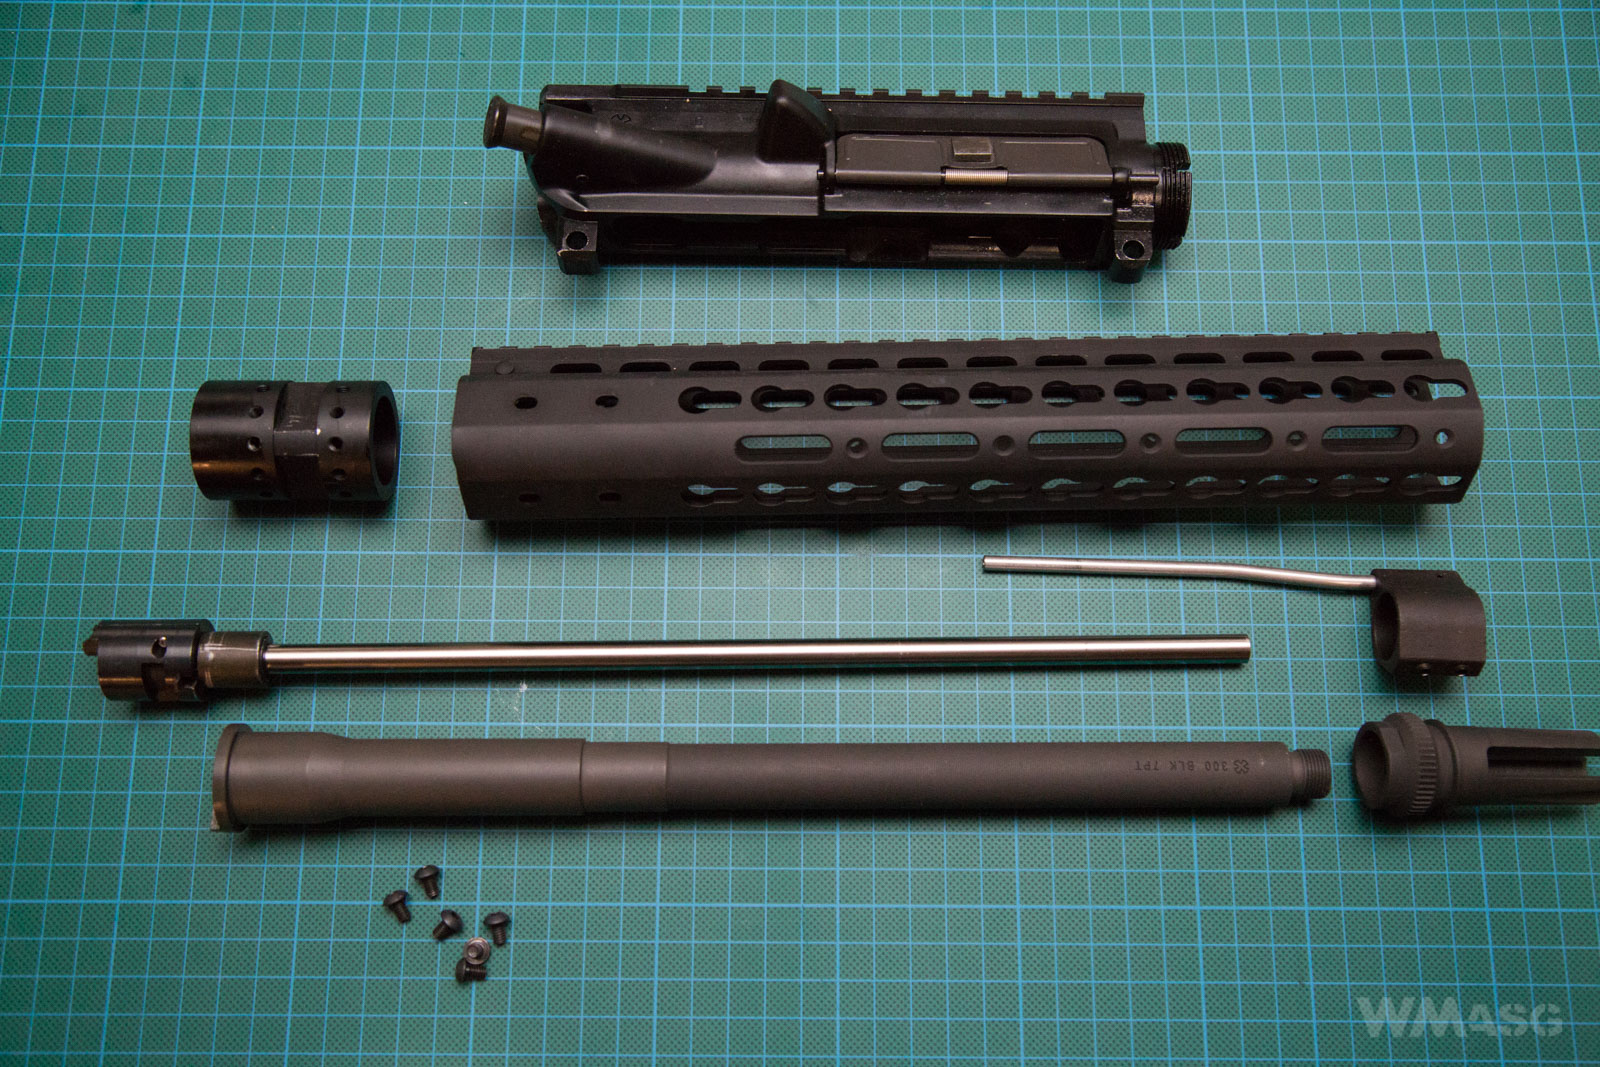
A moment earlier - with a bolt carrier and charging handle.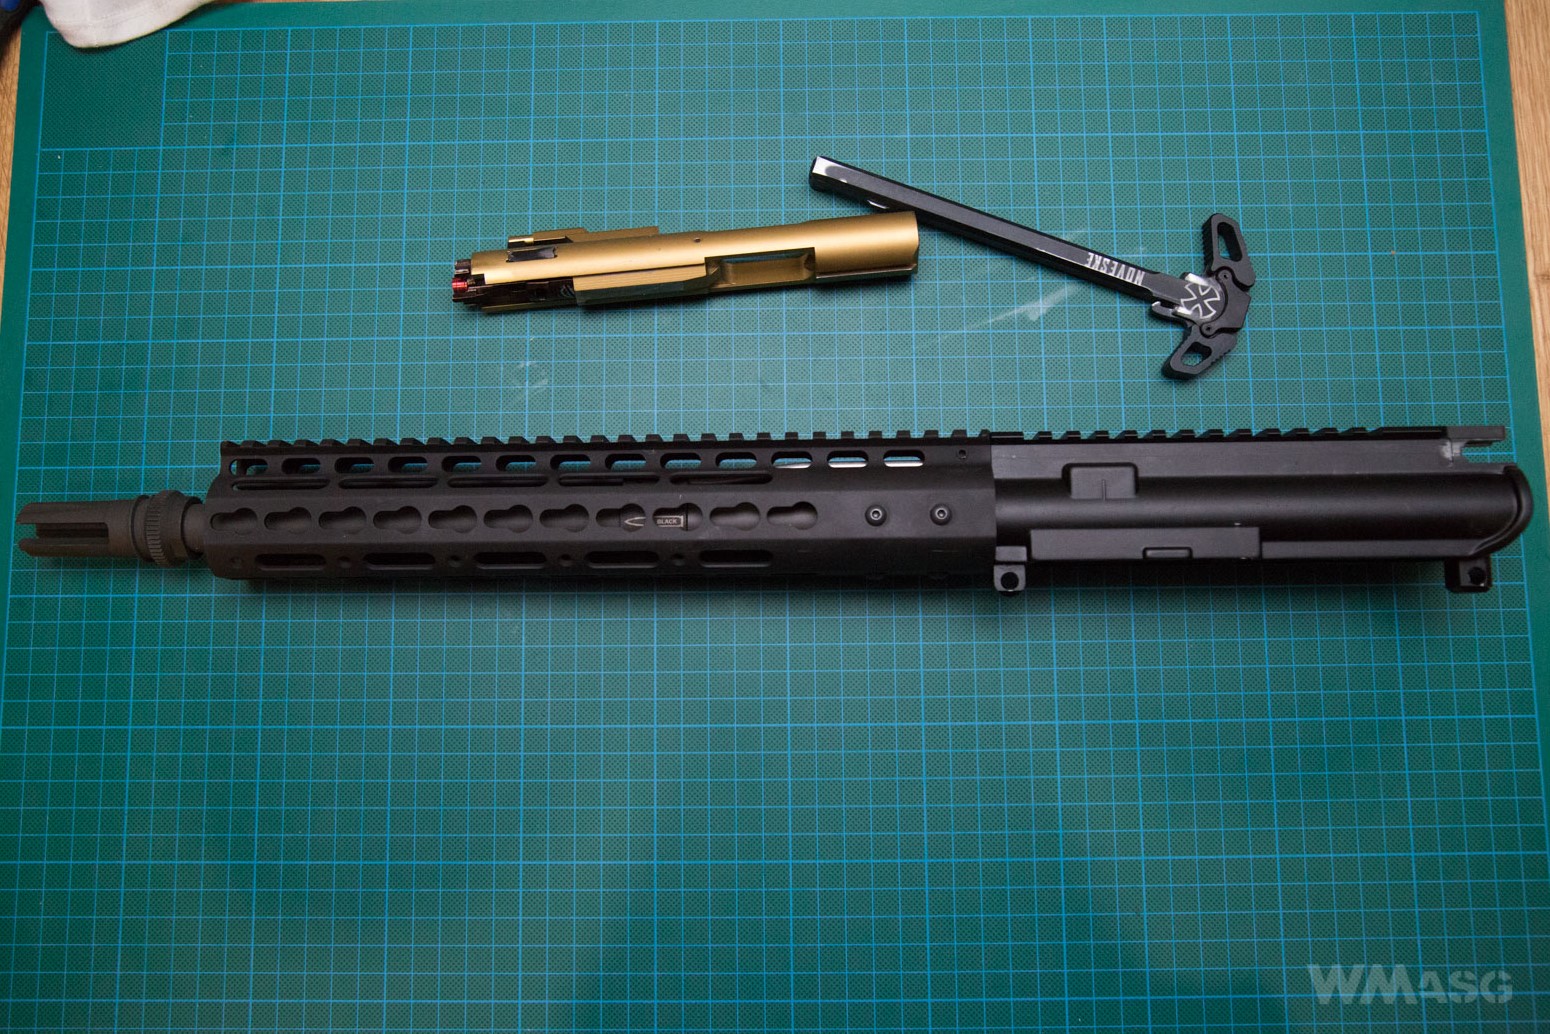
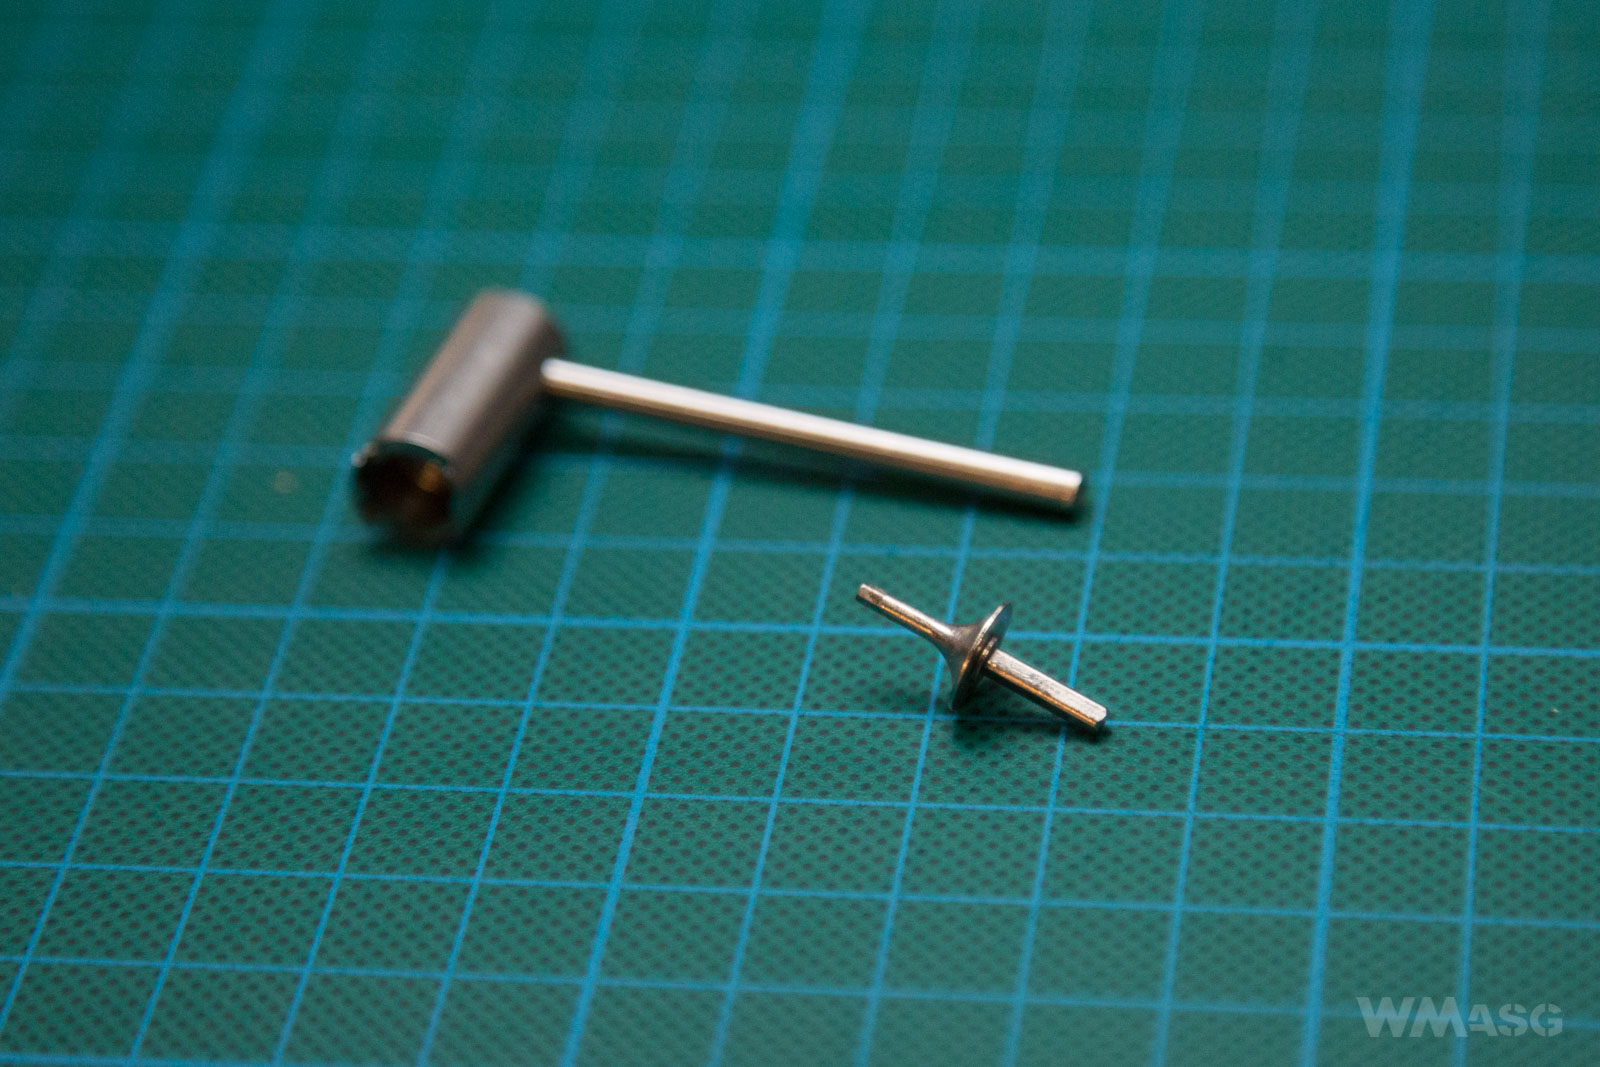
And the charging handle in a close up, before disassembly. Double-sided handles are clearly visible.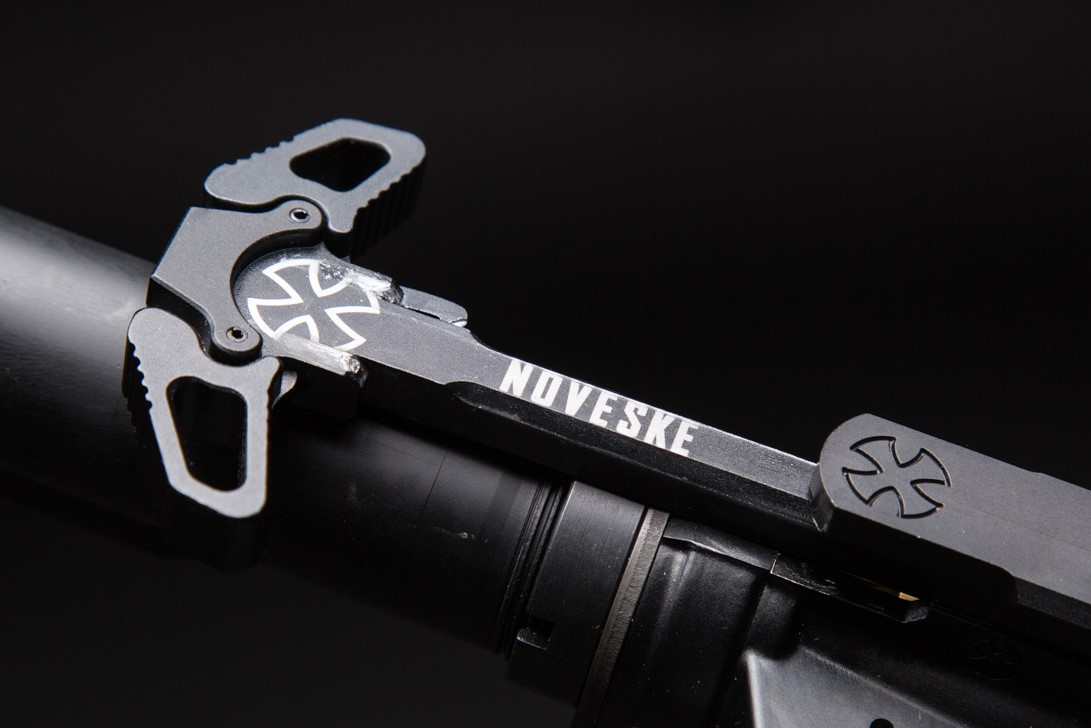
For comparison, the original from the Noveske site: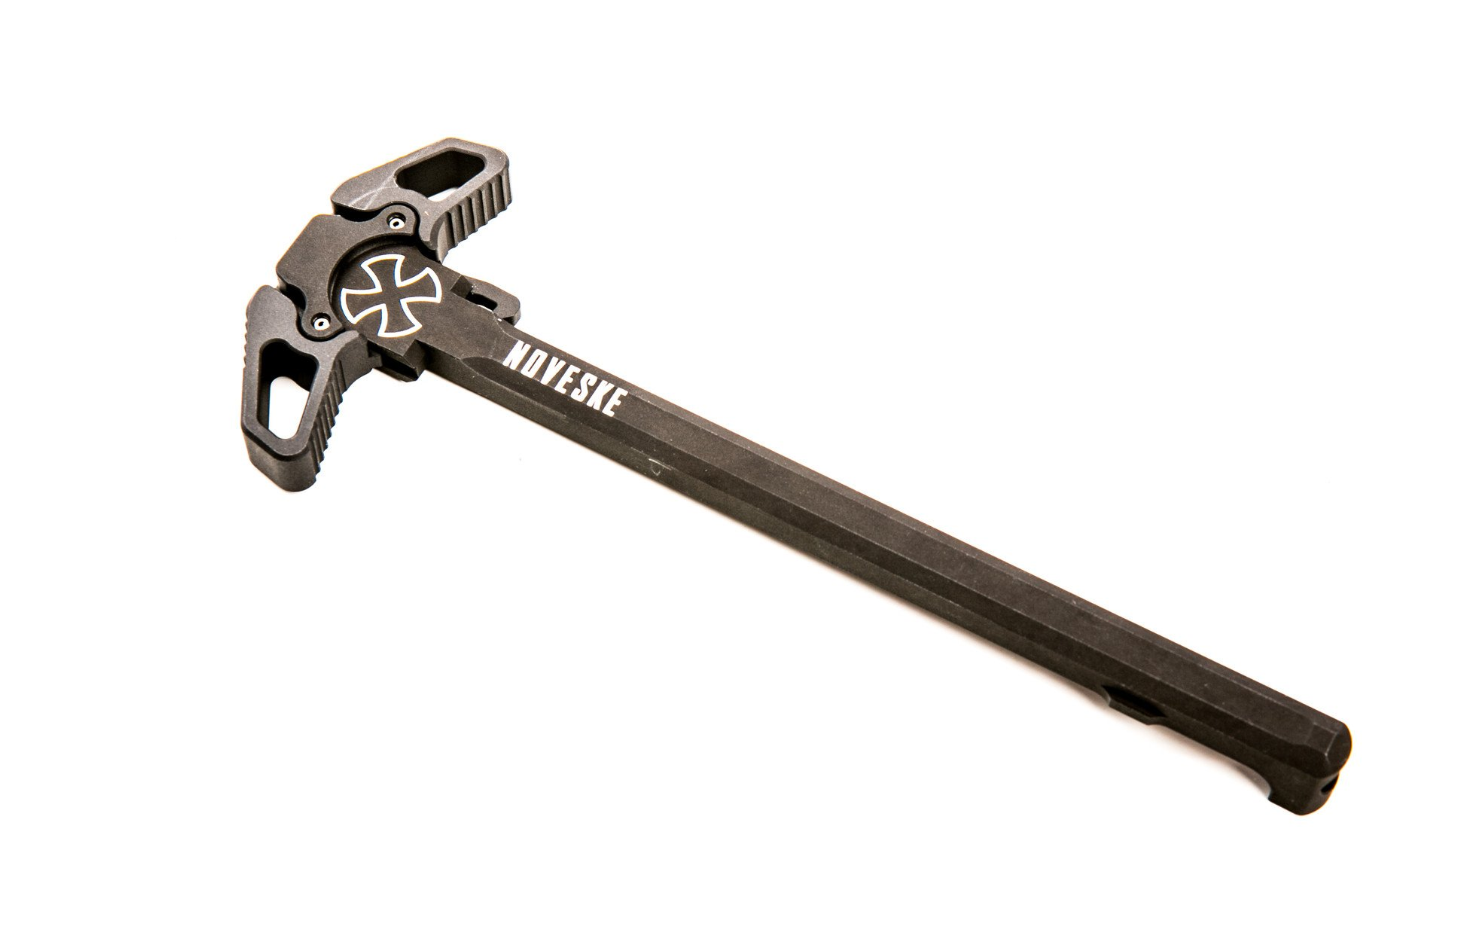
The external barrel, the gas block and flash hider
The external barrel is made of steel and has a length of 12 inches.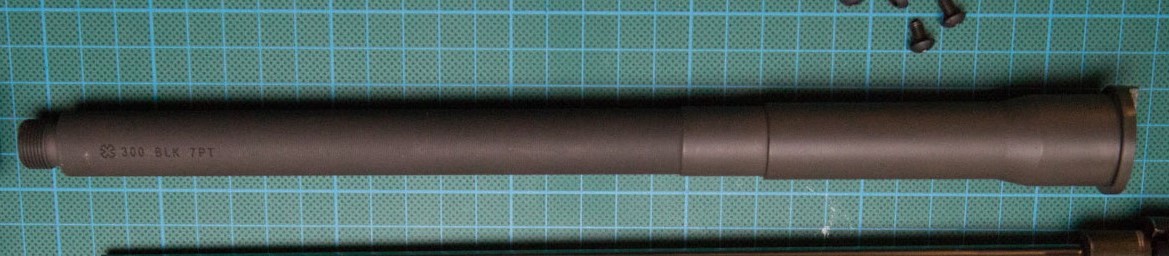 The markings here also deserve attention:
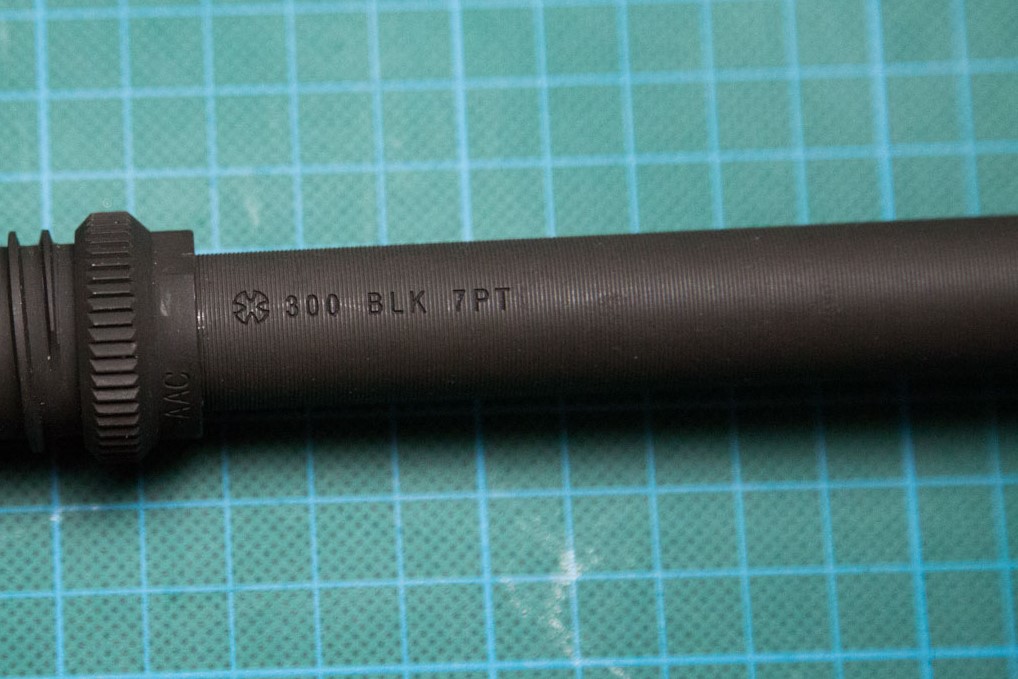
Especially the "Steel X" and the 300 BLK inscription. This is a marking of the .300 AAC Blackout, a powerful 7.62x35 mm caliber.
To make it complete, the specification speak about a steel flash hider by Svobody: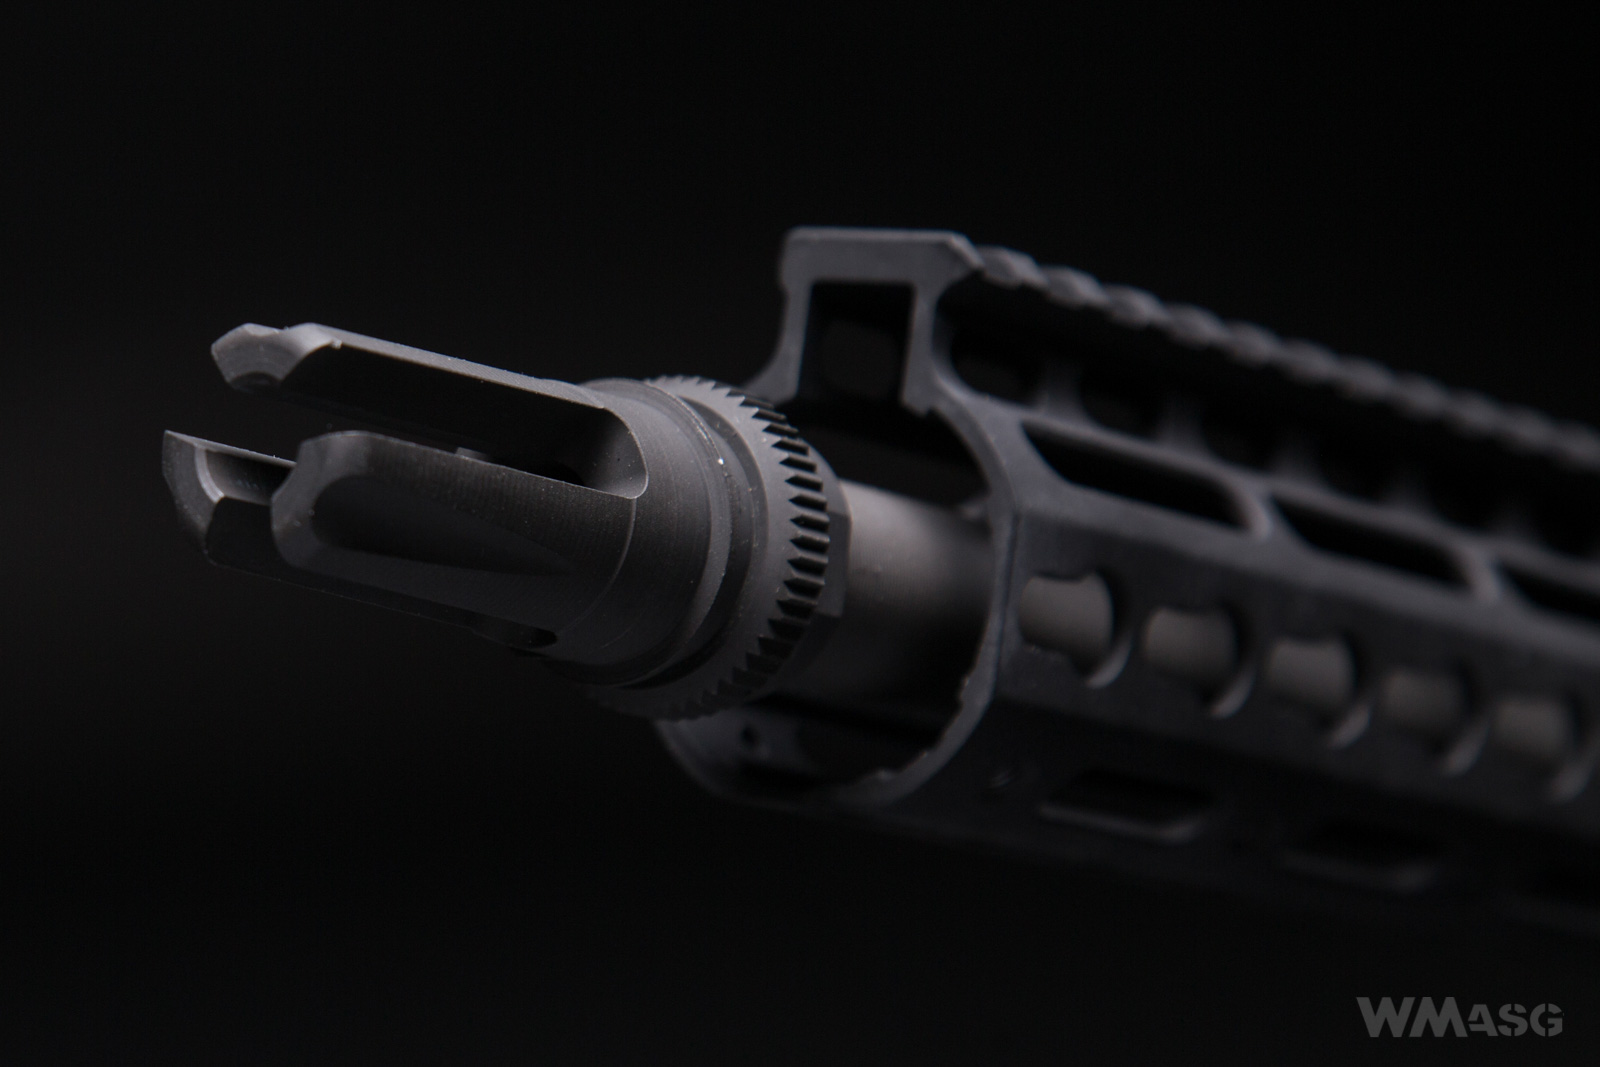
 But, what is not mentioned in the specification, is that it is a copy of the Blackout 51T flash hider produced by AAC (Advanced Armament Corporation), the creator of the .300 Blackout cartridge. Of course, the 51T is dedicated to this type of ammunition. What's more , AAC produces the 51T in two variants for different external barrels. Universal (standard socket) and deep (with a deep socket) for barrels with an outer diameter of 0.75 in (19 mm) and thinner. The replica has a barrel with an outer diameter of 18.1 mm, so a copy of the cooler, in my opinion, blackout 51T Deep Socket flash hider was used. It even has AAC markings. The original one available at Noveske.
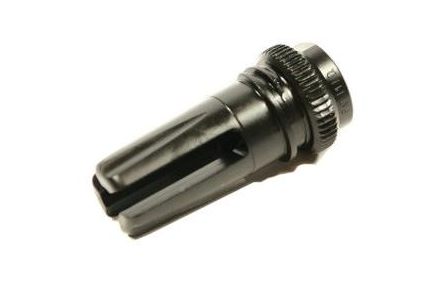
Unfortunately, the flash hider can not be unscrewed with a standard key.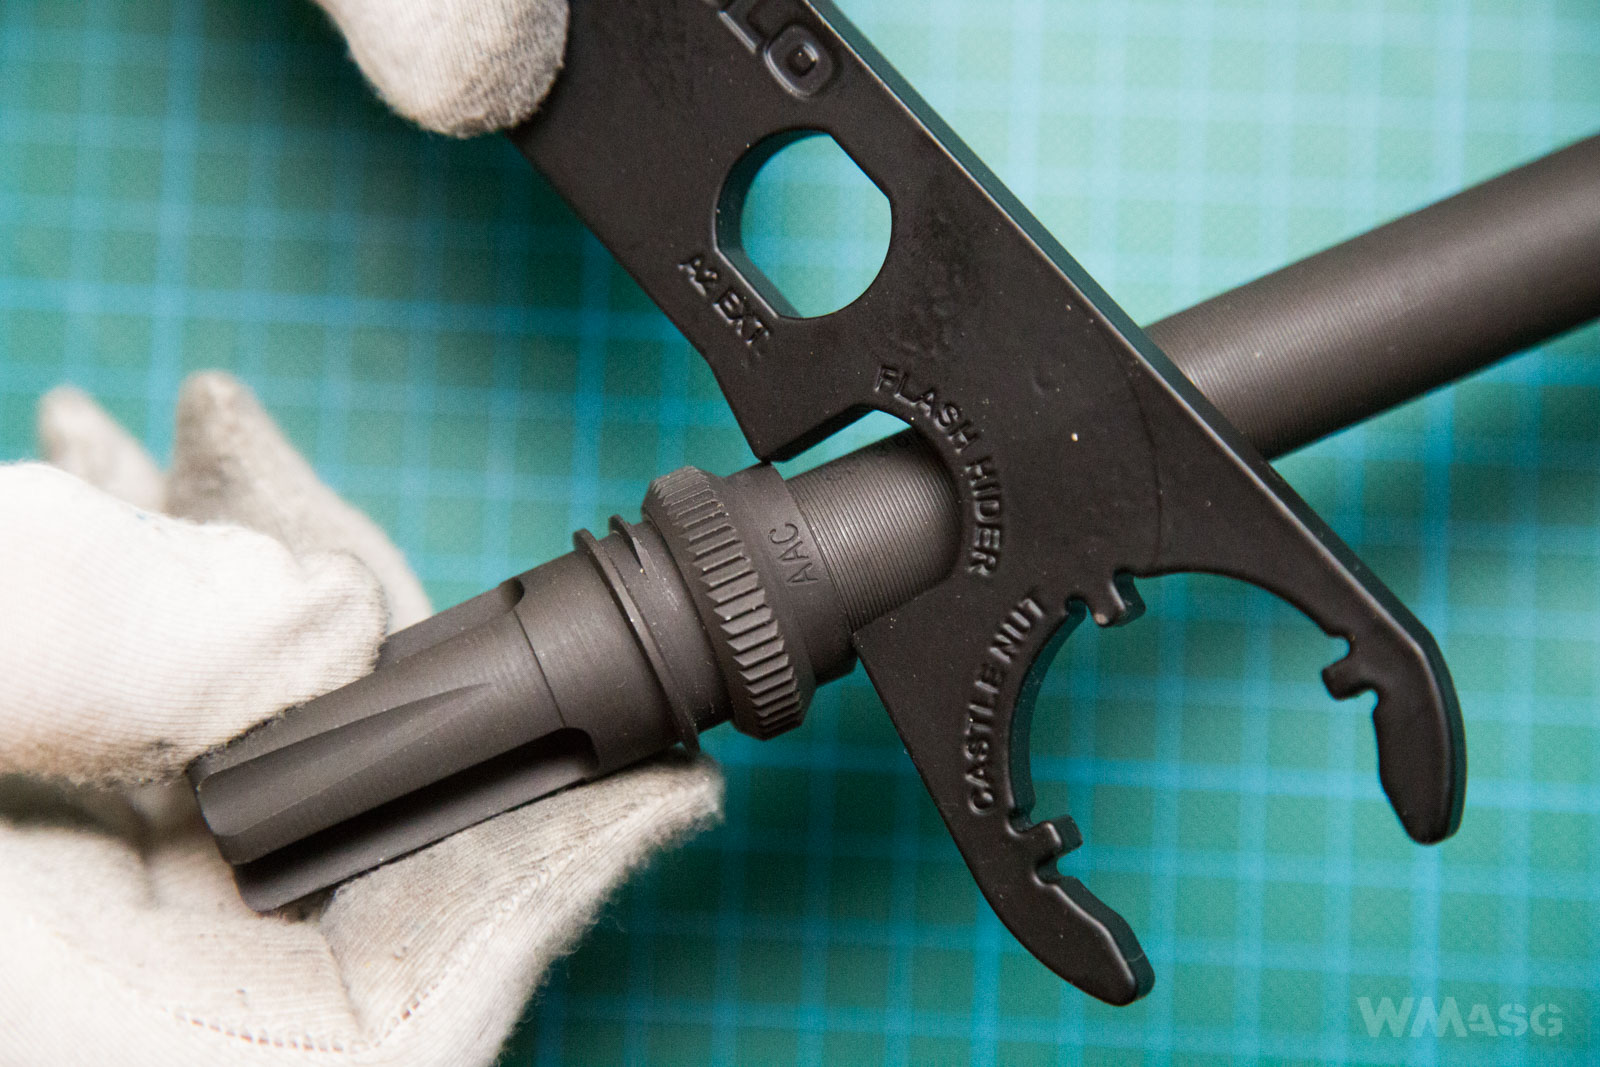
You need a key with a spacing of 22.18 mm, dedicated or adjustable. You just need to remember about removing the hex setting screw that is no invisible in the photo.
The gas block: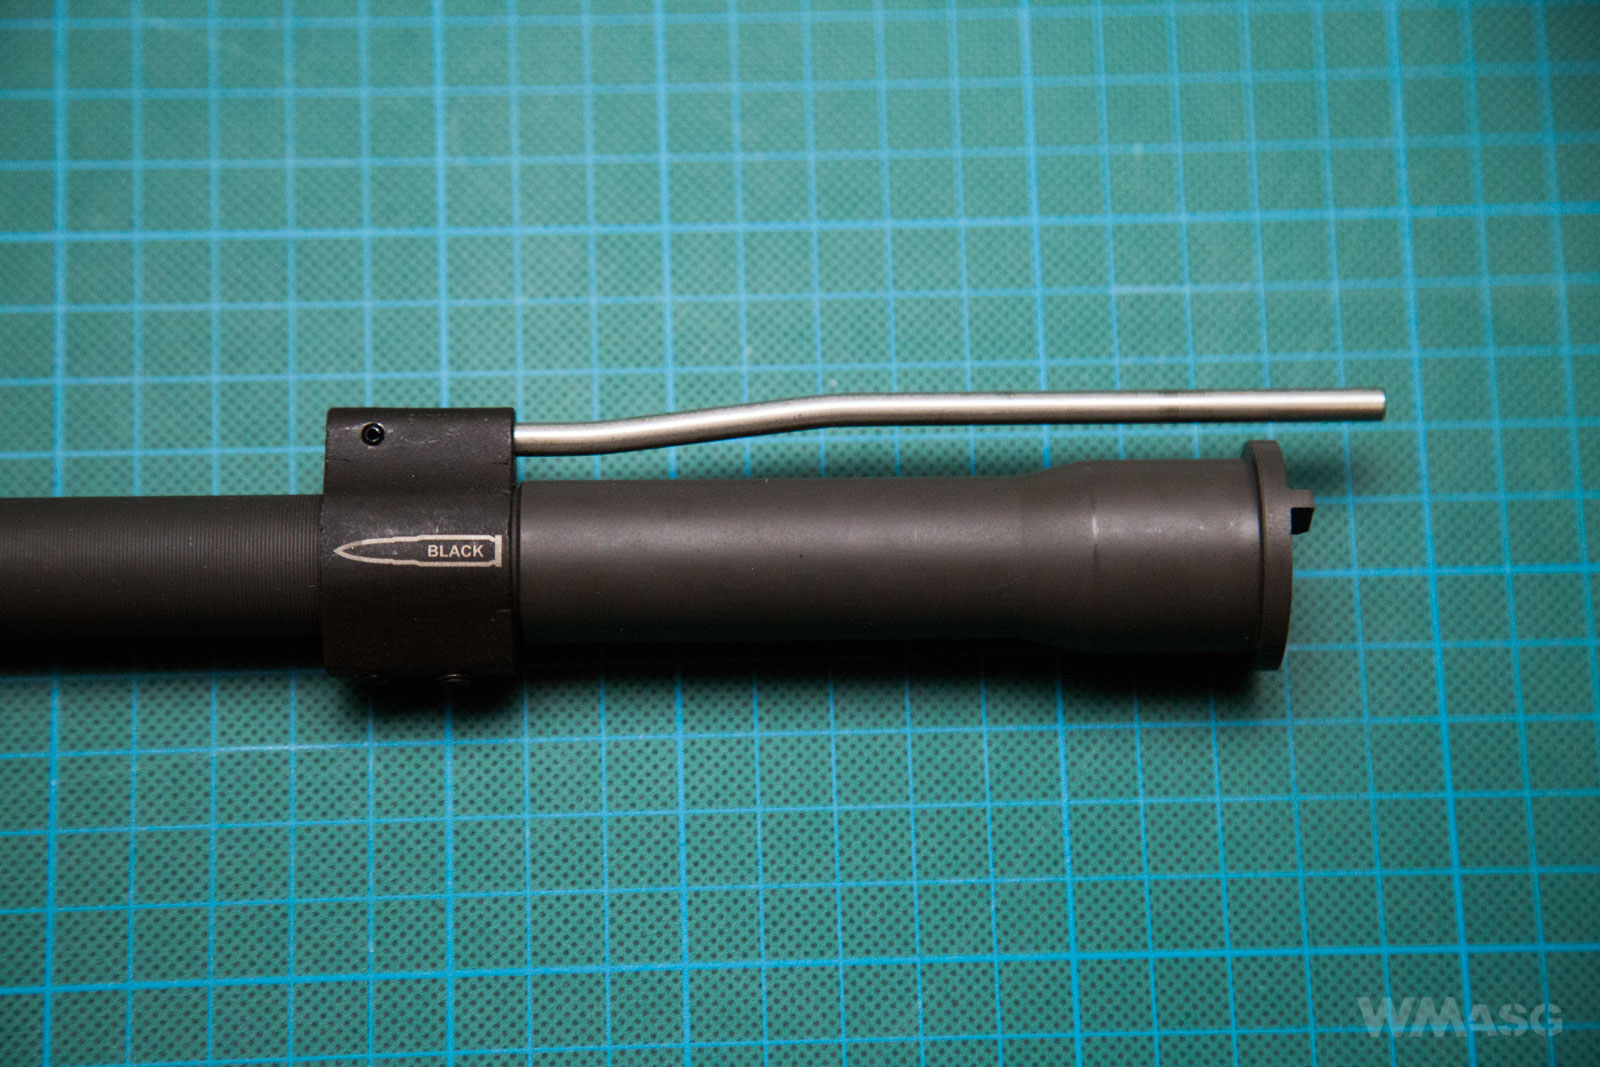
Parts made of polymer
The only parts made of polymer are the pistol grip, the buttstock and magazine housing. We will deal with the magazine in a moment, but it is impossible to say too much about the grip and the buttstock. The material they are made of is very hard and stiff. Accuracy of manufacturing and fitting with the other parts is at the highest level. The pistol grip has a traditional shape with a single nub separating the fingers. The gap between the grip and the lower receiver is basically non-existent.
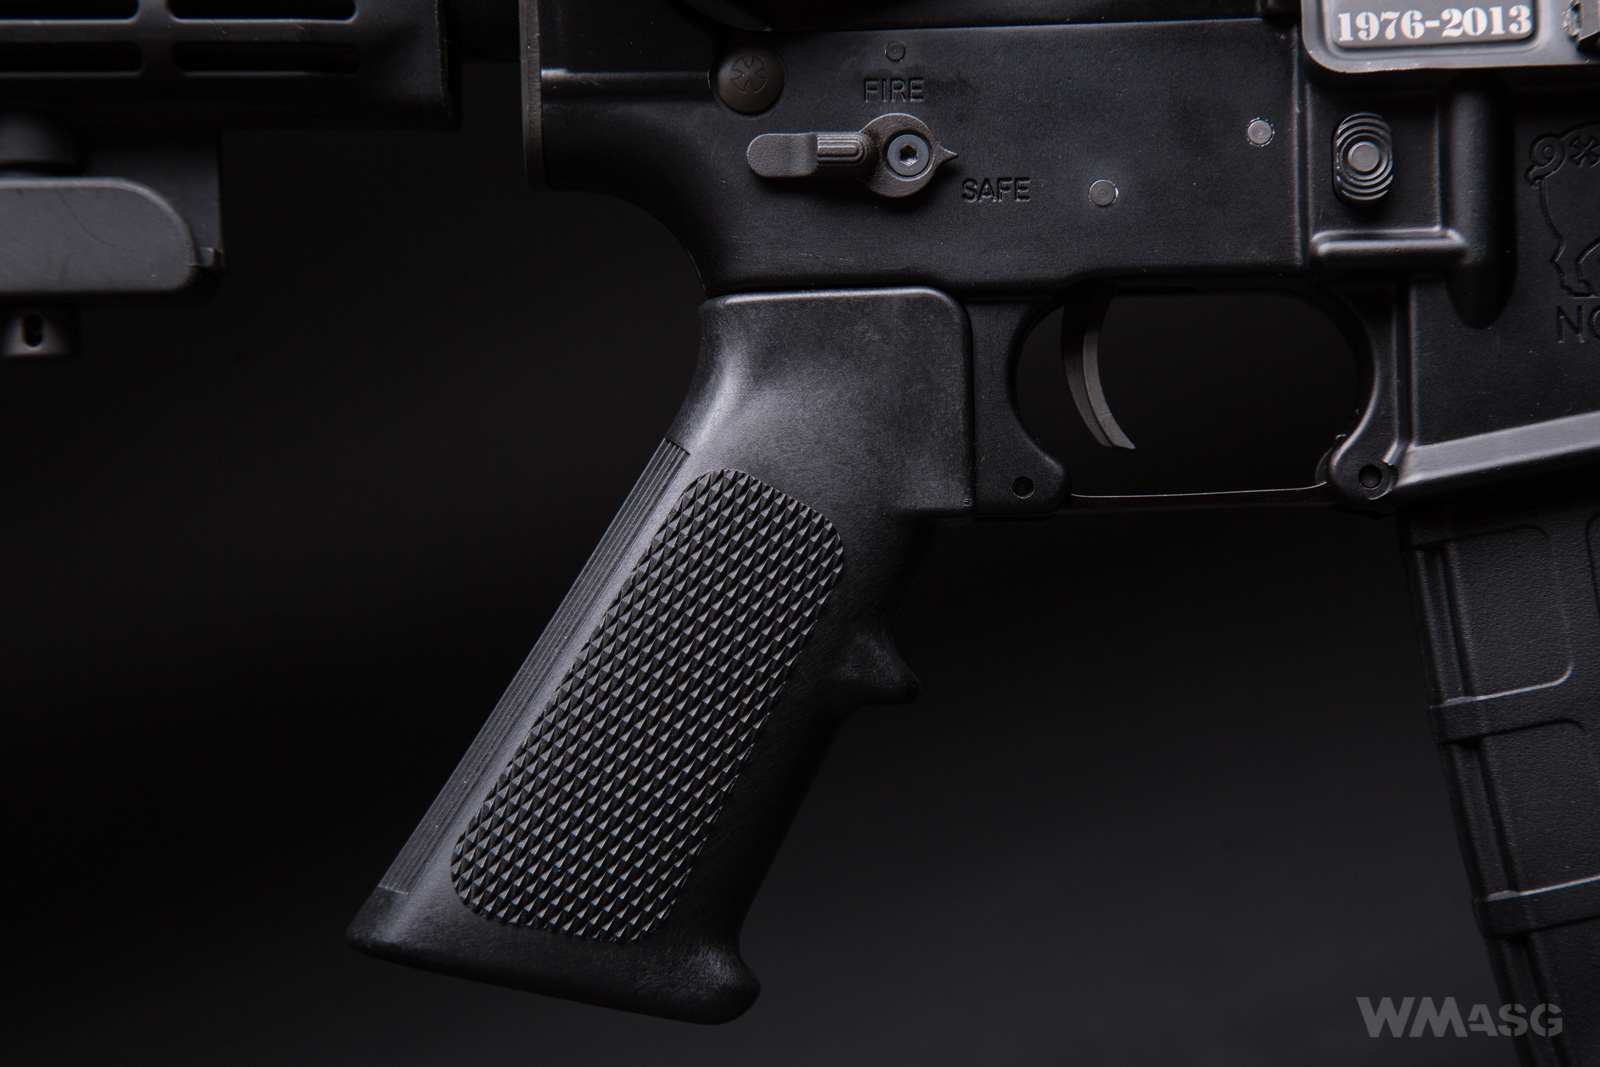
A buttstock in an equally traditional shape, with a butt plate that is inclined from the vertical line and allows to be extended in five positions (including two extreme ones).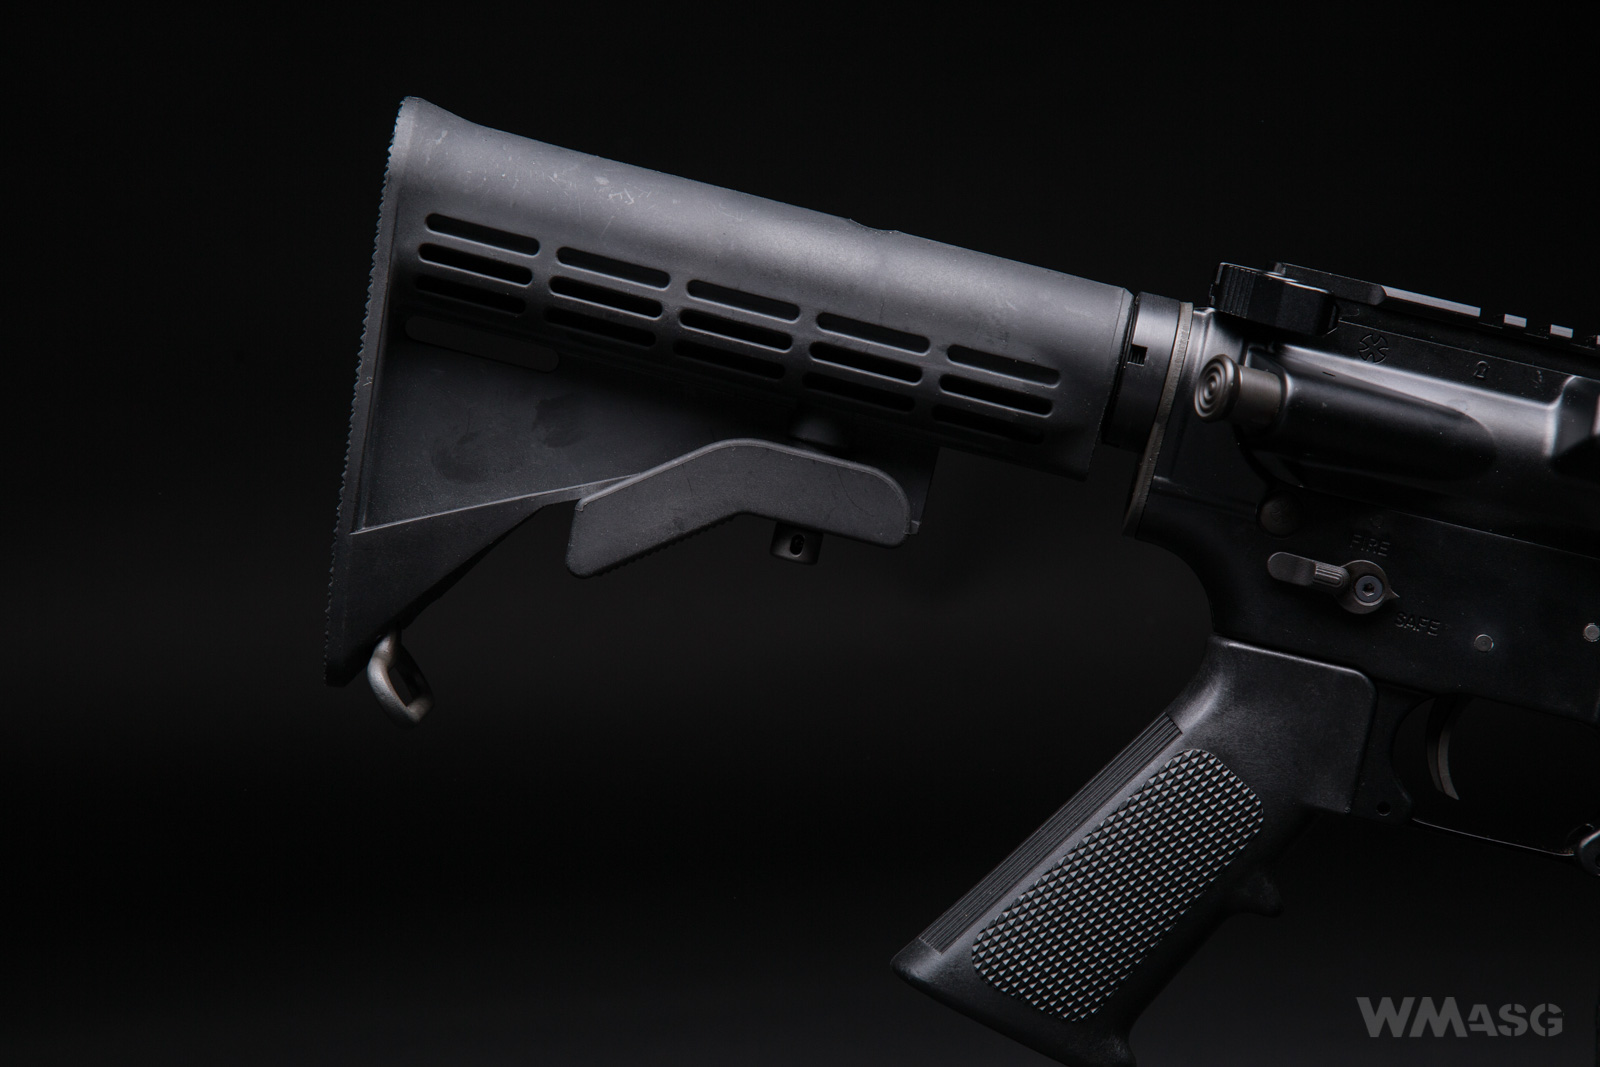
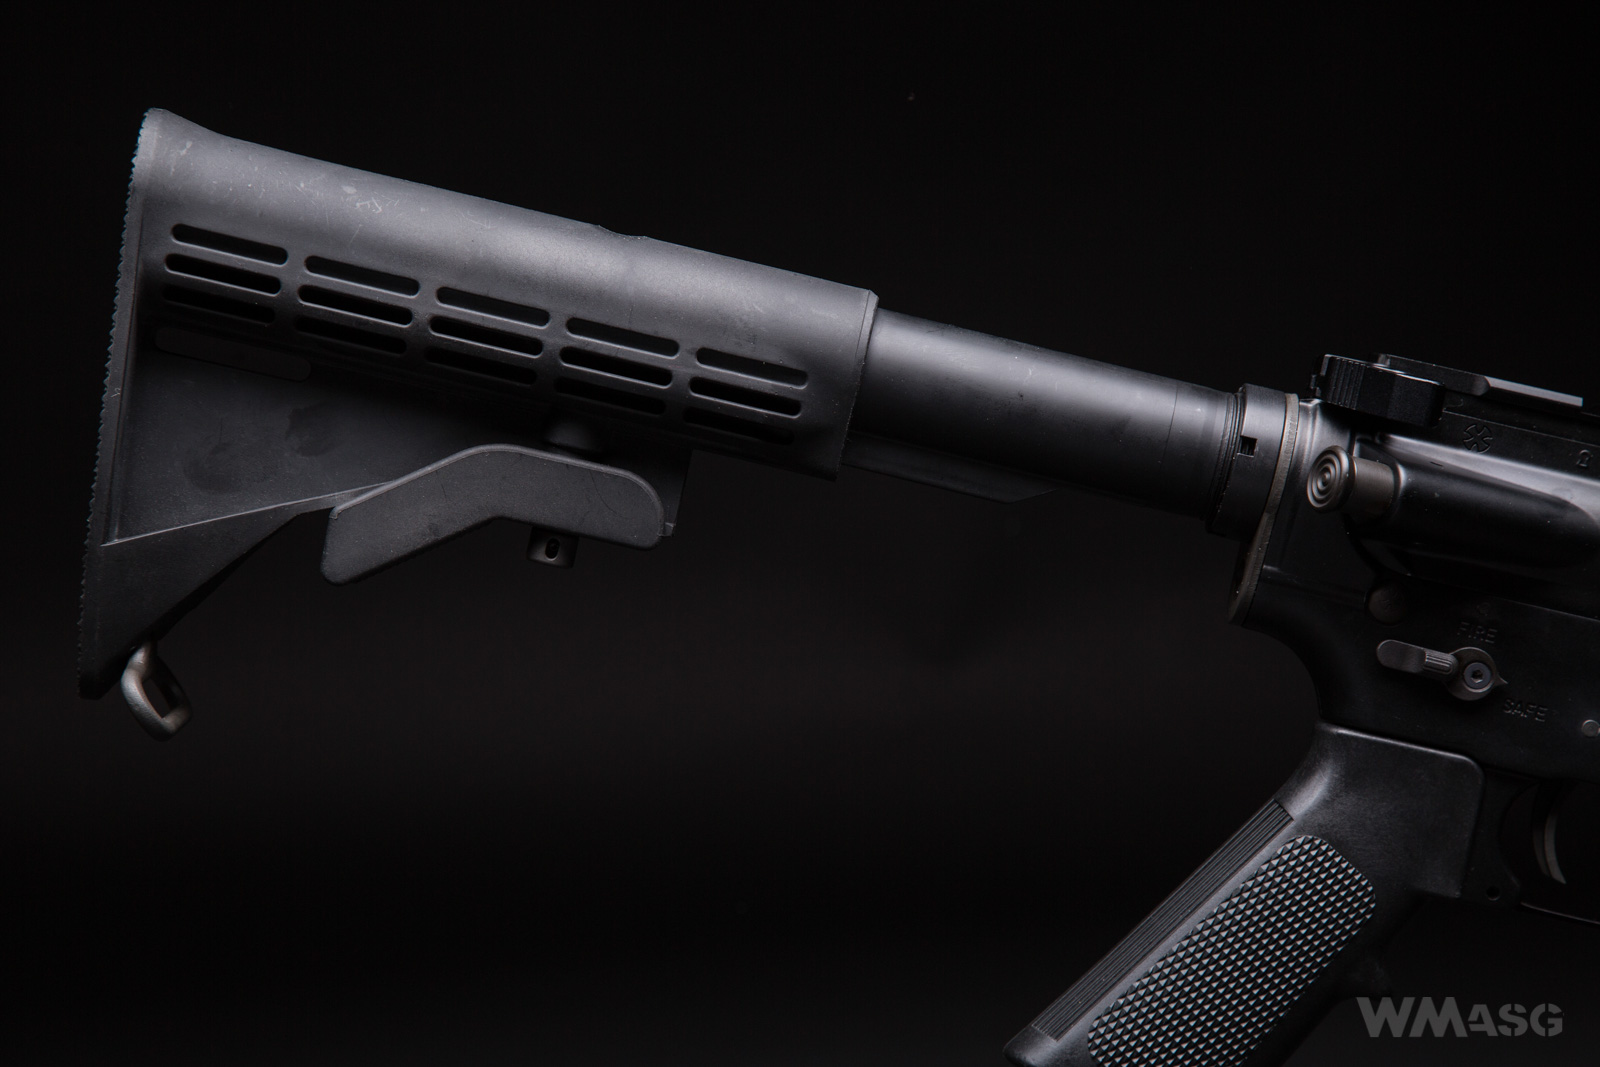
The buttstock has two places to attach a carrying sling. A traditional metal ear at the bottom of the butt plate and an equally typical slot indicated by the arrow. The replica has no other points for mounting a sling, also in the front part.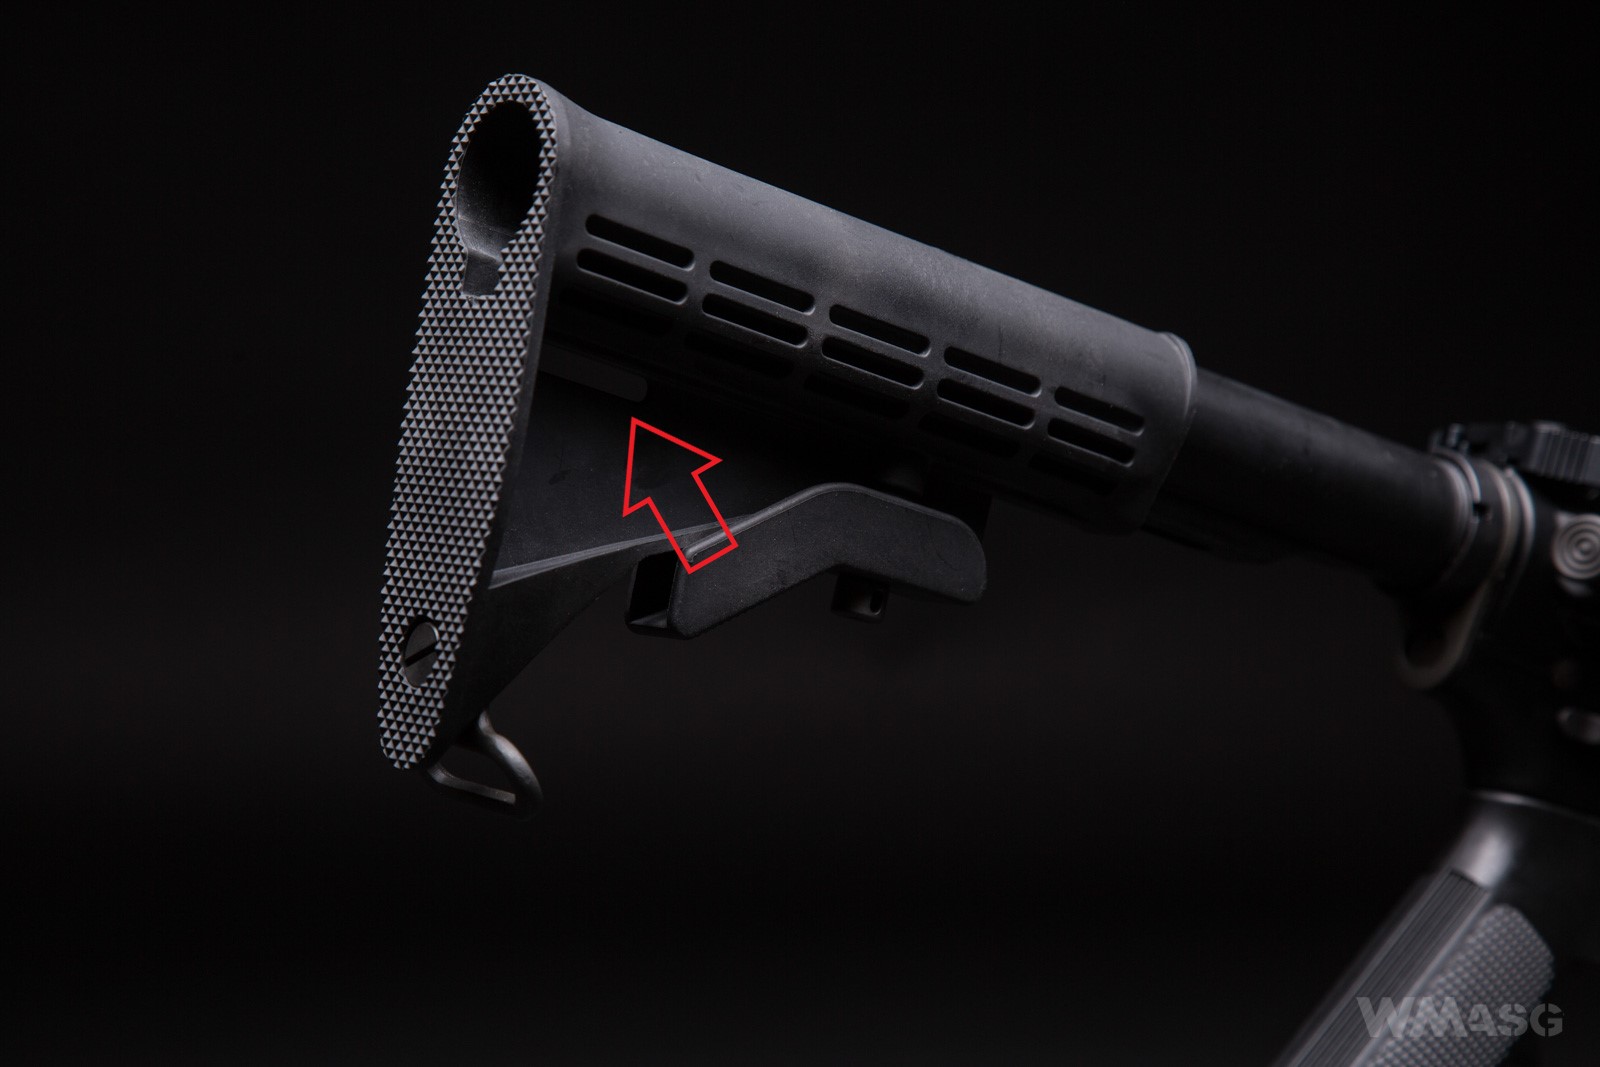
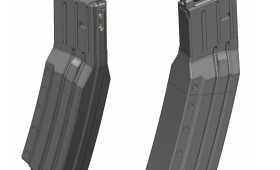
The magazine
The magazine holds 30 BBs and has a housing made of plastic and a metal interior with a gas tank. Visually, it is a variation on the Magpul's PMAG series. I am writing about a variation, because despite a great attention to detail in the case of the external barrel design team the has cut significant corners in case of the magazine. First of all, small differences in shape of the upper part.
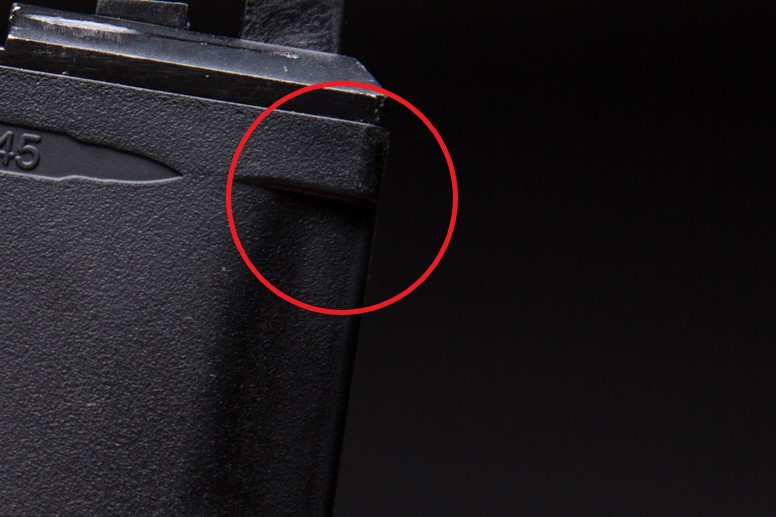 Secondly, the lack of characteristic ribbons and inscriptions in the lower part.
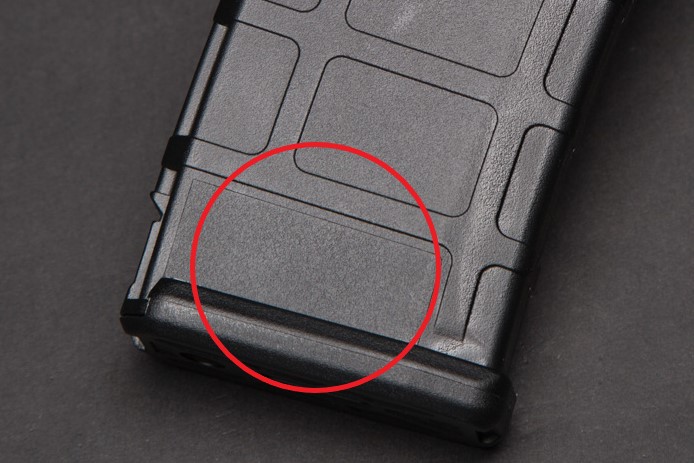
The thirdly, the marking of the cartridge.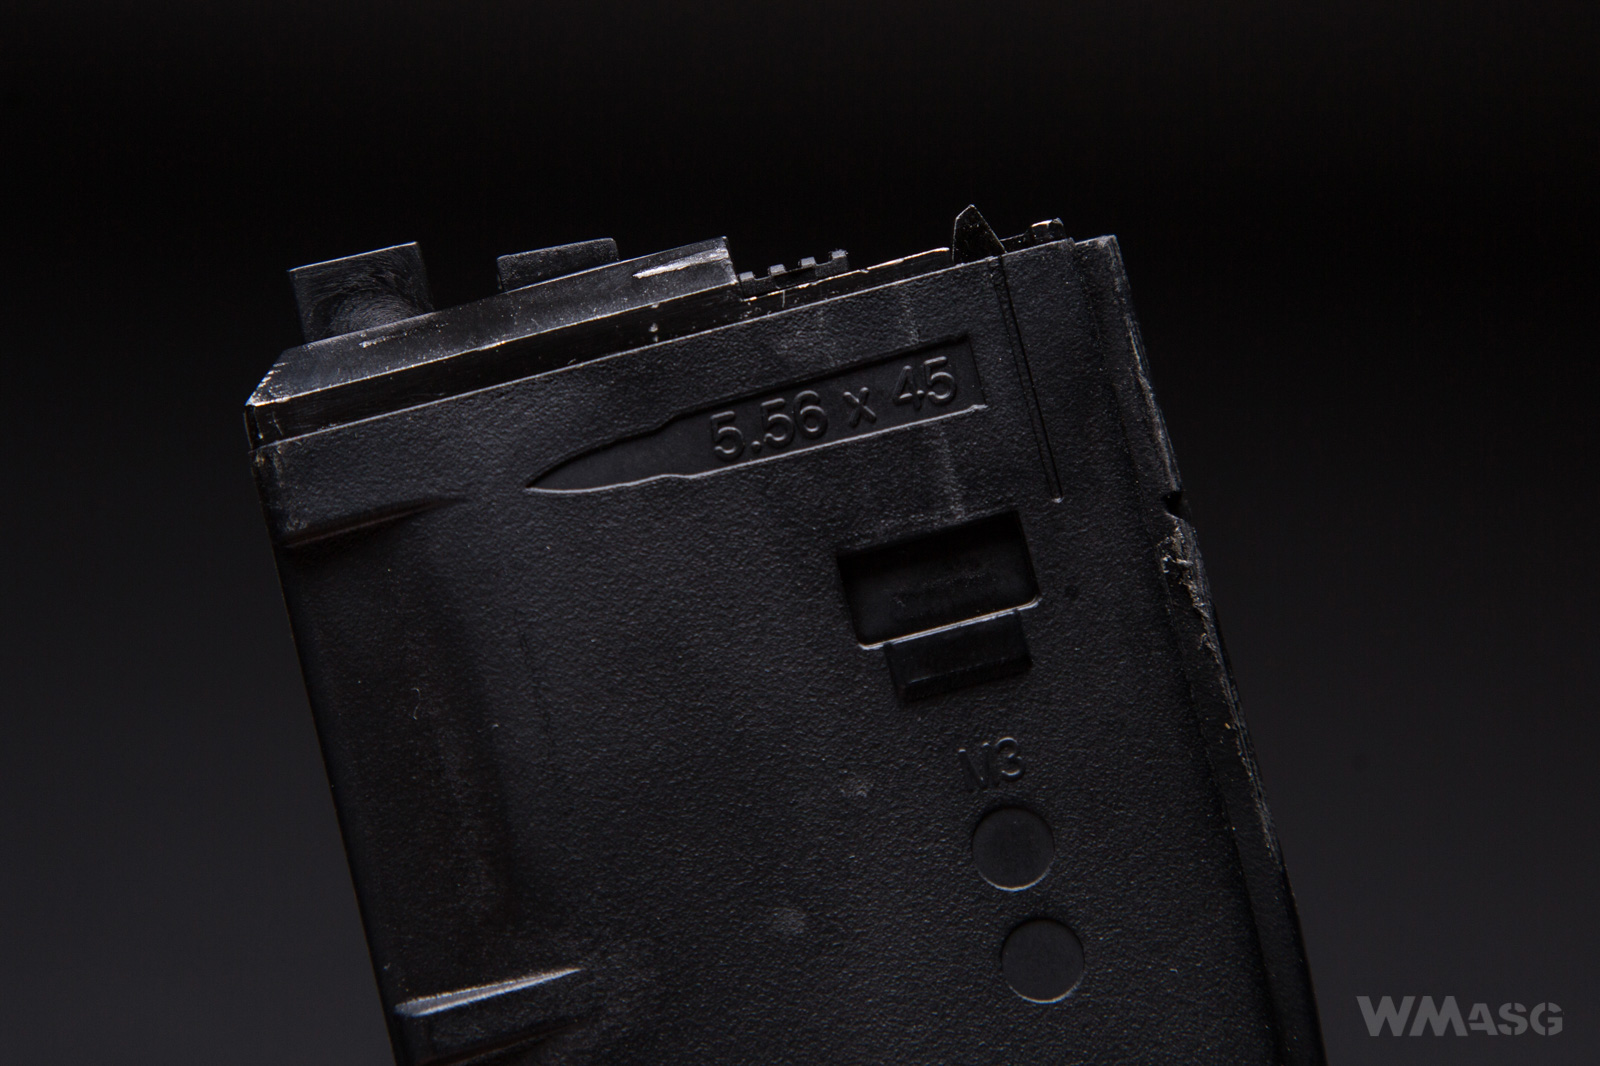
Let me remind you: .300 AAC Blackout is 7.62x35 mm cartridge. What's more, Magpul produces PMAGs dedicated for this type of ammunition.
But on the other hand, the .300 AAC Blackout can be used with the "normal" AR lower receiver (5.56x45 mm) and also use magazines for this kind of ammunition. So it comes out that as usual I'm picking on things, because the magazine attached to the replica works as it should and does not cause any problems.
The gas charging valve is located deeply in the bottom of the magazine.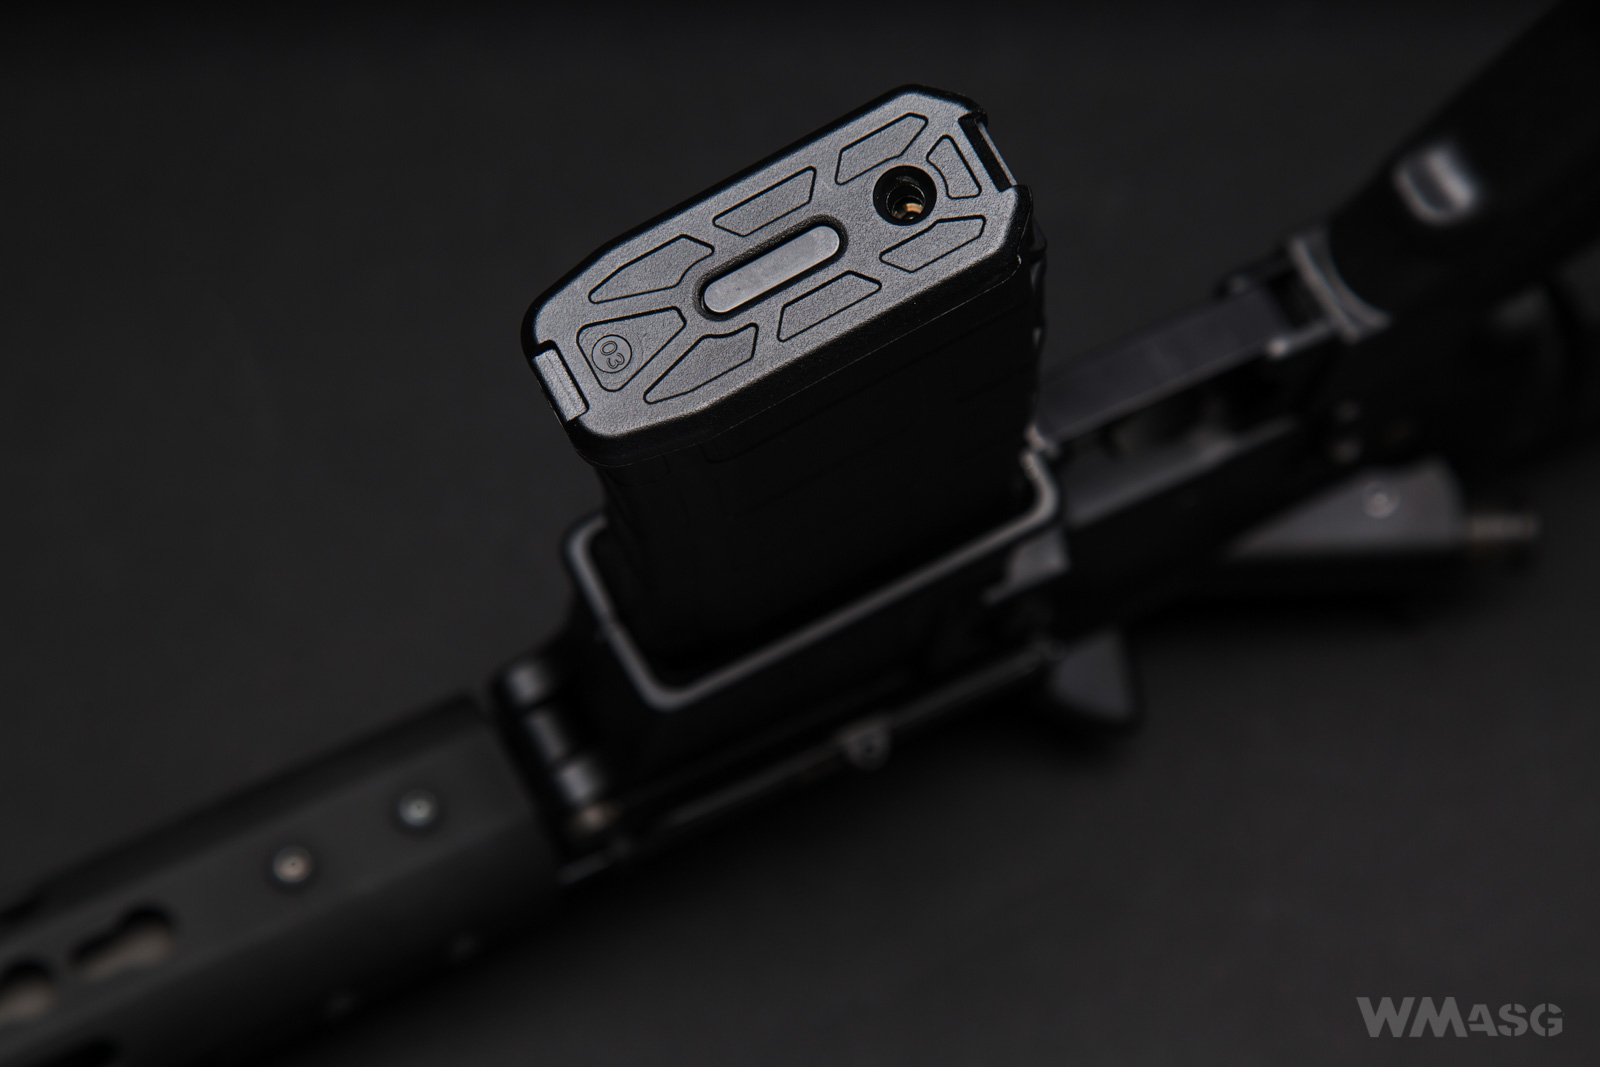
The main valve is at the top back pack part of the magazine.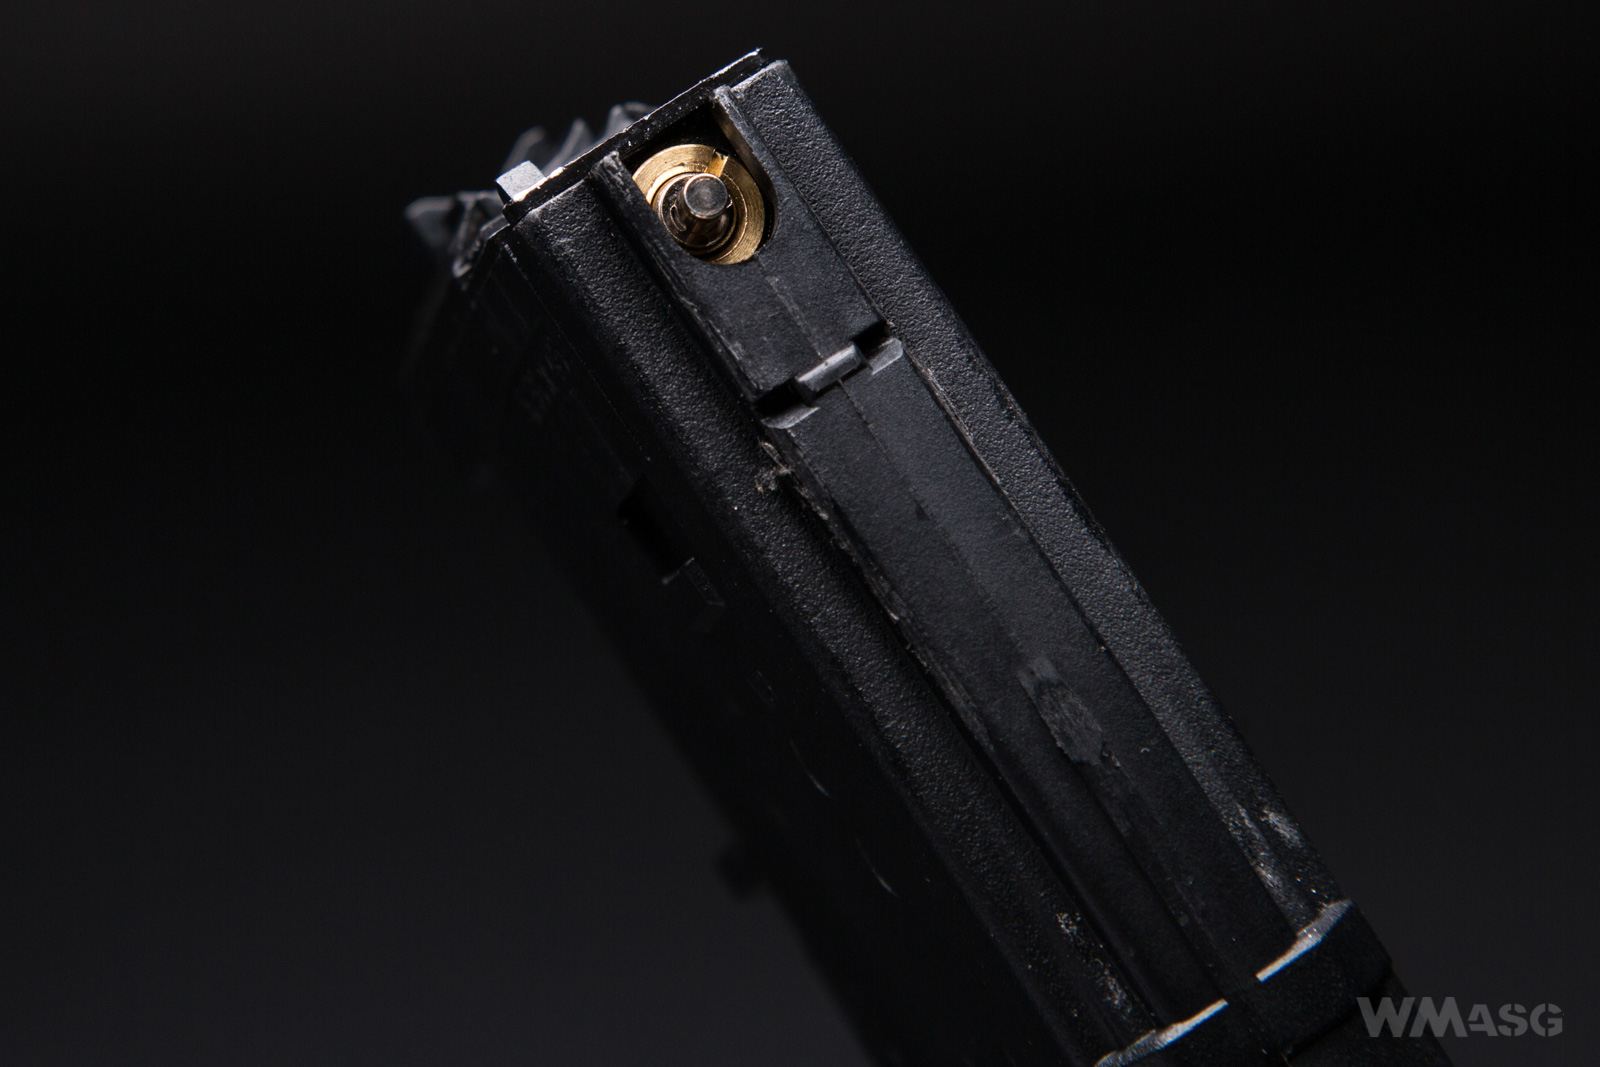
The inner barrel and the HopUp chamber
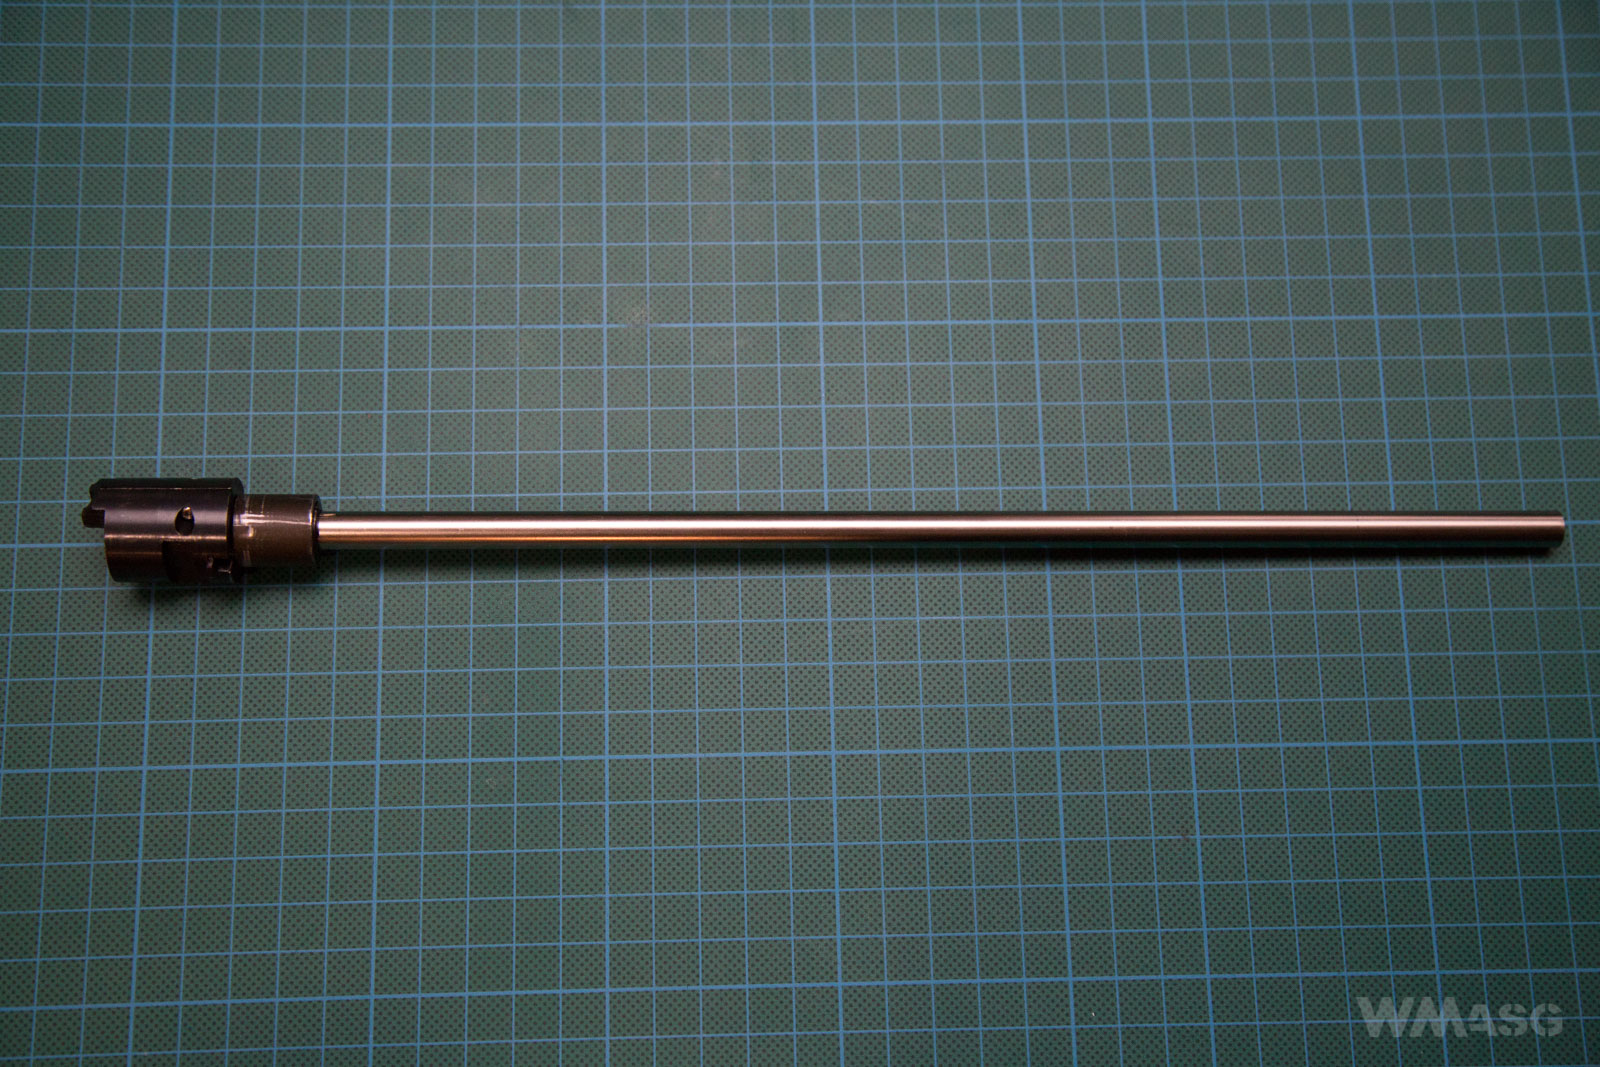
The chromed inner barrel has a diameter of 6.01 mm. The outlet is deeply beveled.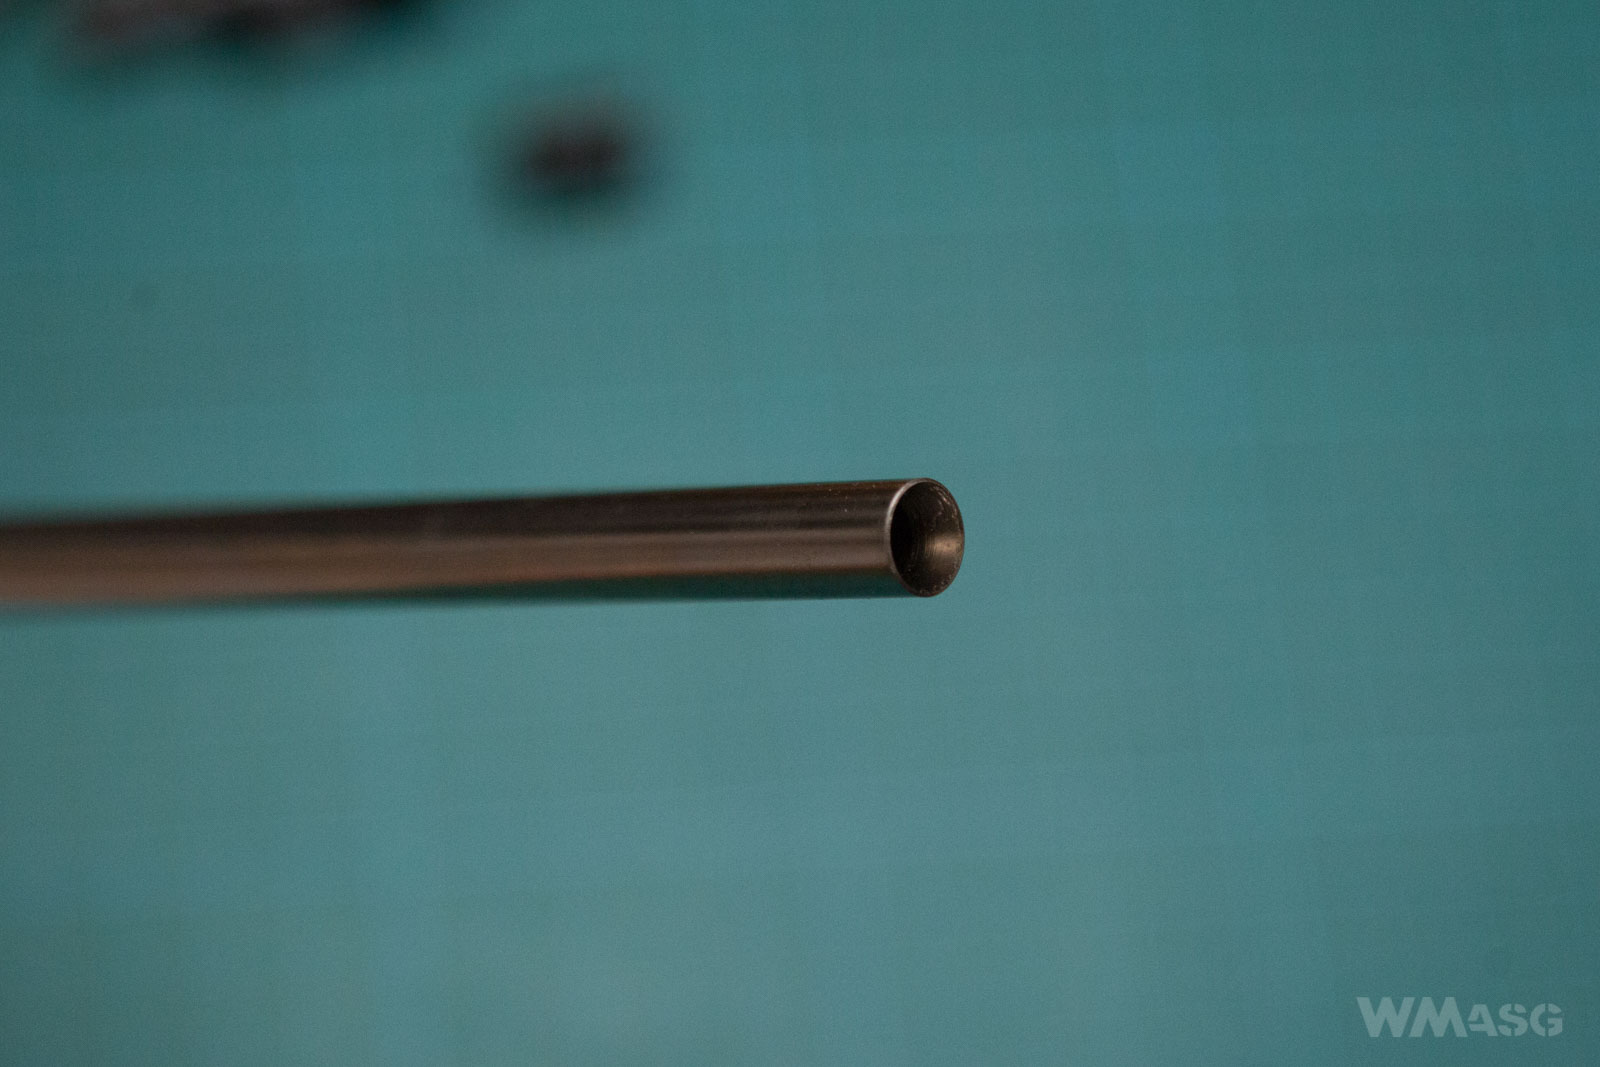 The barrel works with rubber bucking dedicated for gas powered replicas.
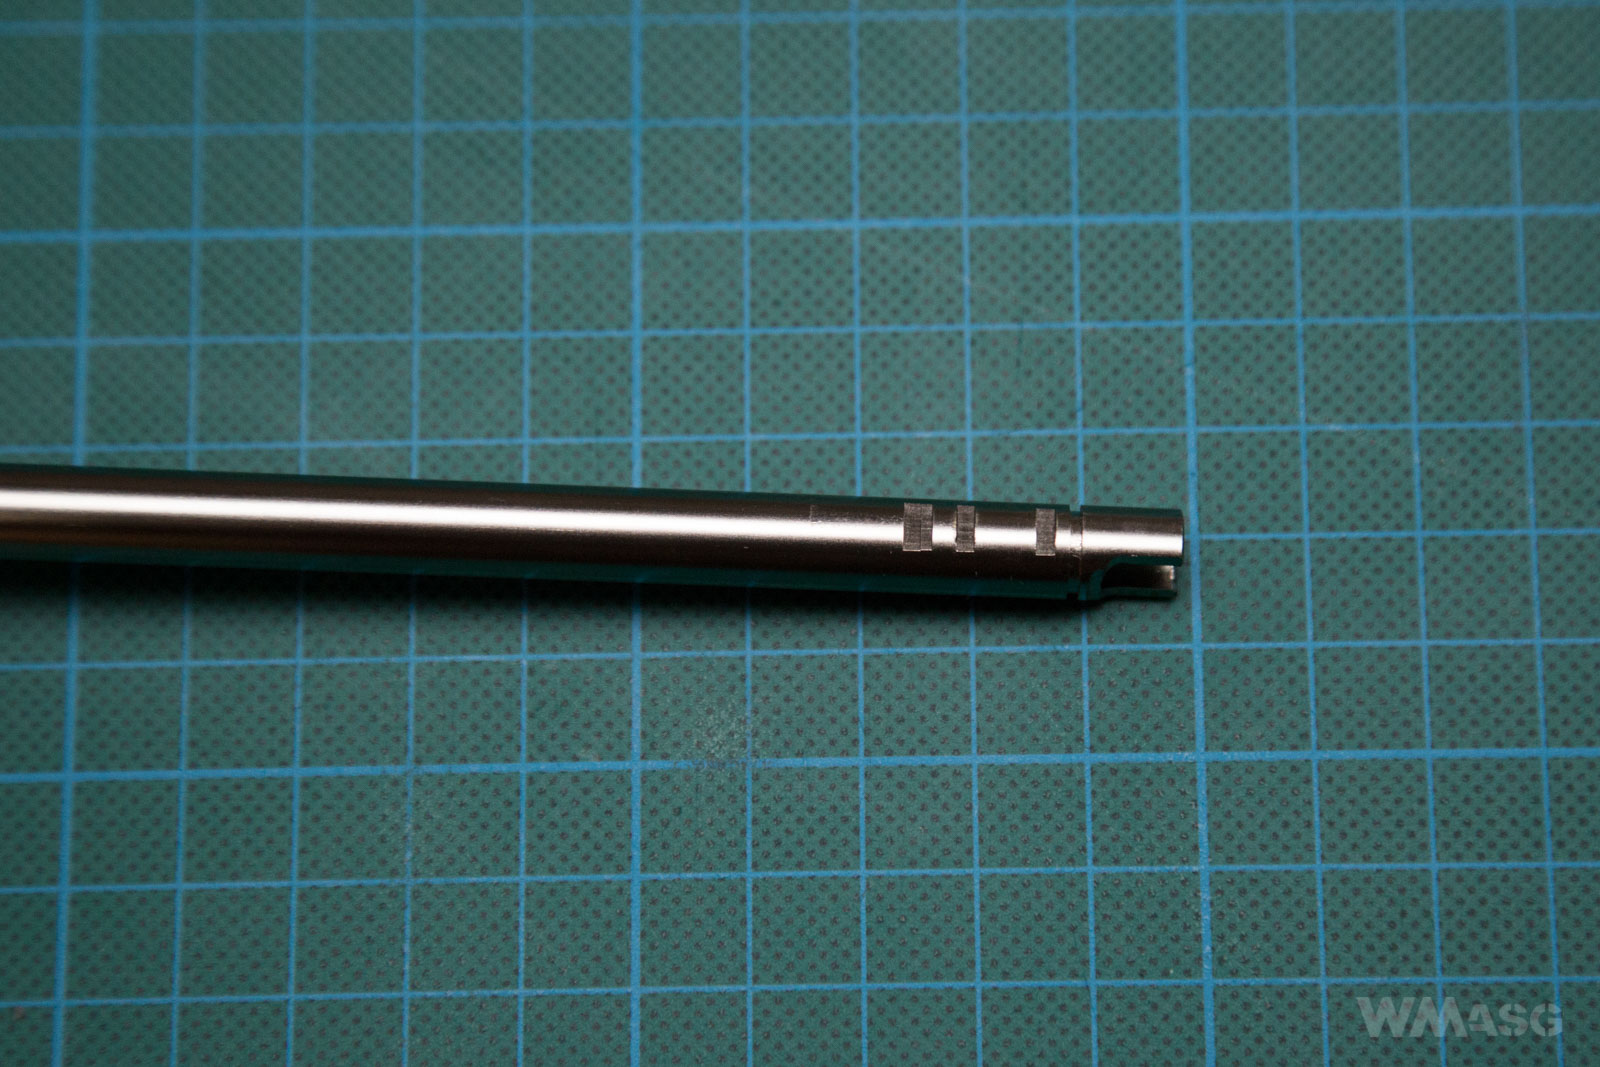
The HopUp chamber is made of steel. The arrows indicate the parts that fix the position of the barrel in the socket.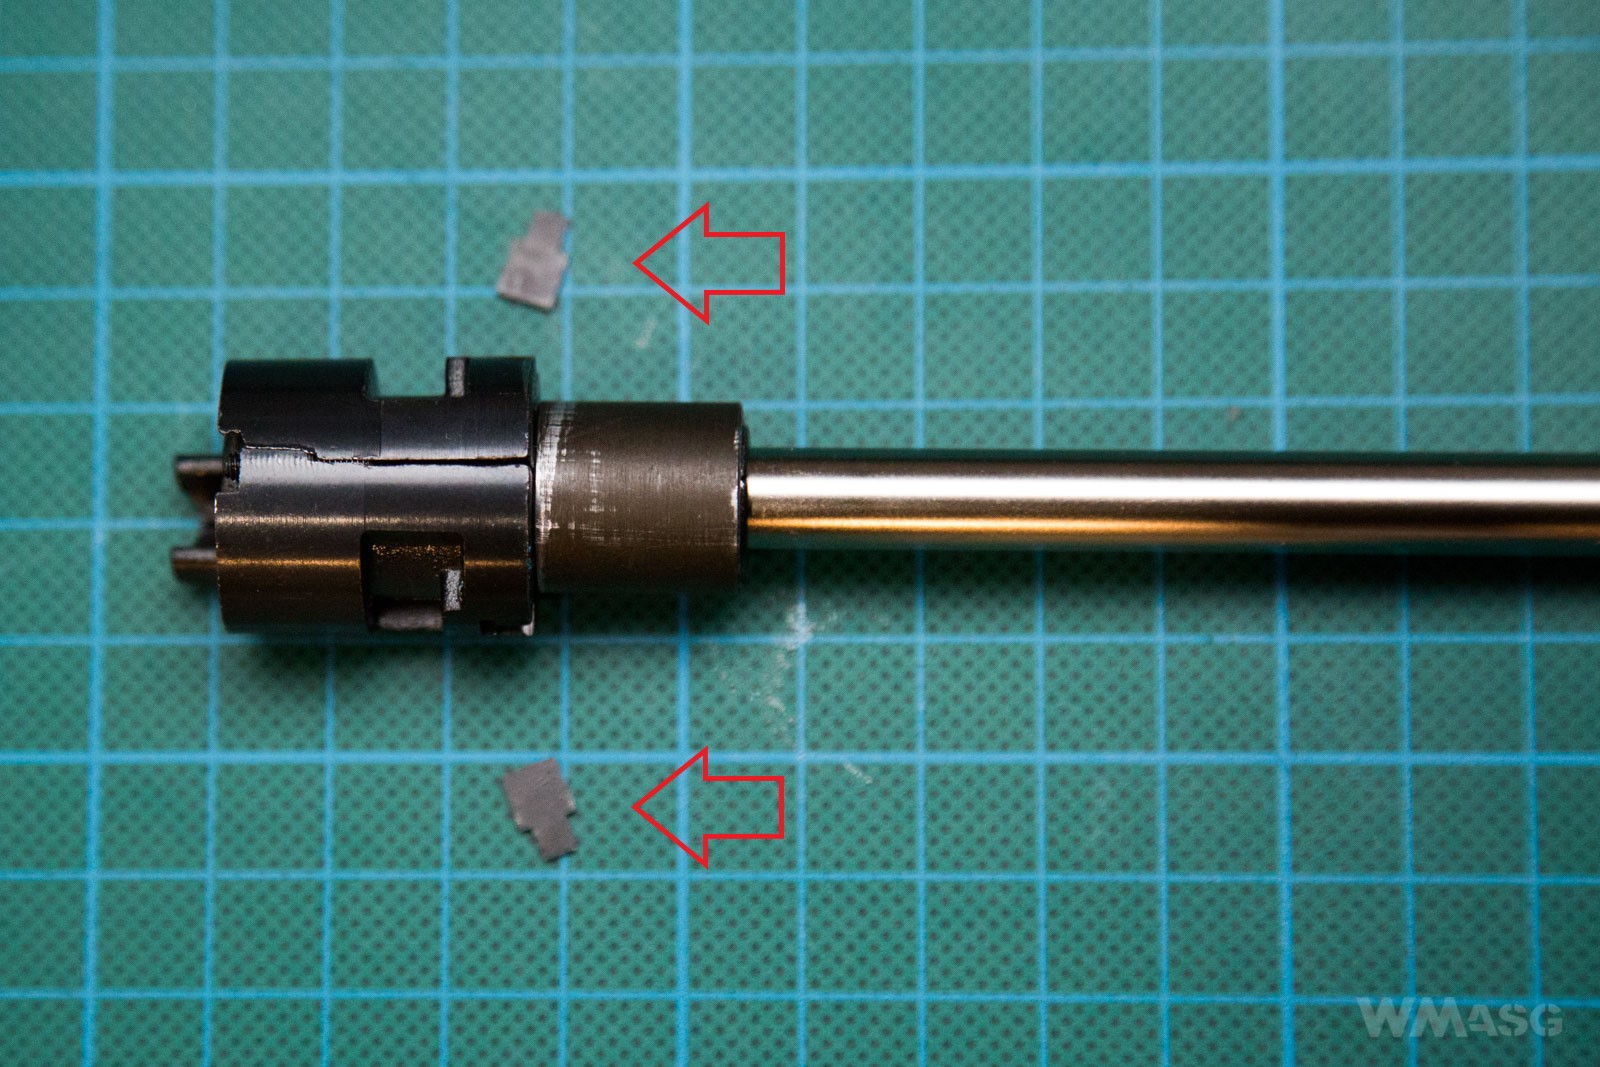
The yellow arrow is the place where vertically (perpendicular to the chamber) enters into the wider end of the barrel retainer. Its narrower end enters the right notch in the barrel's slot and precisely determines its position and prevents it from turning. The circle indicates a flat spacer.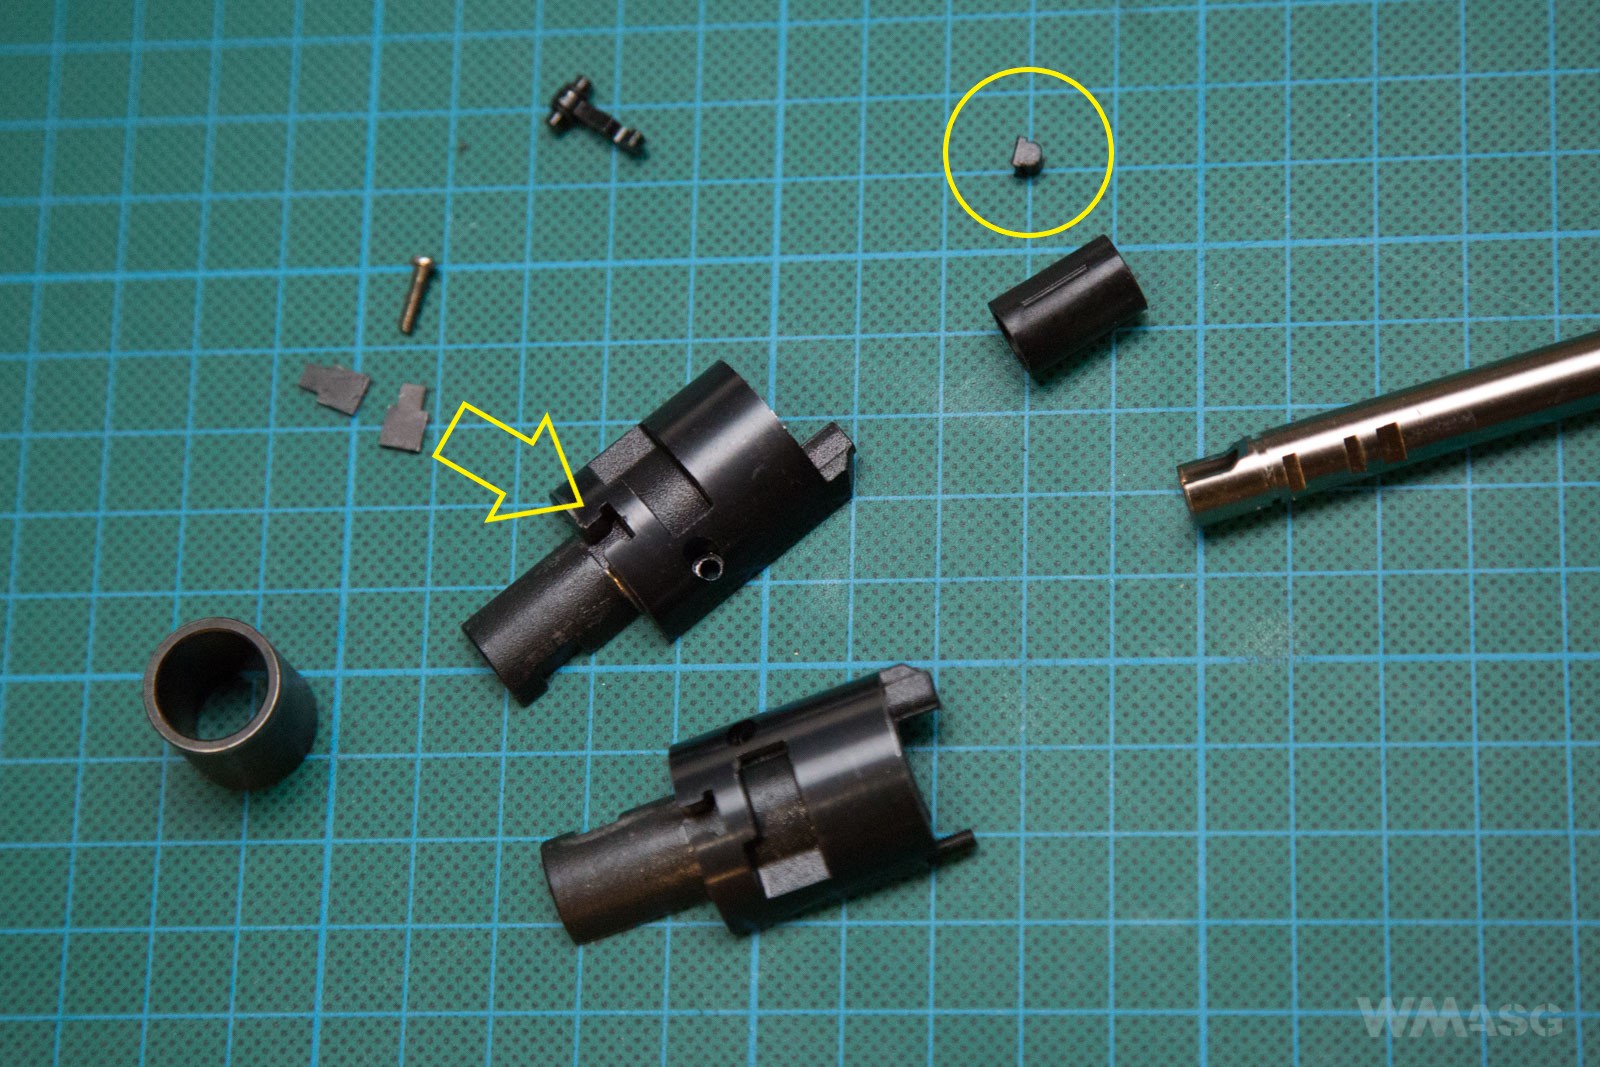
HopUp pressure lever and spacer.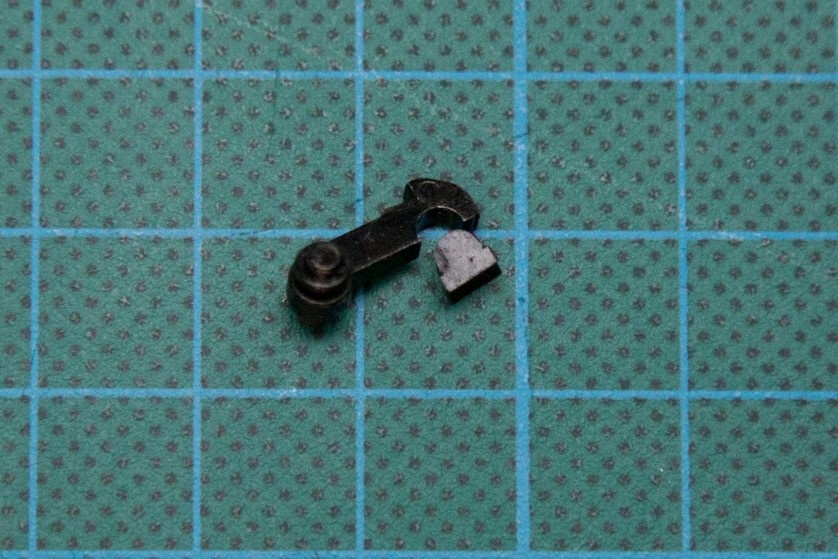
Mode of operation and adjustment of the HopUp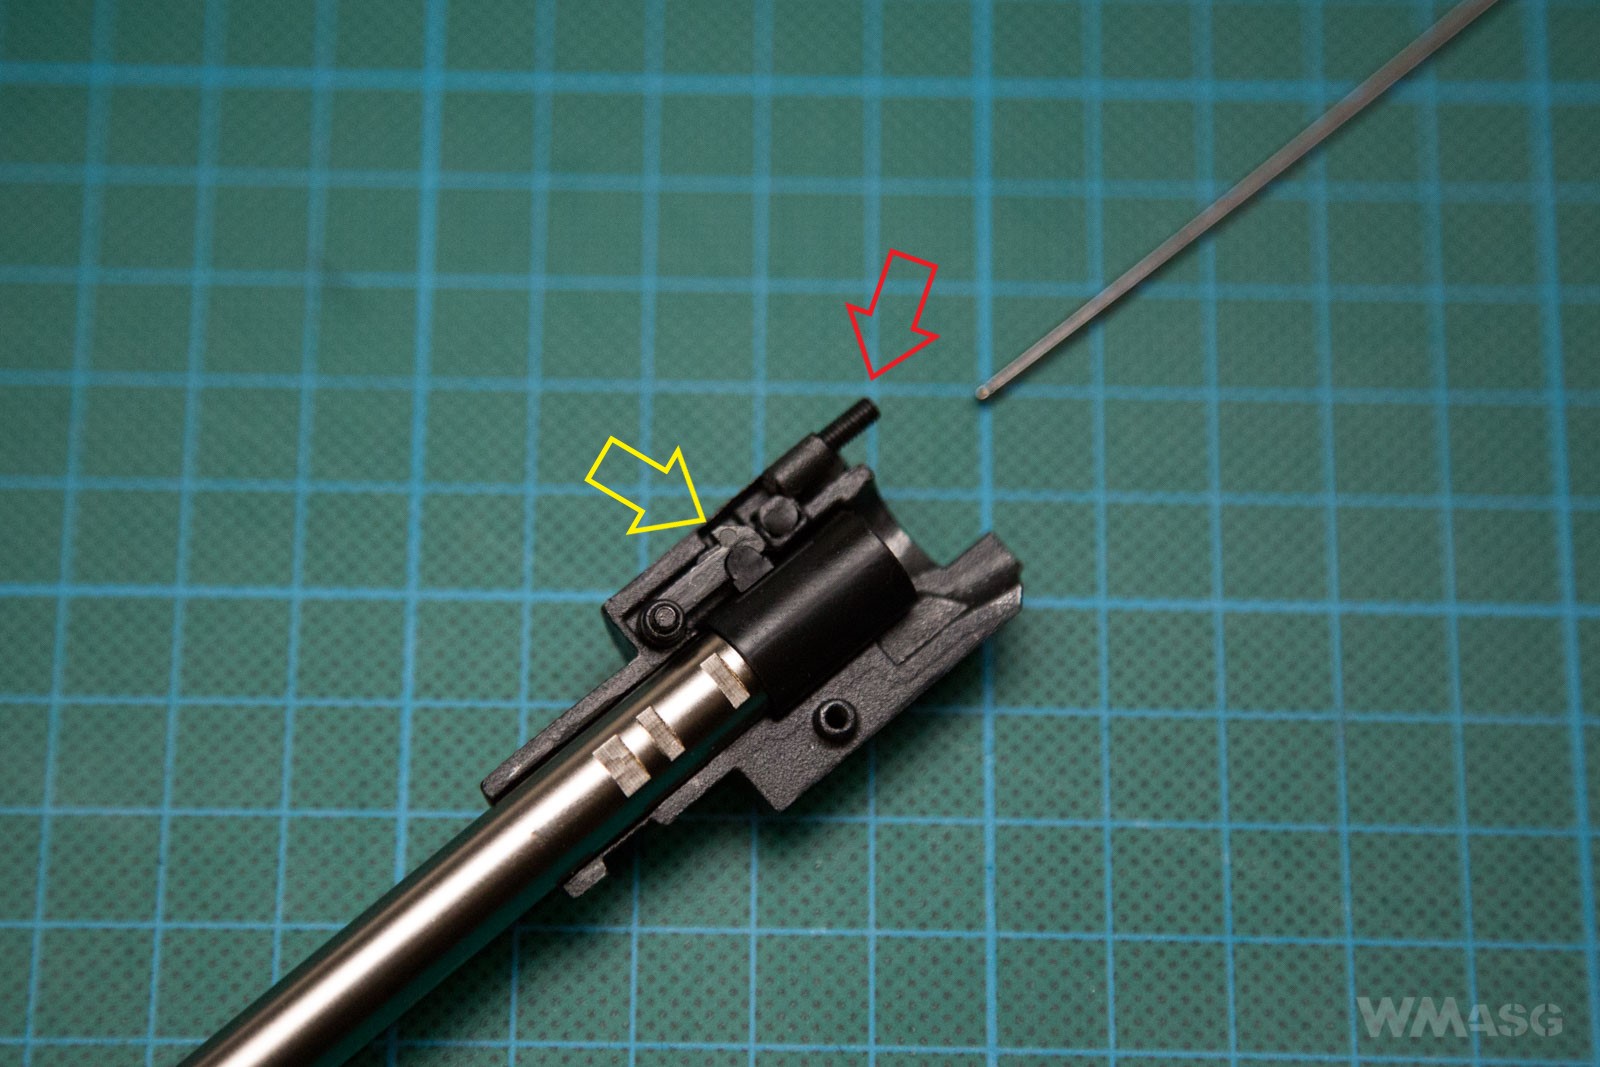
Tightening the hex screw (red arrow) puts the pressure on the inclined edge of the pressure arm (yellow arrow) and moves the arm with the spacer down towards the bucking, i.e. resulting in a stronger backward spin of a BB. Loosening the screw allows the arm to go back (raise) resulting in the BB being spun with lesser force. The pressure arm retracts (lifts) only thanks to the elasticity of the bucking, there is no spring.
The HopUp adjustment presents some difficulties due to the positioning of the adjusting screw and not the easiest access to it. The screw is located at to part of the chamber (see the photo below, with the key inserted into the adjustment screw).
So somewhere over there, where the arrow points.
Inserting a hex key into the ejector port and adjusting the system is not the simplest of tasks.
RA-TECH has special HopUp adjustment keys available in its offer.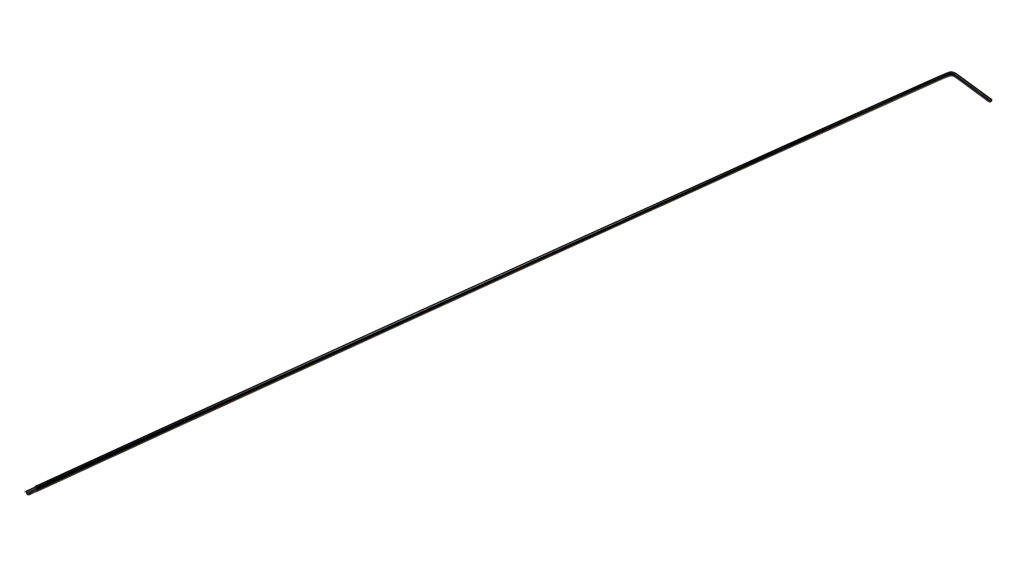
Price: 7 USD
Length: 26.5 cm
Photo from the RA-TECH website.
From the key length I deduce that the HopUp adjustment sequence should look like this:
1. we take out the rear pin and break open the replica;
2. we pull out the bolt carrier;
3. with a 26.5 cm long and flexible wrench we poke the adjusting screw, trying to hit its socket;
4. finally we hit and tighten it by, for example, half a turn;
5. we assemble the bolt and the replica back together and attach the magazine;
6. we shoot and see that the HopUp is too weak;
7. we pull out the magazine and repeat points 1 to 5.
8. we shoot again and, if we were lucky, we are ready, and if not, we repeat points 1 to 5.
BRAVO!
I prefer using a shorter key through the ejector port.
And by the way, the tested unit did not have any HopUp adjustment key in the set.
NPAS
The tested replica is equipped with the new version of the original RA-TECHA system presented in spring of 2018. The outer (gold) part is made of steel. The inner (the brown part, you can see only the bolt's locking lugs) is made of anodized aluminum. The innovation here is the use of magnetic valve stabilization and a set of three interchangeable aluminum nozzles, allowing to achieve different values of the muzzle velocity.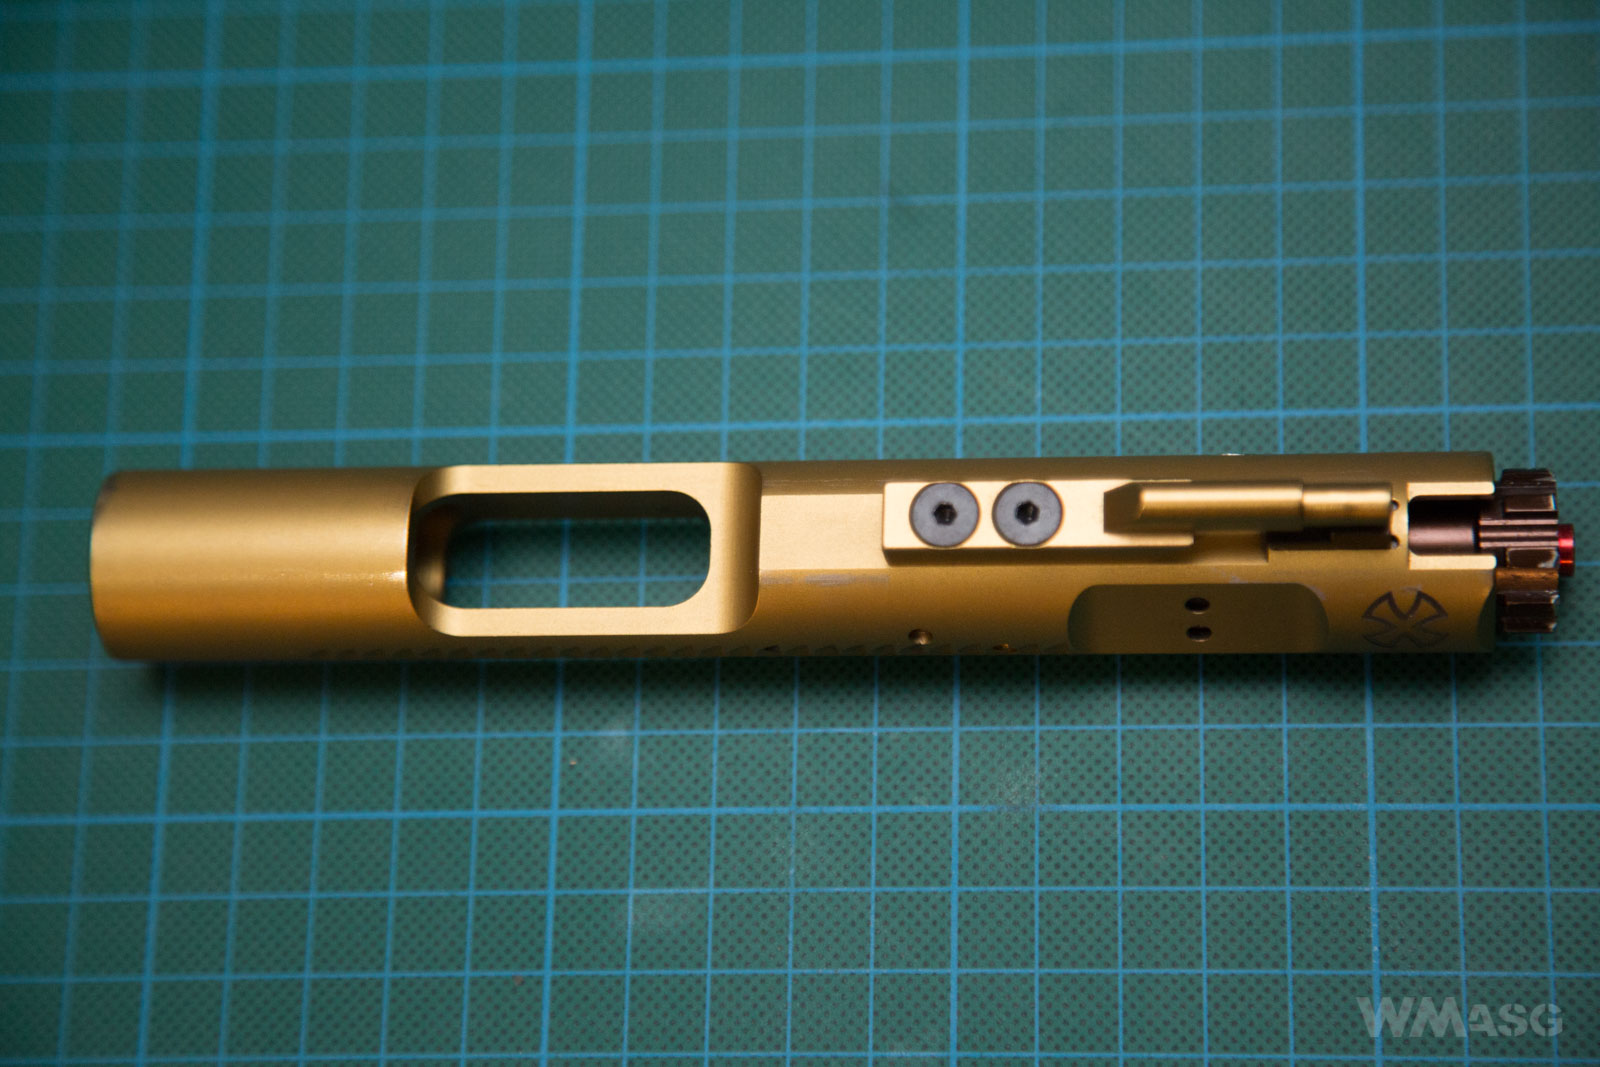
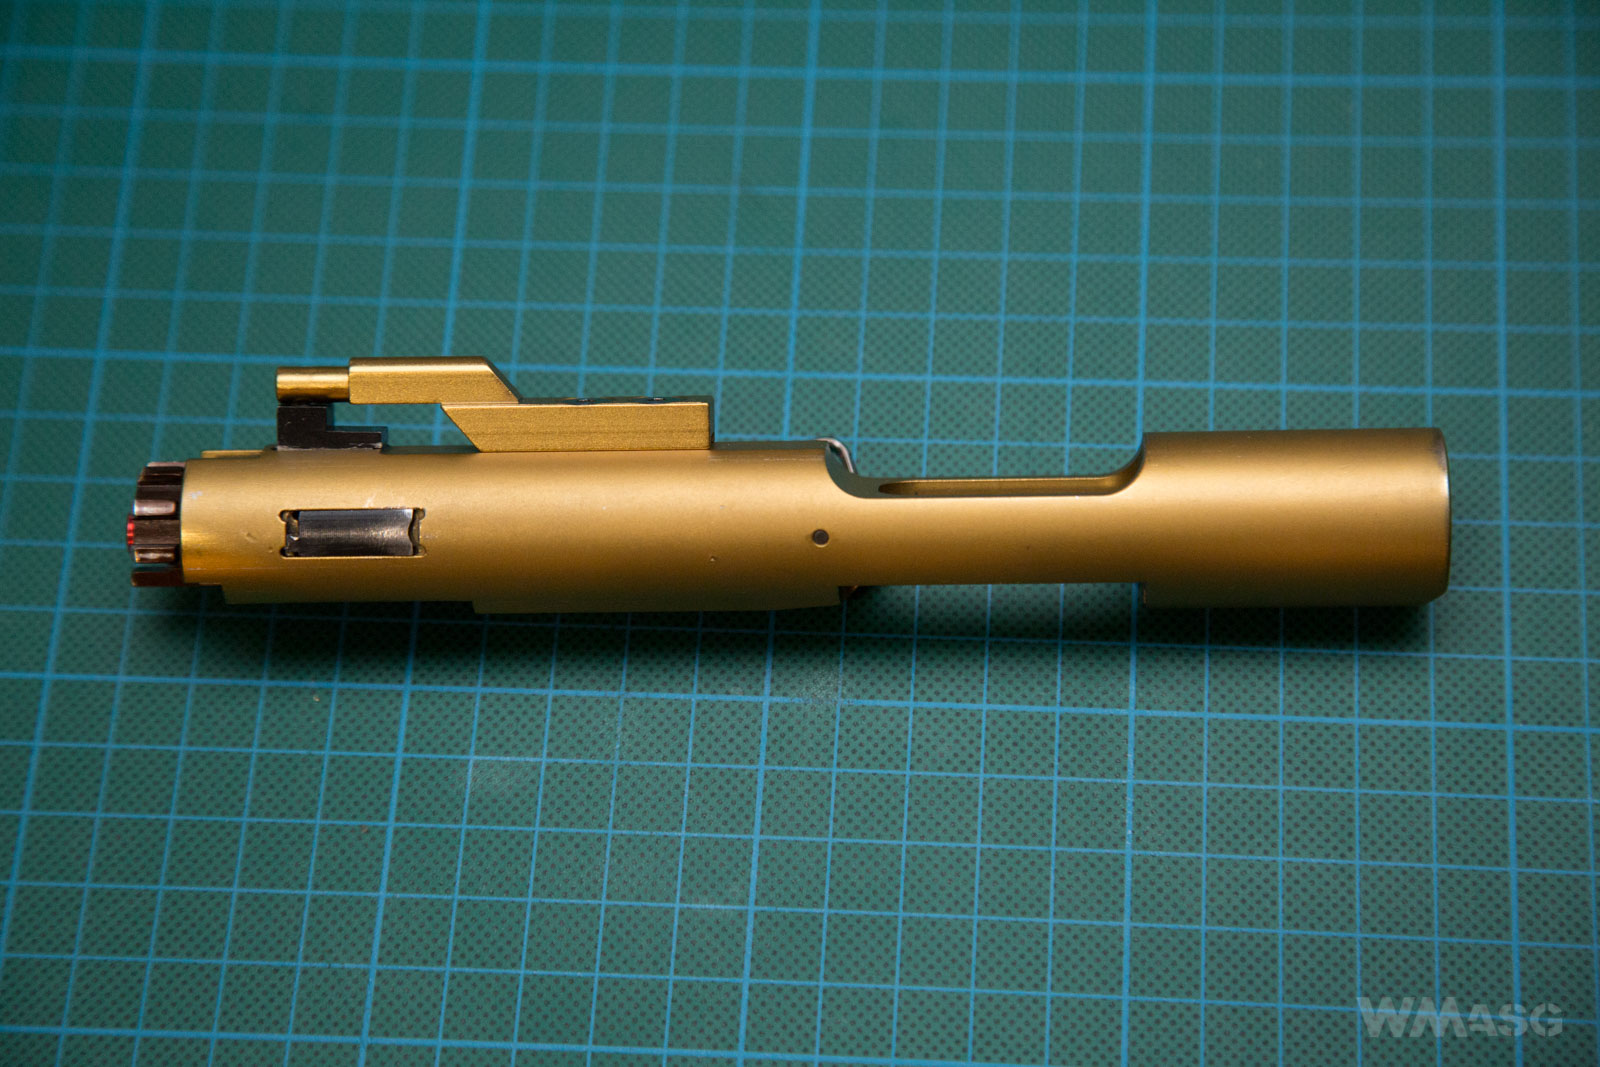
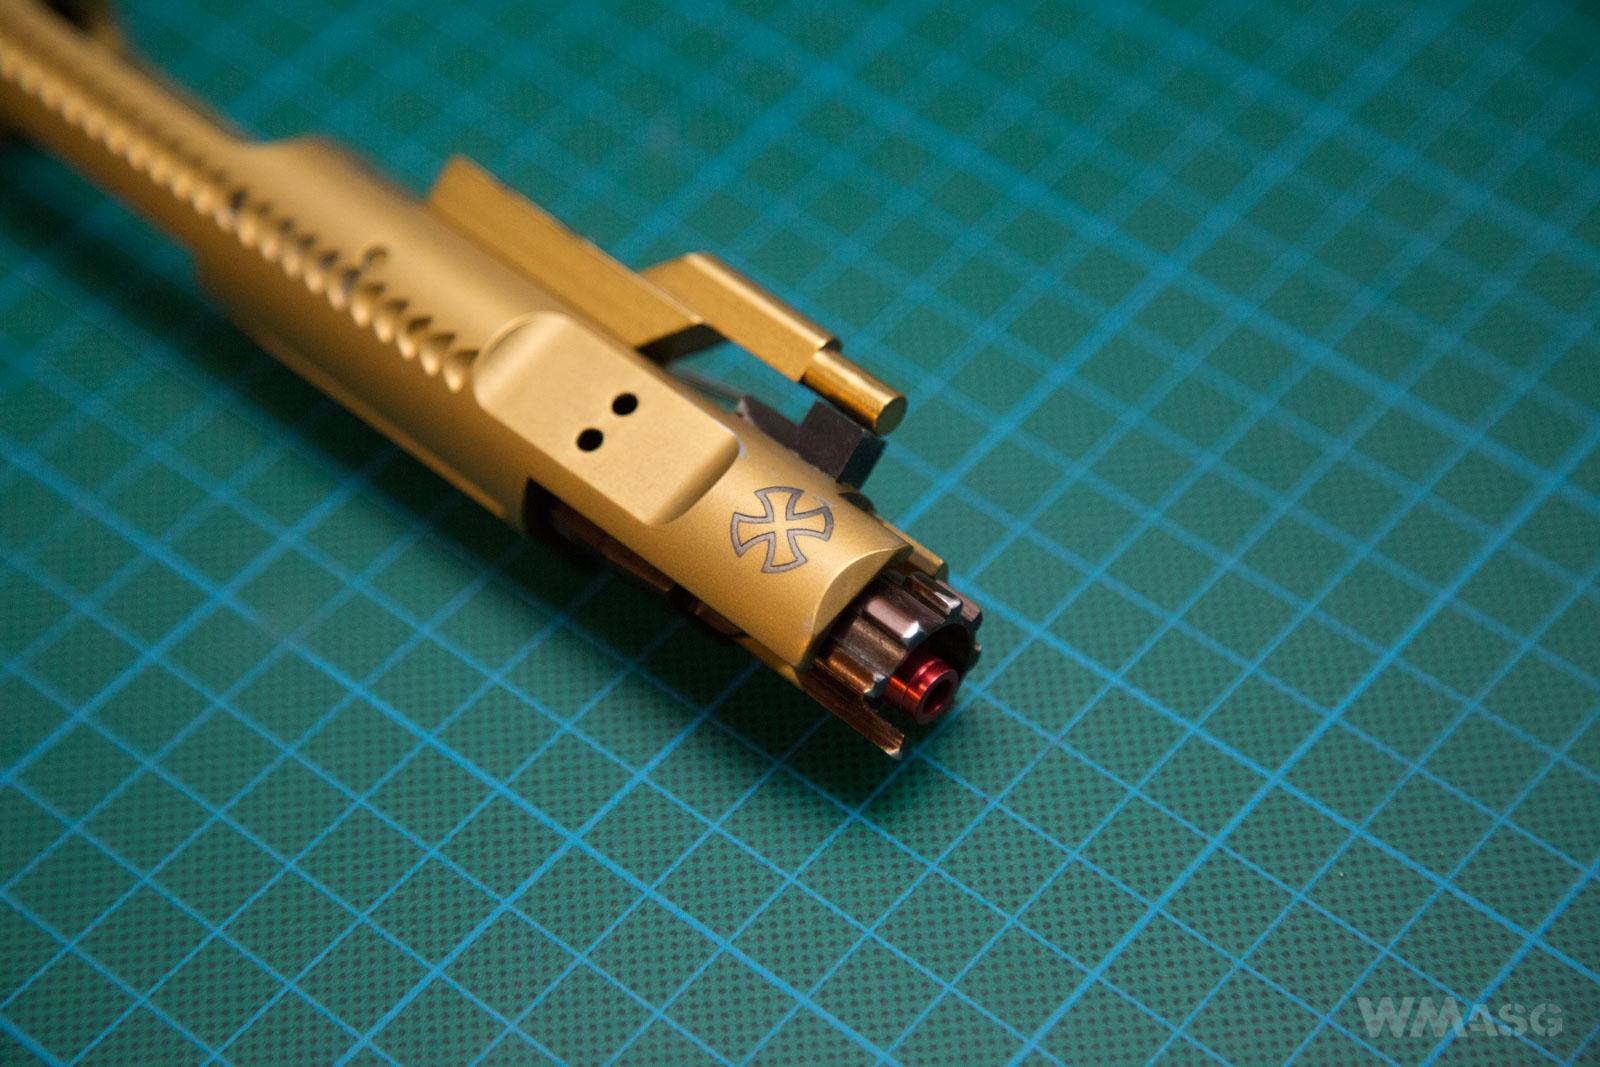
In the pictures above, the places where the bolt carrier works with neighboring parts are clearly visible as the color is worn out there. The red part is one of the interchangeable aluminum nozzles. This one has a hole with the largest diameter and generates the highest muzzle velocity. The interchangeable nozzles below are included with a dedicated key for replacing them. You can clearly see the difference in the diameters of the holes: red - 4 mm, blue - 3 mm, green - 2 mm.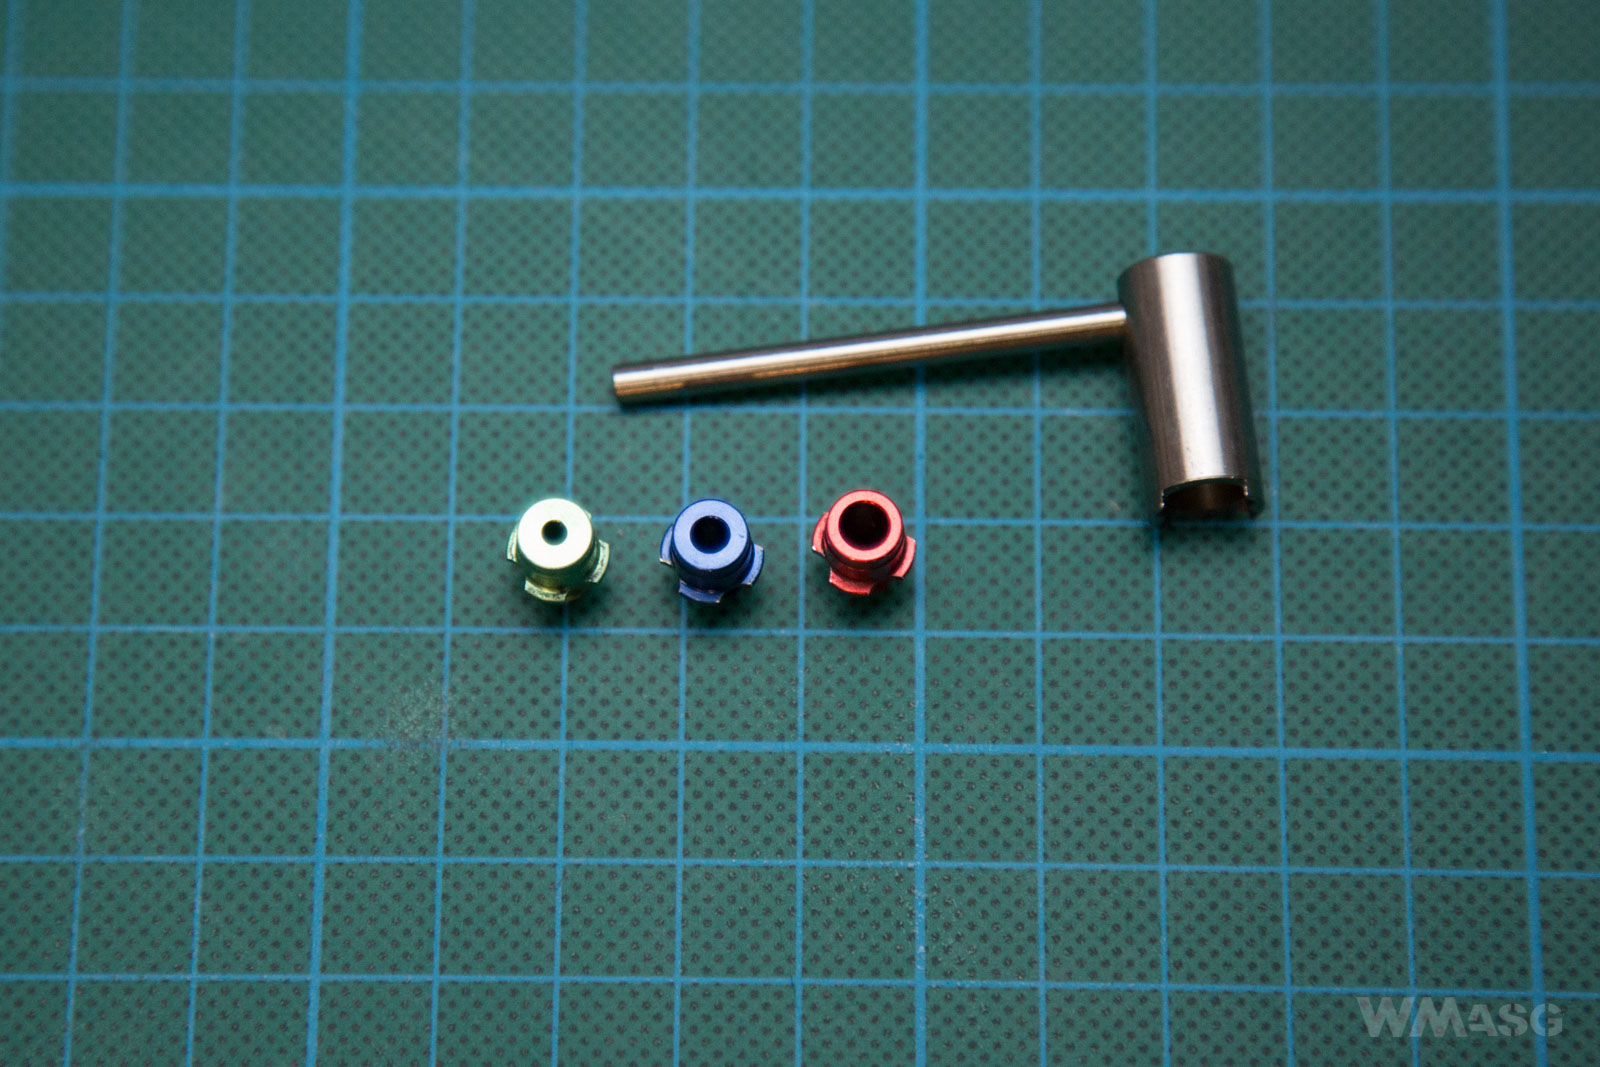 Disassemble bolt carrier
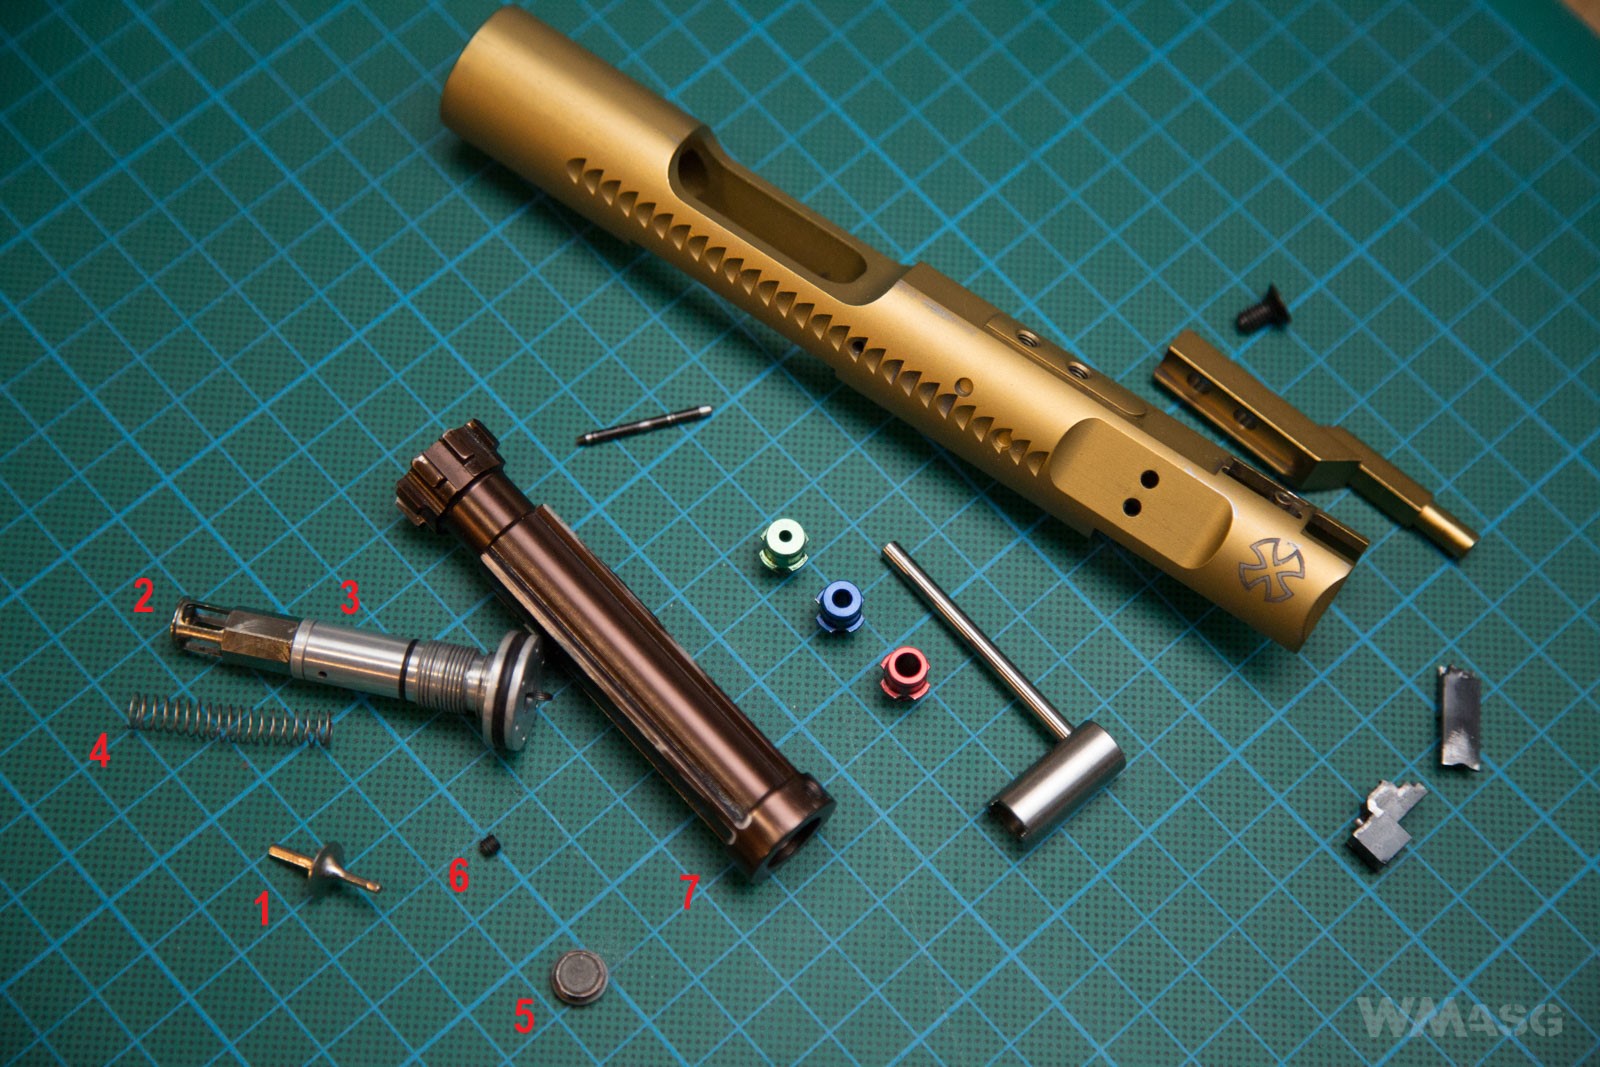
1. disk adjusting valve for fine tuning;
2. disc valve socket screwed into the piston (3);
3. piston;
4. valve return spring;
5. magnet that stabilizes the valve socket;
6. screw securing the piston after screwing it into the bolt (7);
7. bolt
The valve with the adjustment key in a close up. The thicker part of the key is used to replace the nozzles. Thinner for valve adjustment. When using the green or the blue nozzle it is necessary to temporarily disassemble them to adjust the valve due to the hole diameter being too small. When using the red nozzle, the key passes through the hole.
The thicker valve connector has a square cross section and enters the socket. Turning the valve key also rotates the seat by changing its position in the feed opening and thus changes the amount of gas directed into the nozzle.
The way of assembling the whole set. The thicker end of the valve in the socket, the thinner in the directed of the nozzle. The red arrows indicate the stabilizing magnet and the place where it is fixed. The yellow arrow shows the gas supply port.
Operation schematics
(drawings by RA-TECH)
The valve (and the socket) is completely tightened. A large portion of gas directed straight into the nozzle. The replica generates the highest muzzle velocity, but the blowback is the weakest. The location of the stabilizing magnet is marked in green.
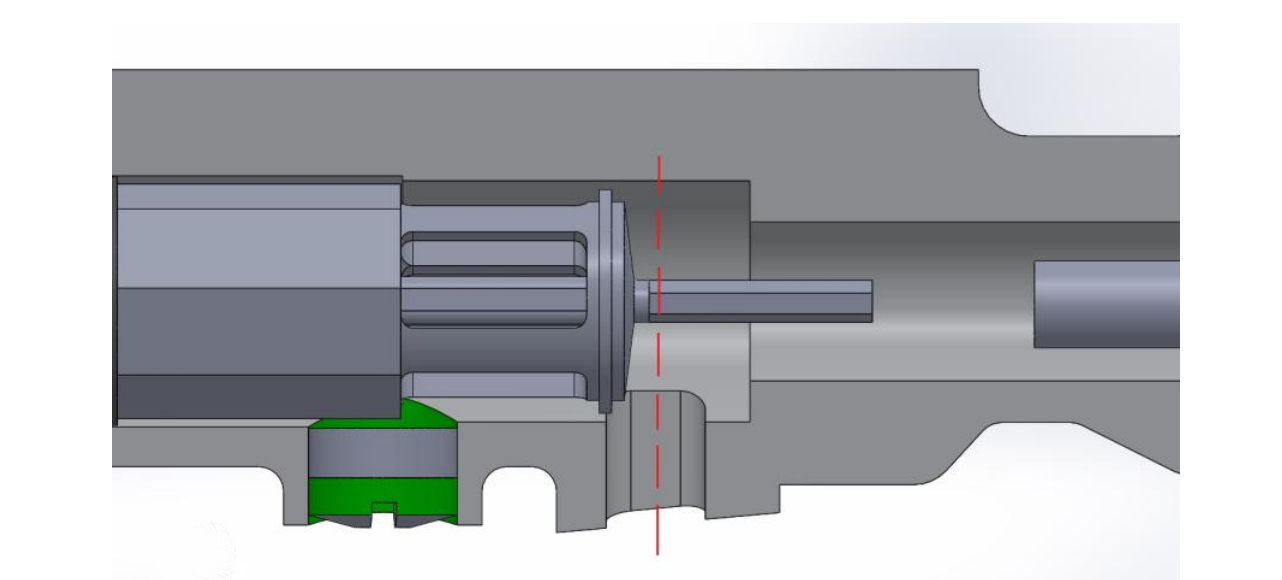
Midway position.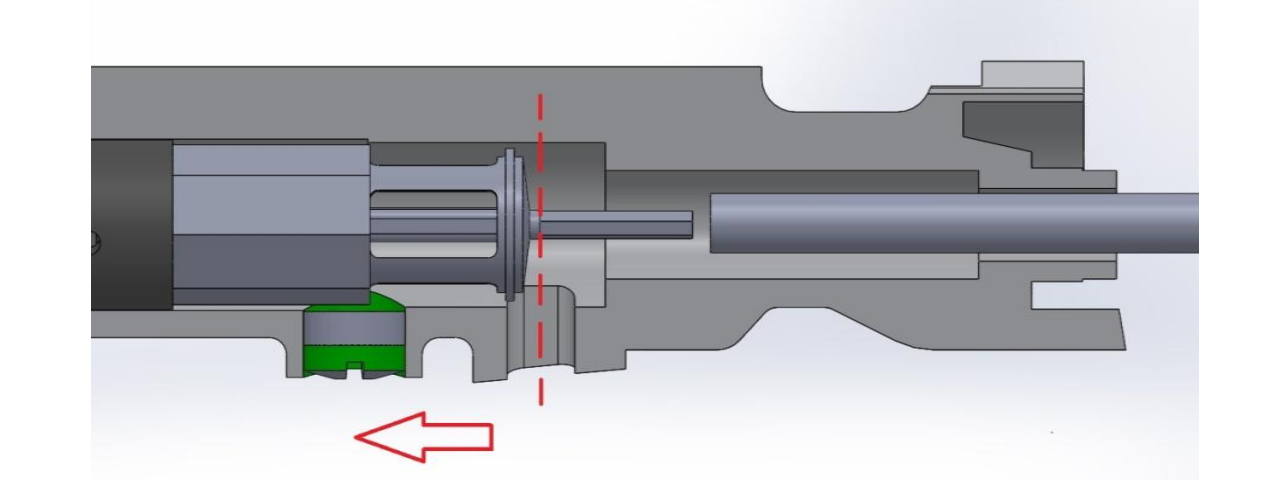
And the valve is fully opened. Stronger blowback, less gas directed into the nozzle. The manufacturer recommends not to unscrew the valve more than half the lenght of the gas supply port (red dotted line).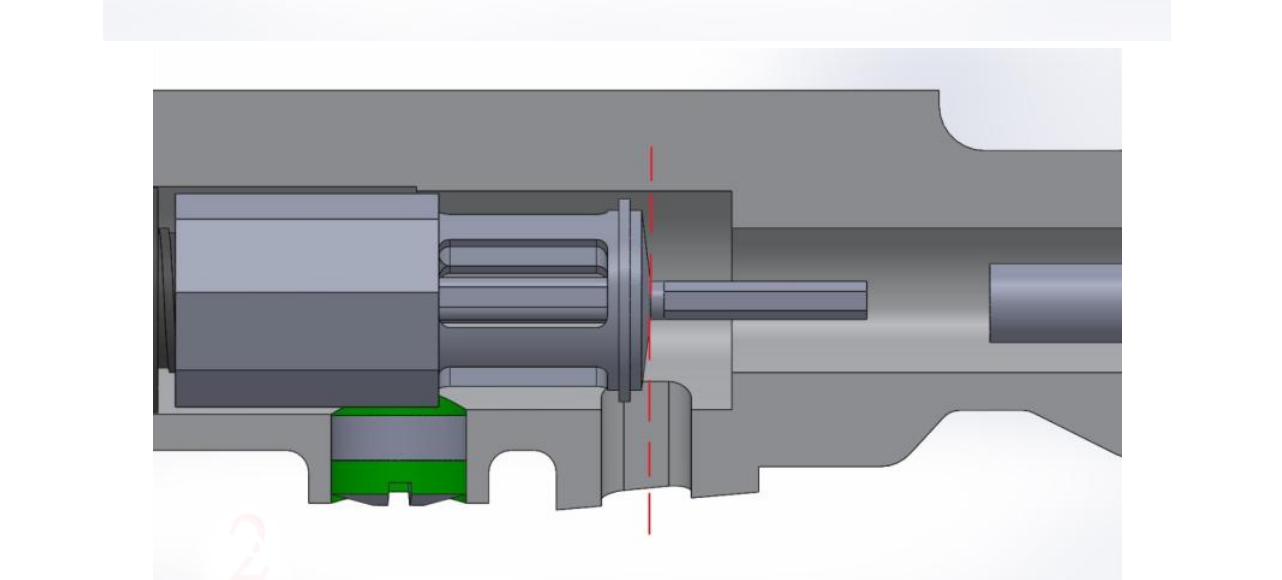
The role of the magnet is to keep the valve socket in a fixed position and, more precisely, to limit the vibrations caused by the system's operation as those vibrations would change the valve's capacity and cause the muzzle velocity to "flow". The socket has a prism cross-section, the magnet holds its subsequent sides, hence the valve adjustment is stepped, not liquid.
Catalog muzzle velocities for individual nozzles
0.2 g BBs, Green Gas, 370 mm barrel.
red - about 475 fps;
blue - about 410 fps;
green - about 312 fps.
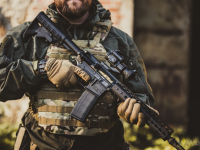
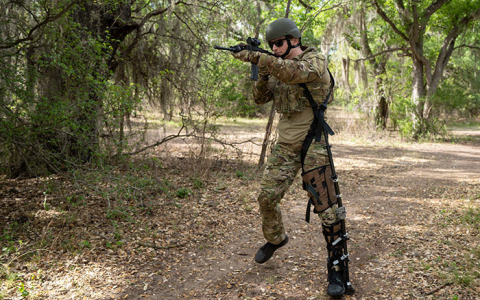
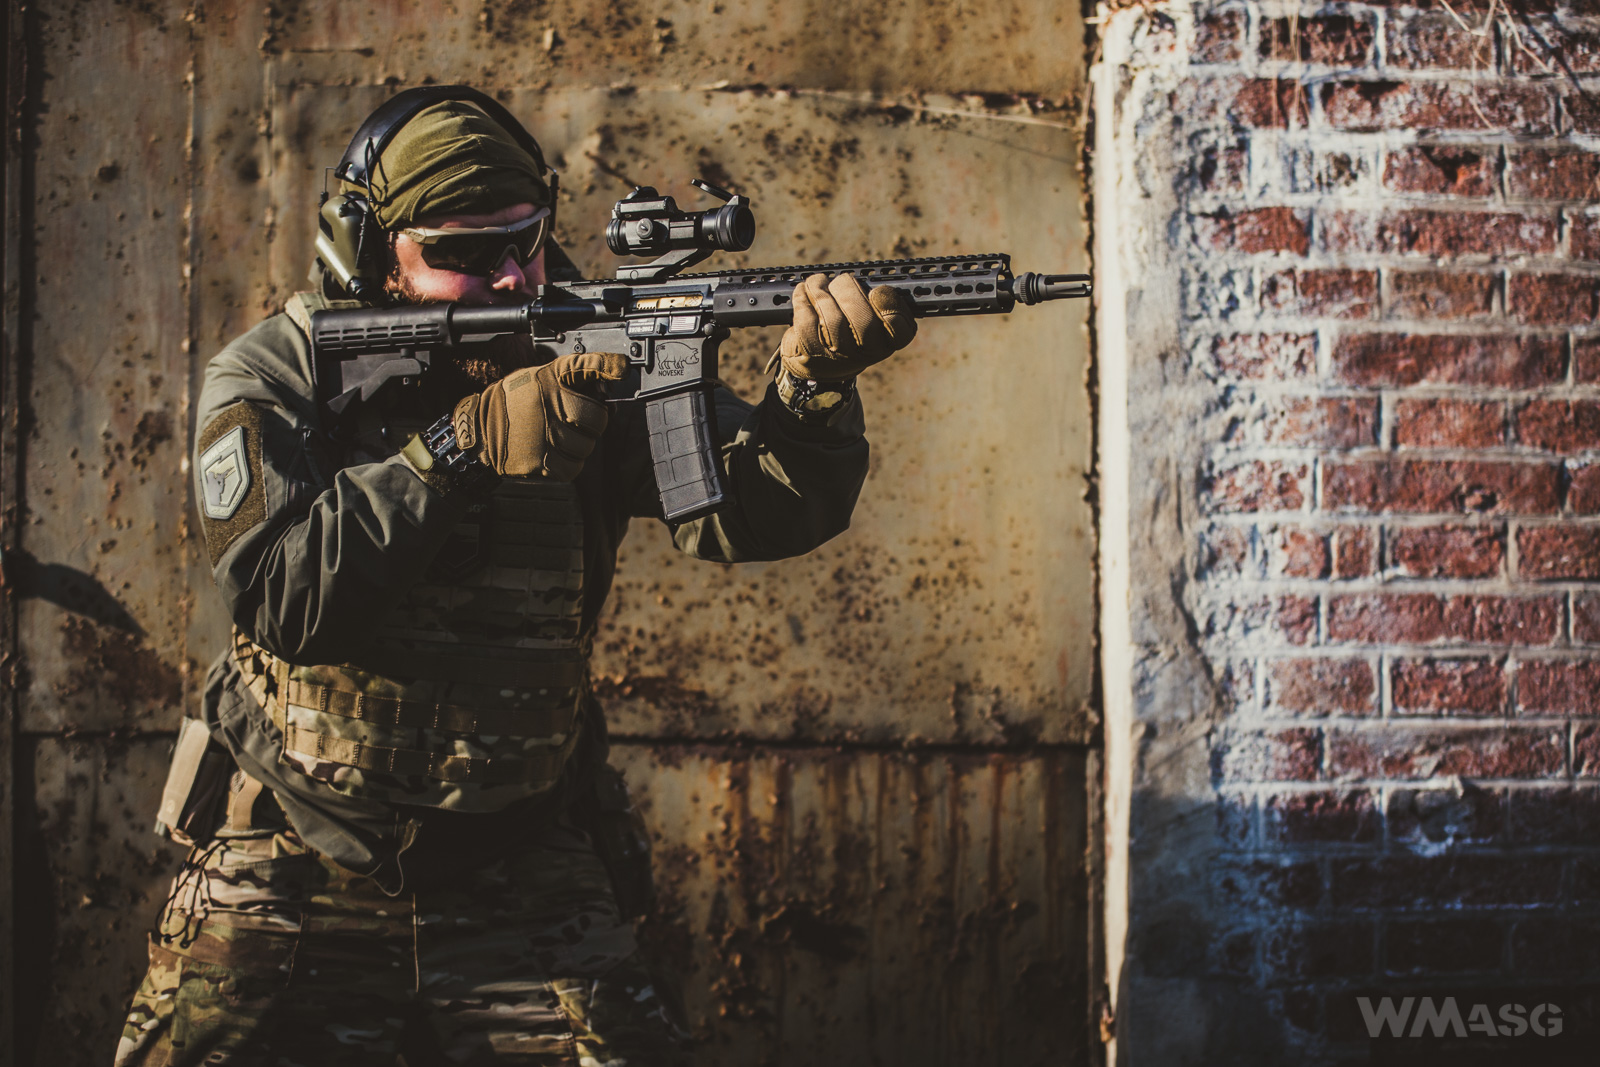
Shooting
Shooting with gas powered replicas certainly has a bigger fun factor than with electrical replicas. First of all, due to the way you use the replica, which, besides loading, does not differ from the use of a real firearm. Here even the safety selector switch works as it should. The replica can not be put into safe if the trigger mechanism spring is compressed (the replica is not loaded, no matter if the magazine is inserted or not).
The replacement of nozzles resulted in a change of the muzzle velocity in a manner similar to the catalog values given by the manufacturer (details will be given in a moment). Attempts to adjust the valve also have an impact on the muzzle velocity. Did I notice a change in recoil after adjustments? Well, no ... I mean, I believe that according to physics there should be a chance but I did not feel the difference.
Regardless of the nozzle used, from one filling of the magazine with gas, I managed to fire about 90 times, but as with all gas powered replicas, I had the impression that each subsequent shot was slightly weaker and the dynamics of the blowback system was also decreasing.
Measurement results
0,2 g Open Blaster BBs, ProTech gas, HopUp set to zero. Ambient temperature 22oC. The measurements were made with the XCORTECH X3500 chronograph.
The red nozzle
The first 10 shots after filling the magazine with gas, the valve was tightened all the way in:
1. 442,20
2. 439,90
3. 439,50
4. 441,00
5. 439,10
6. 436,70
7. 433,30
8. 436,00
9. 433,60
10. 429,80
average: 437,90 fps, spread: 12,40 fps
The first 10 shots after filling the magazine with gas, the valve was loosened:
1. 384,50
2. 400,20
3. 392,20
4. 391,60
5. 401,20
6. 399,90
7. 396,20
8. 403,80
9. 382,70
10. 395,60
average: 395,90 fps, spread: 21,10 fps
The first shots from the third magazine with a tightened valve at about 380 fps, the last at about 330 fps.
The blur nozzle
The first 10 shots after filling the magazine with gas, the valve was tightened all the way in:
1. 364,00
2. 363,20
3. 360,90
4. 363,50
5. 358,80
6. 361,00
7. 353,10
8. 357,20
9. 355,40
10. 350,30
average: 358,74 fps, spread: 13,70 fps
The first 10 shots after filling the magazine with gas, the valve was loosened:
1. 359,90
2. 363,50
3. 358,10
4. 361,60
5. 354,50
6. 360,00
7. 353,60
8. 360,10
9. 352,70
10. 355,70
average: 359,00 fps, spread: 10,80 fps
The first shots from the third magazine with a tightened valve at about 320 fps, the last at about 270 fps.
The green nozzle
The first 10 shots after filling the magazine with gas, the valve was tightened all the way in:
1. 277,9
2. 278,30
3. 272,90
4. 272,80
5. 271,50
6. 270,90
7. 268,10
8. 267,20
9. 264,90
10. 266,40
average: 271,20 fps, spread: 13,40 fps
The first 10 shots after filling the magazine with gas, the valve was loosened:
1. 241,30
2. 240,60
3. 240,60
4. 239,80
5. 239,70
6. 239,20
7. 239,20
8. 238,50
9. 237,80
10. 233,20
average: 239,45 fps, spread: 8,10 fps
The first shots from the third magazine with a tightened valve at about 200 fps, the last at about 170 fps.
The values differ from the reference values given by the manufacturer, but I remind you that the factory measurements were made on a barrel with a length of 370 mm.
Target shooting test
The test was carried out on our own enclosed shooting range, at an ambient temperature of 16oC, the Hop-Up was set to zero. The measurements were made at a distance of 25 m, using the XCORTECH X3500 chronograph and Open Blaster 0.2 g BBs. The replica was secured in the K-Zone shooting rest.
Single fire mode.
Full auto firing mode.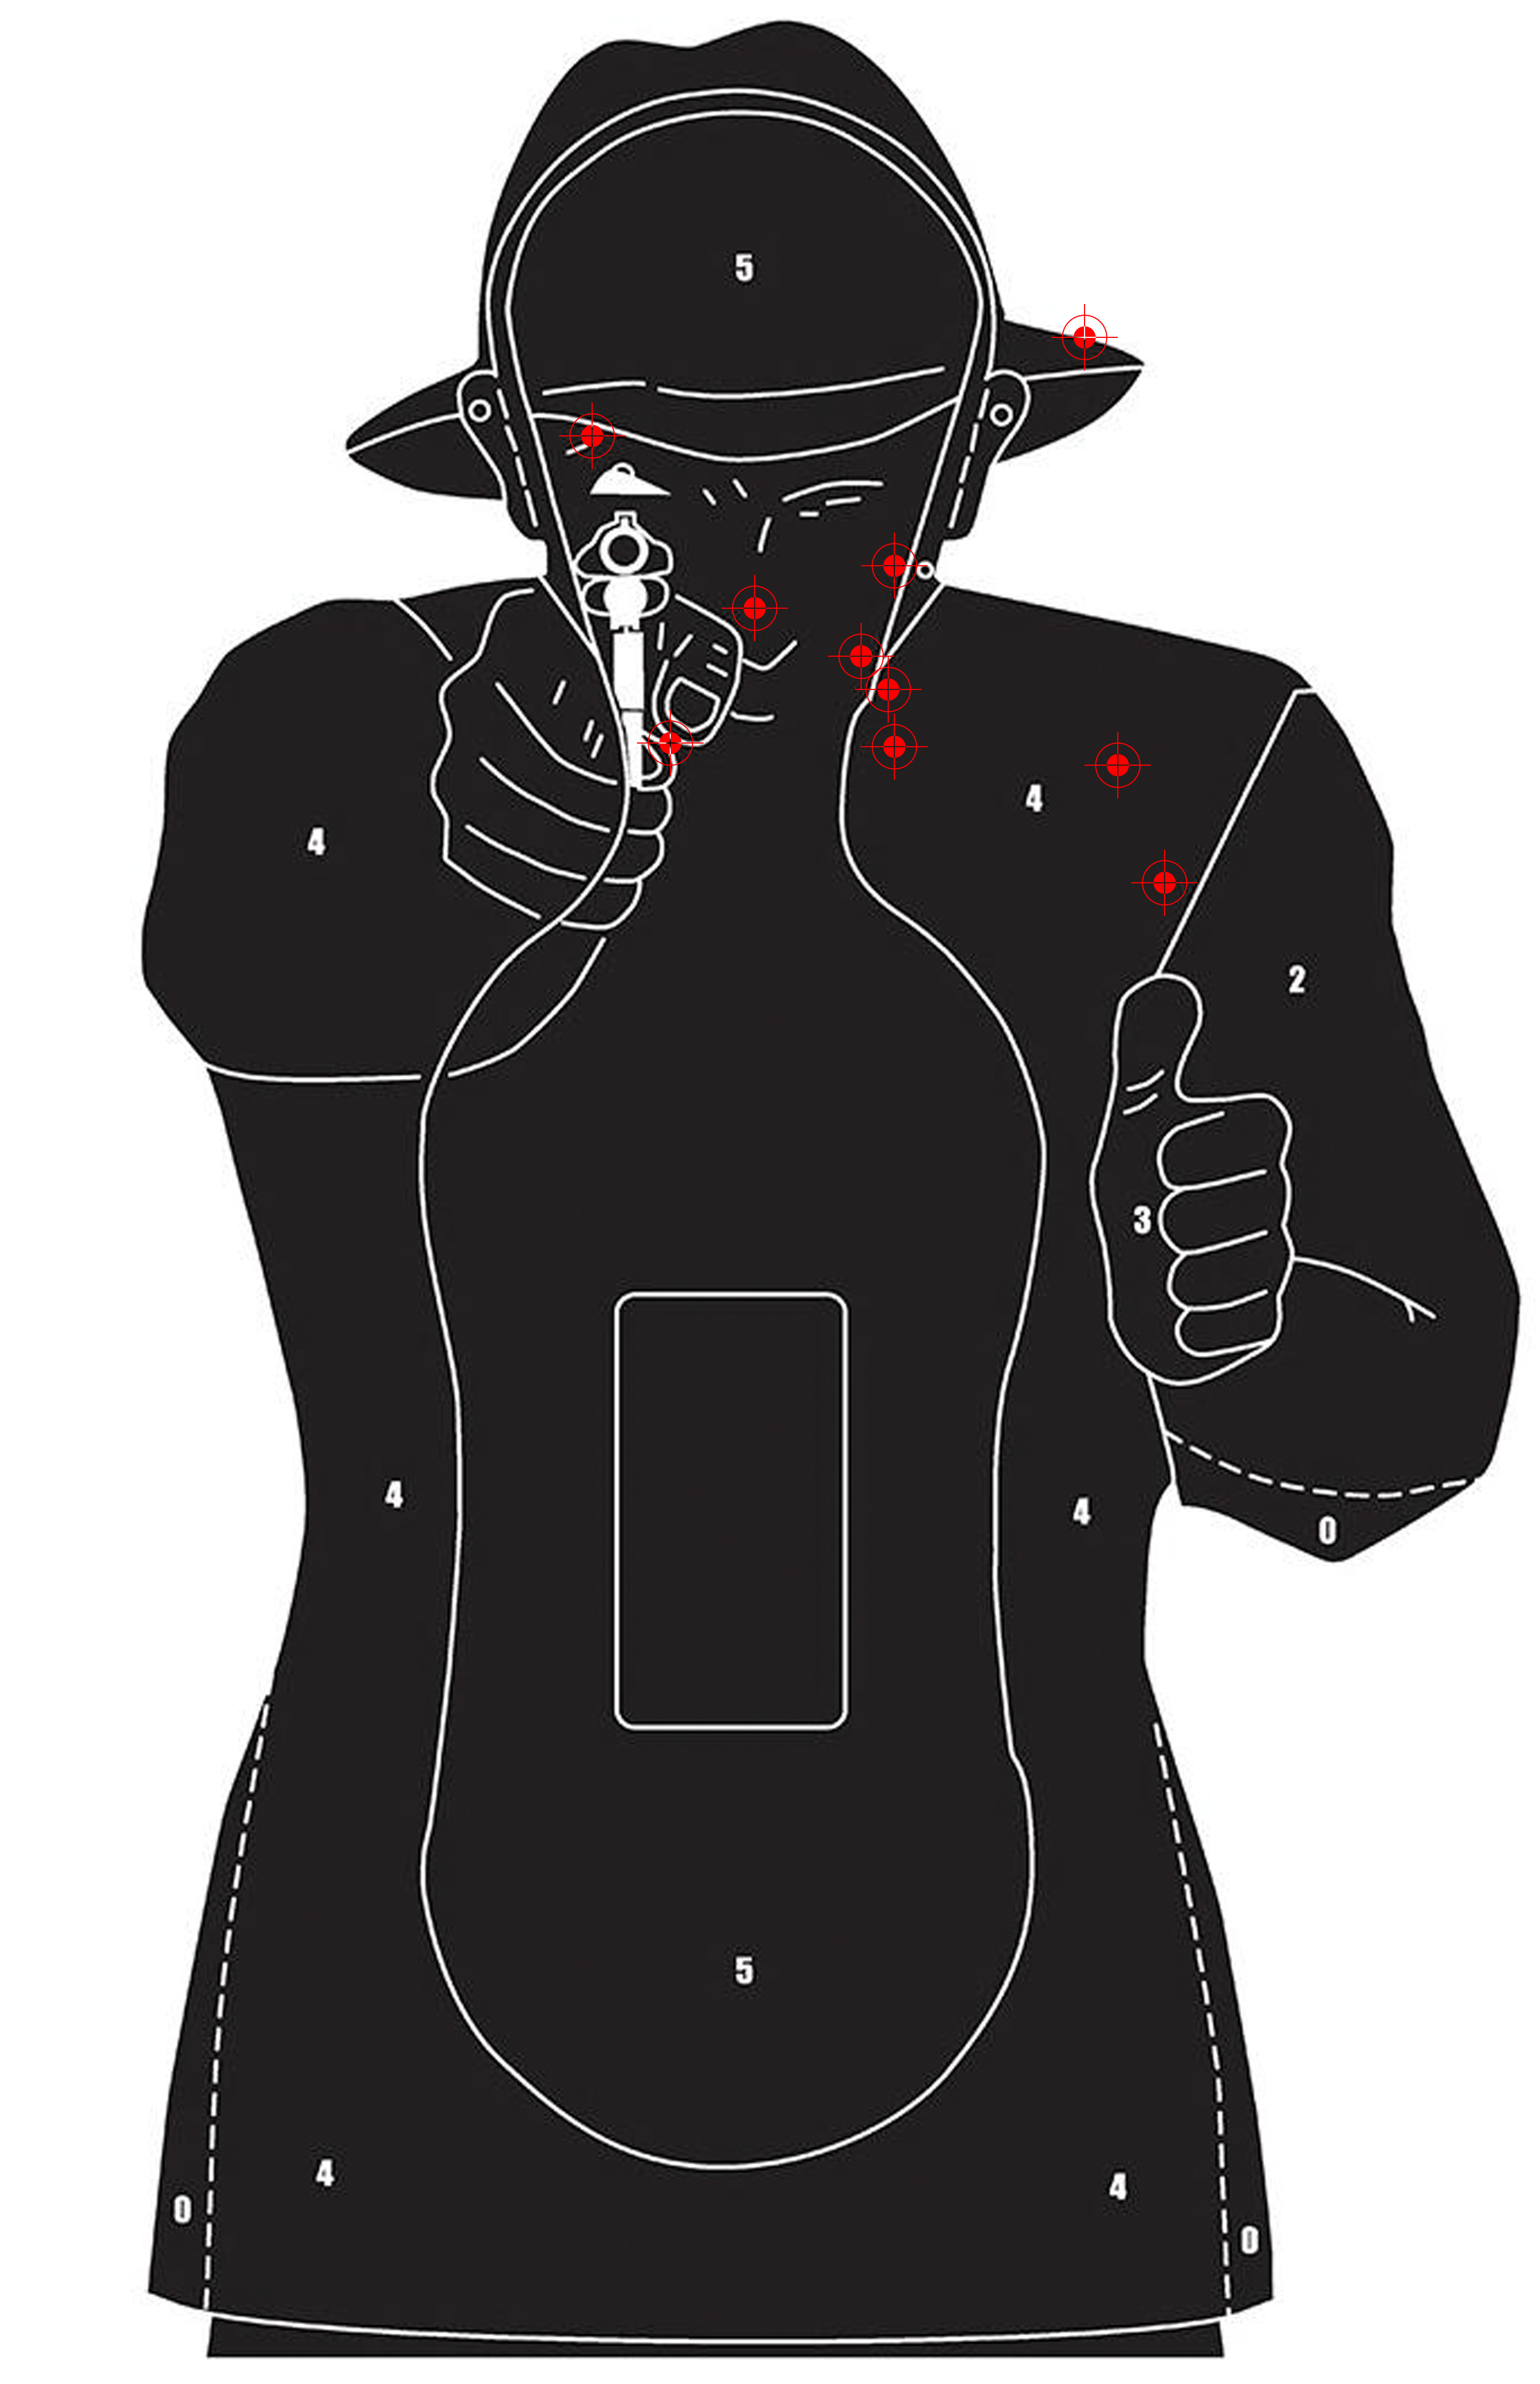
Summary
Externally, the replica is made generally well. The details are perfectly reproduced. I like the licensed markings and operation of the gas powered replica that is similar to a real firearm. None of the electrical replicas give this sense of realism. However, there are a few things that can not be praised. First of all, the quality of the surface of the upper receiver. Perforations shown in the photos are, in my opinion, unacceptable. Secondly, this time on the inside, the fitting and operation of the NPAS system. The fitting issues are also illustrated by the photos. Fragments of too tightly fitted parts were being scratched and lost their color. And we only fired a few hundred shots from the replica. In addition, and this was not shown in our photos, after removing the replica from the box it operated with problems, that is, the bolt carrier often locked up and did not stay in the rear position. A slight correction was necessary. Another issue is the problematic operation of the magnetic valve lock. Well, the magnet seems to be too strong. It holds the valve socket so tightly that it is impossible to tighten or loosen it. The problem is so severe that working surfaces of the valve connector and the adjustment key become damaged. The immediate solution we used during the tests was to completely remove the magnet during the valve adjustment procedure. And this is probably not how it should be as in RA-TECH's videos everything works as it should. But in general, the magnetically locked NPAS with a set of interchangeable nozzles is a great idea in my opinion.
Review was possible thanks to Ra-Tech