
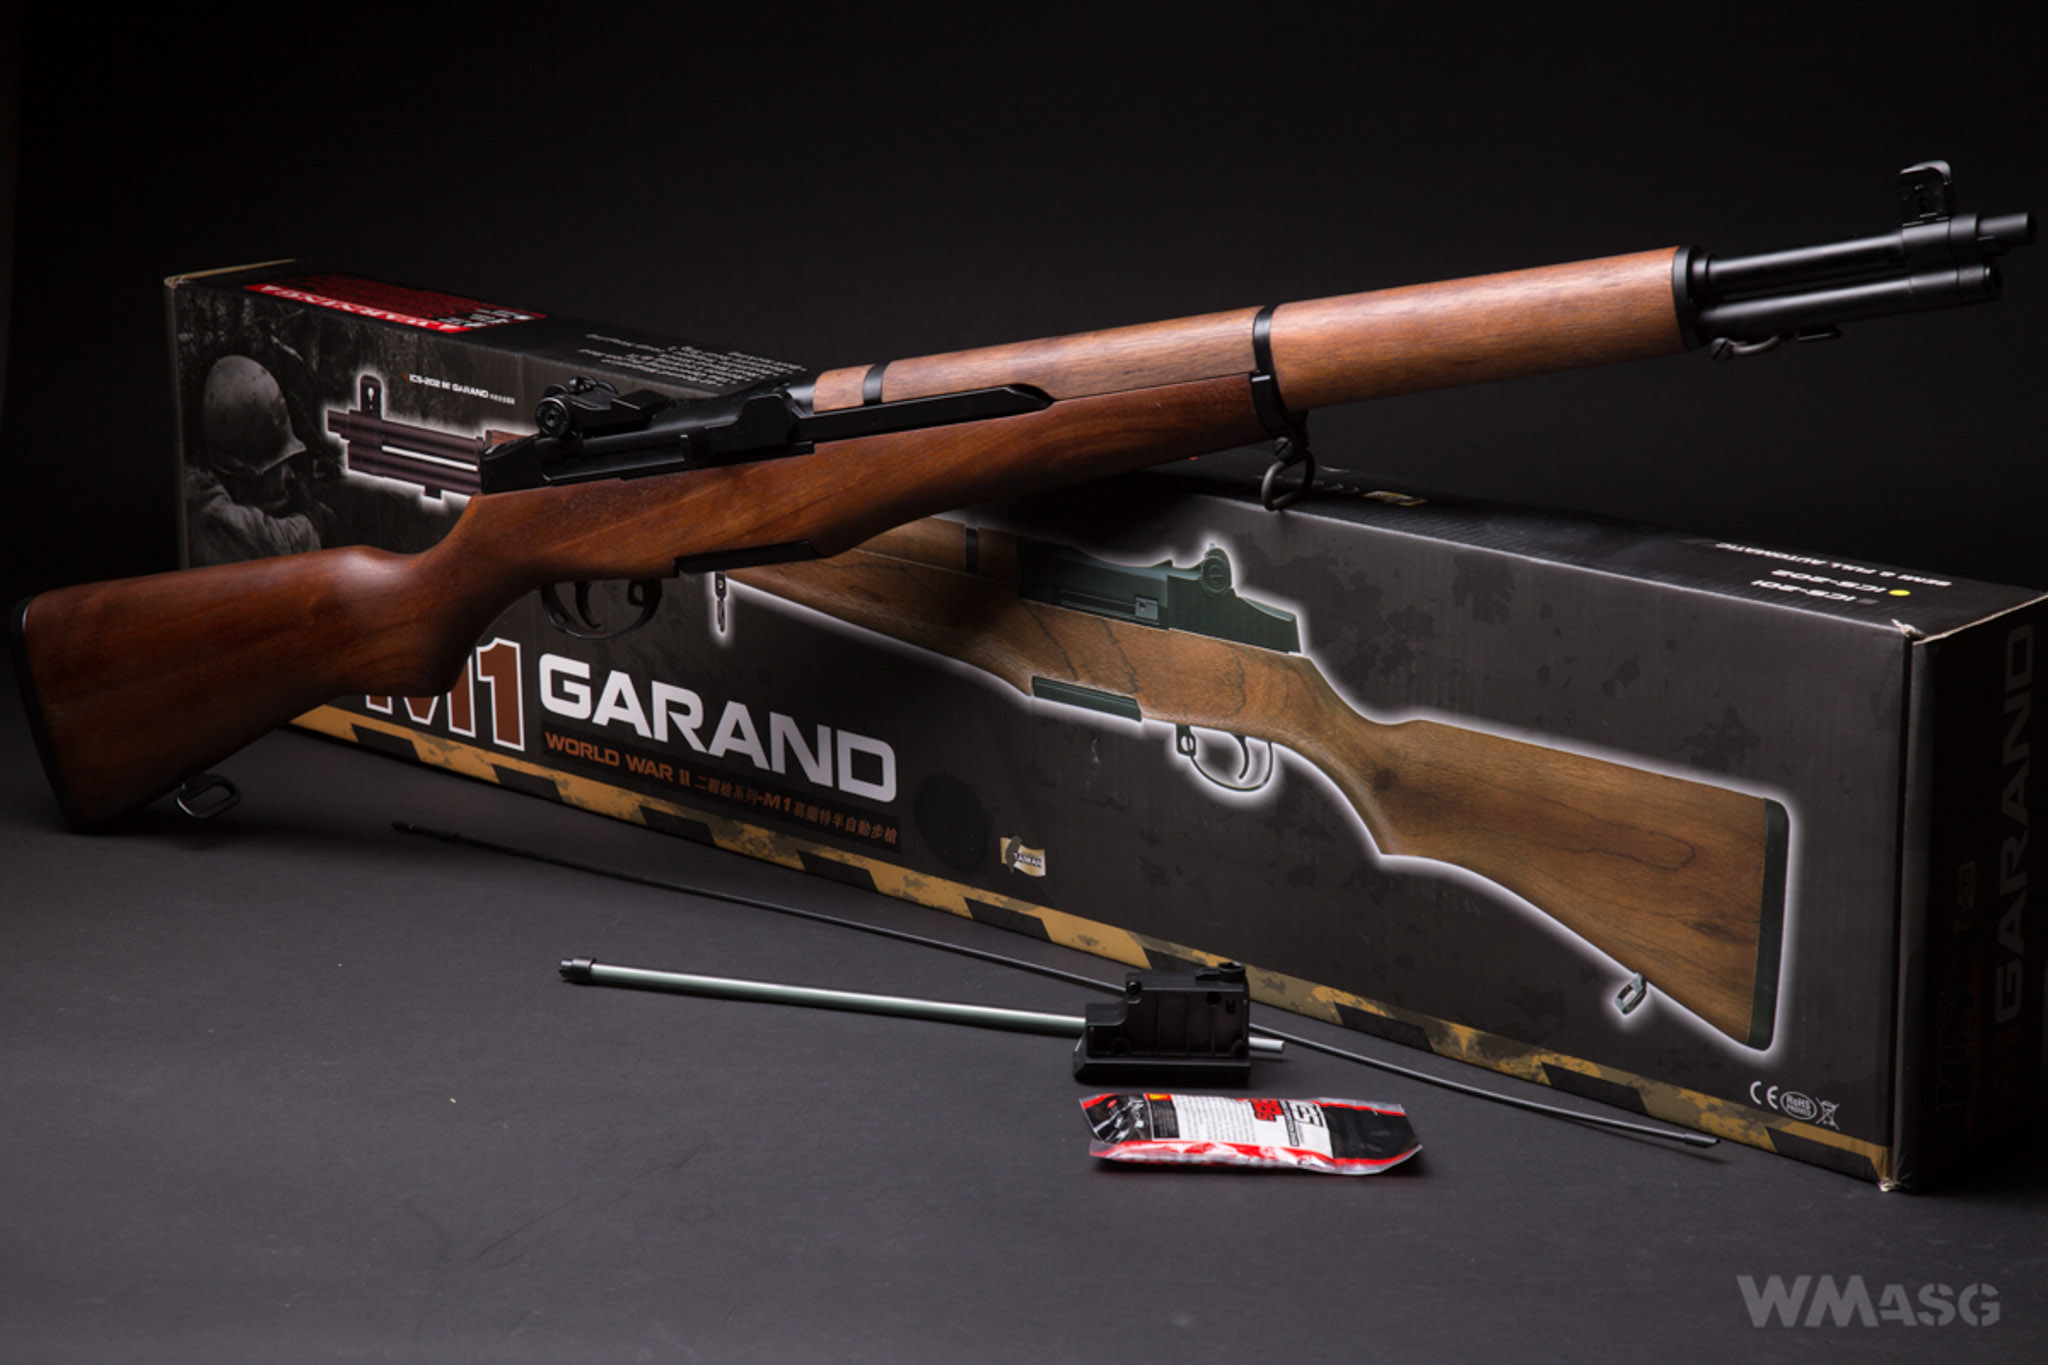
Another replica from the WWII series, after the M3 submachine gun, made by ICS. It is available in two variants: the ICS-201L using 8 mm BBs and ICS-202, which uses 6 mm BBs. We received the second version for testing.
The set includes:
- 2 low-cap magazines holding 42 BBs,
- a manual in English and Chinese,
- a separate manual describing how to unlock the trigger in English,
- a small pack of BBs which weight is not described using Latin alphabet and Arabic numerals,
- 2 spare (different) electric fuses,
- a folded advertising leaflet,
- a plastic cleaning rod,
- a device for loading magazines.
Technical data:
- weight without a magazine: 3.6 kg,
- length: 1100 mm,
- barrel length: 610 mm,
- diameter of the inner barrel: no data given,
- declared muzzle velocity: 443 fps.
The magazine loading device...
In 2002, I bought my first replica. An M4A1 by Tokyo Marui. The set contained a low-cap magazine holding 68 BBs and a tube-shaped device for loading the it. The plastic tube ended on one side with a tip matching the opening in the magazine. On the opposite side was a hand, a tiny funnel which, in theory, facilitates filling the tube with BBs. Finally, a piece of a plastic rod used to push the BBs. The end inserted into the magazine was shaped in such a way that it held the weight of the whole BB stack in the tube - they did not pass through. And this was in 2002!
This Garand comes with the same kind of device. But it does not work as intended – the BBs go right through it. To fill the tube, it must be either plugged with a finger or inserted into the magazine, which makes filling it difficult. I know that is the Garand, WWII and generally oldschool. But a loading tube?
The rifle is packed in a solid cardboard box. Unlike the black boxes of ICS CXP replicas, the Garand box shows what we will find inside from a distance shows. Parts of the set are arranged inside in sockets made in a plastic molding.
Even before taking the replica out of the box I smile. A solid piece of work! Impressions from first attempts to aim the replica are also good. It big, heavy and very nice.
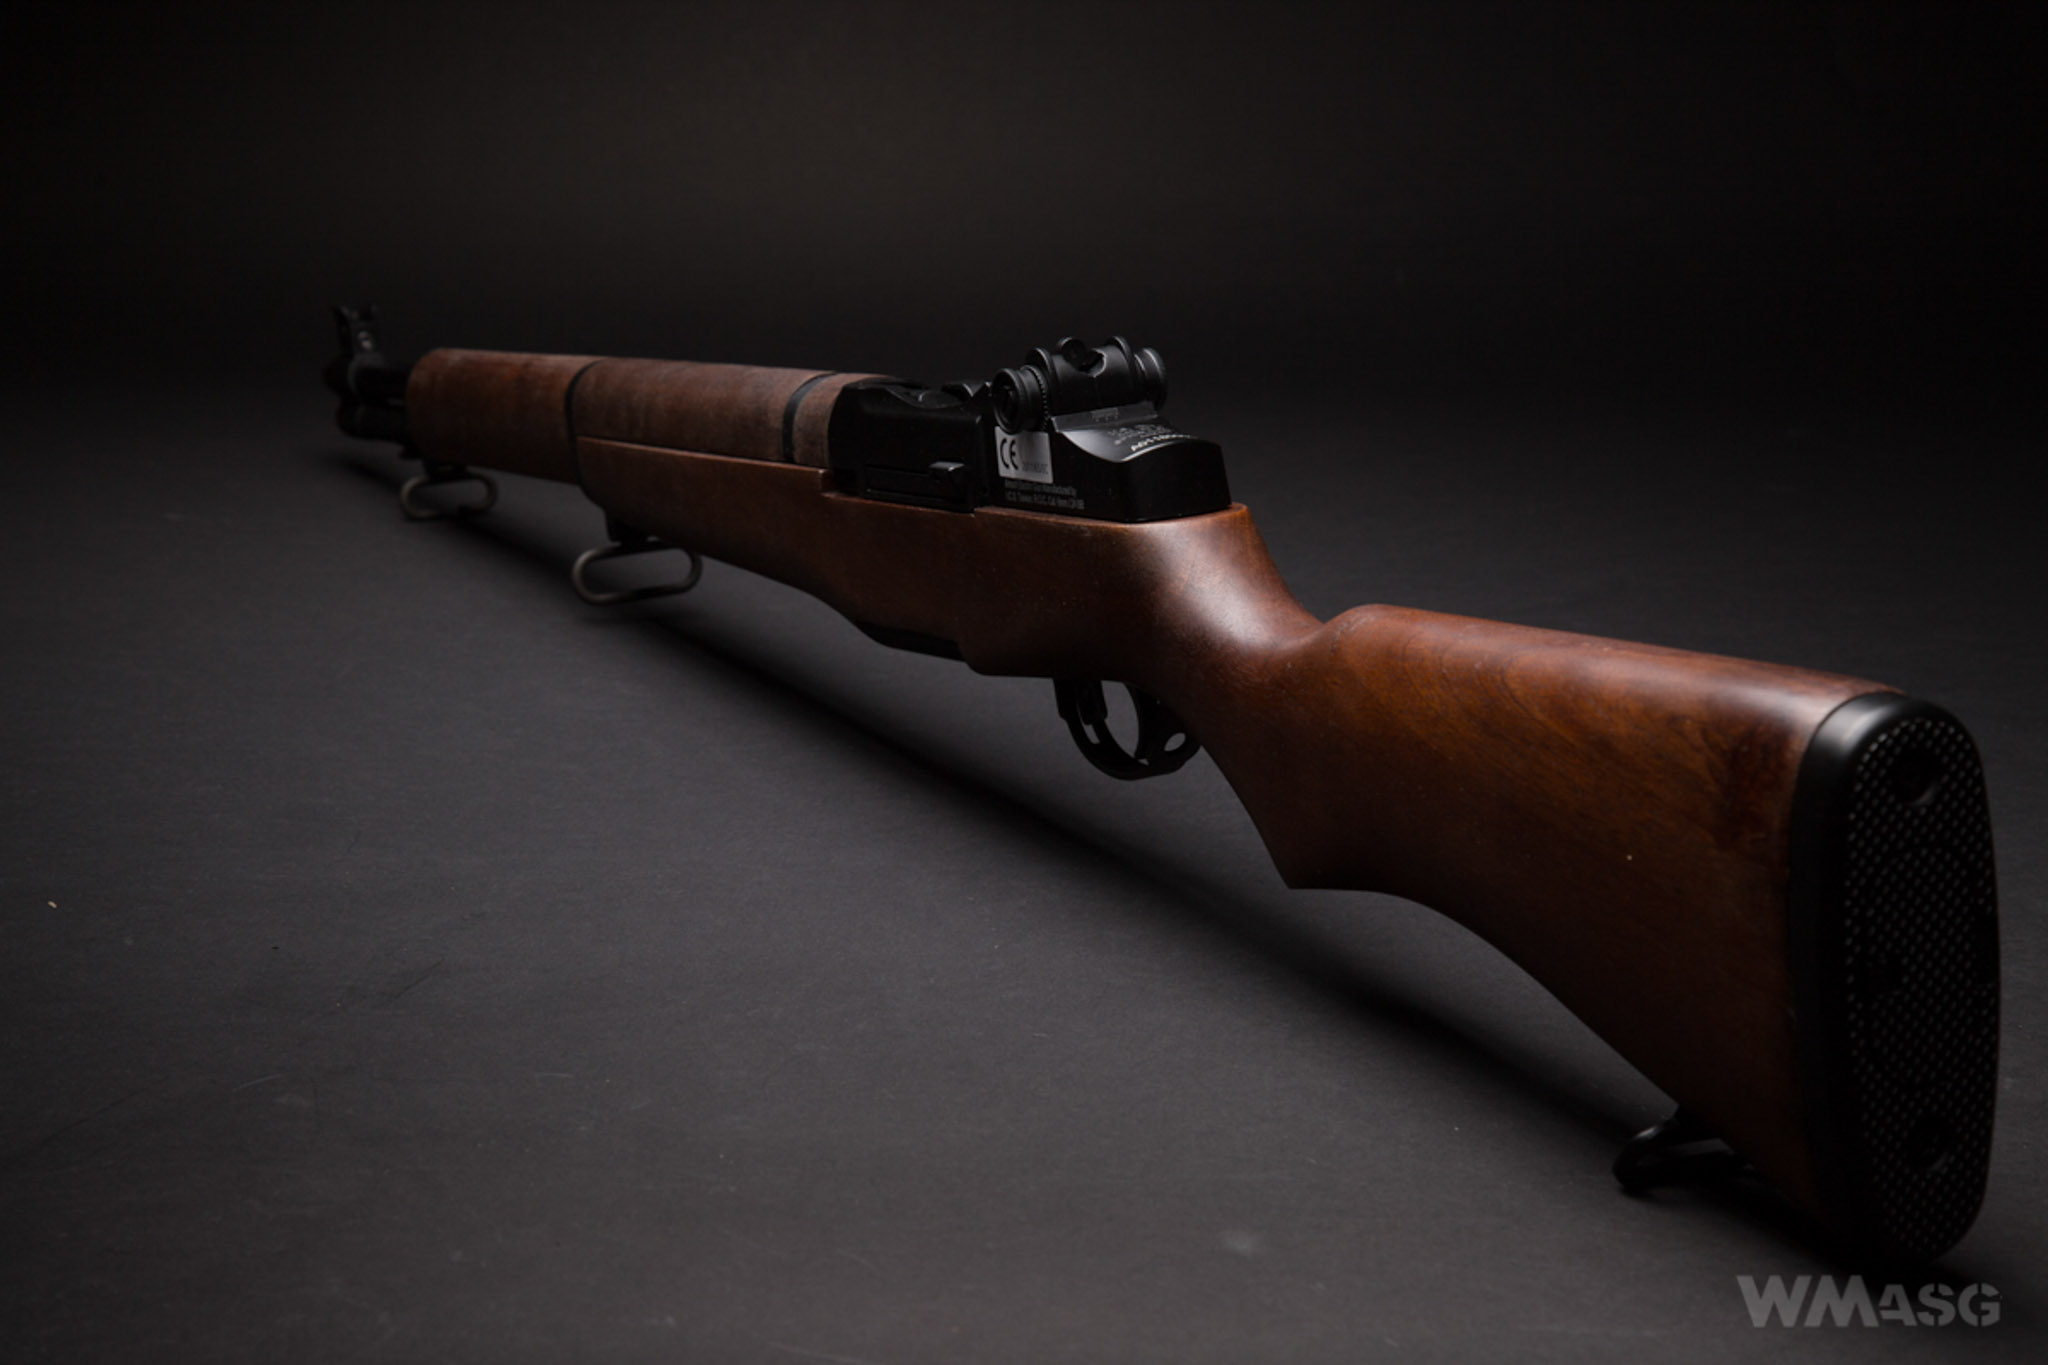
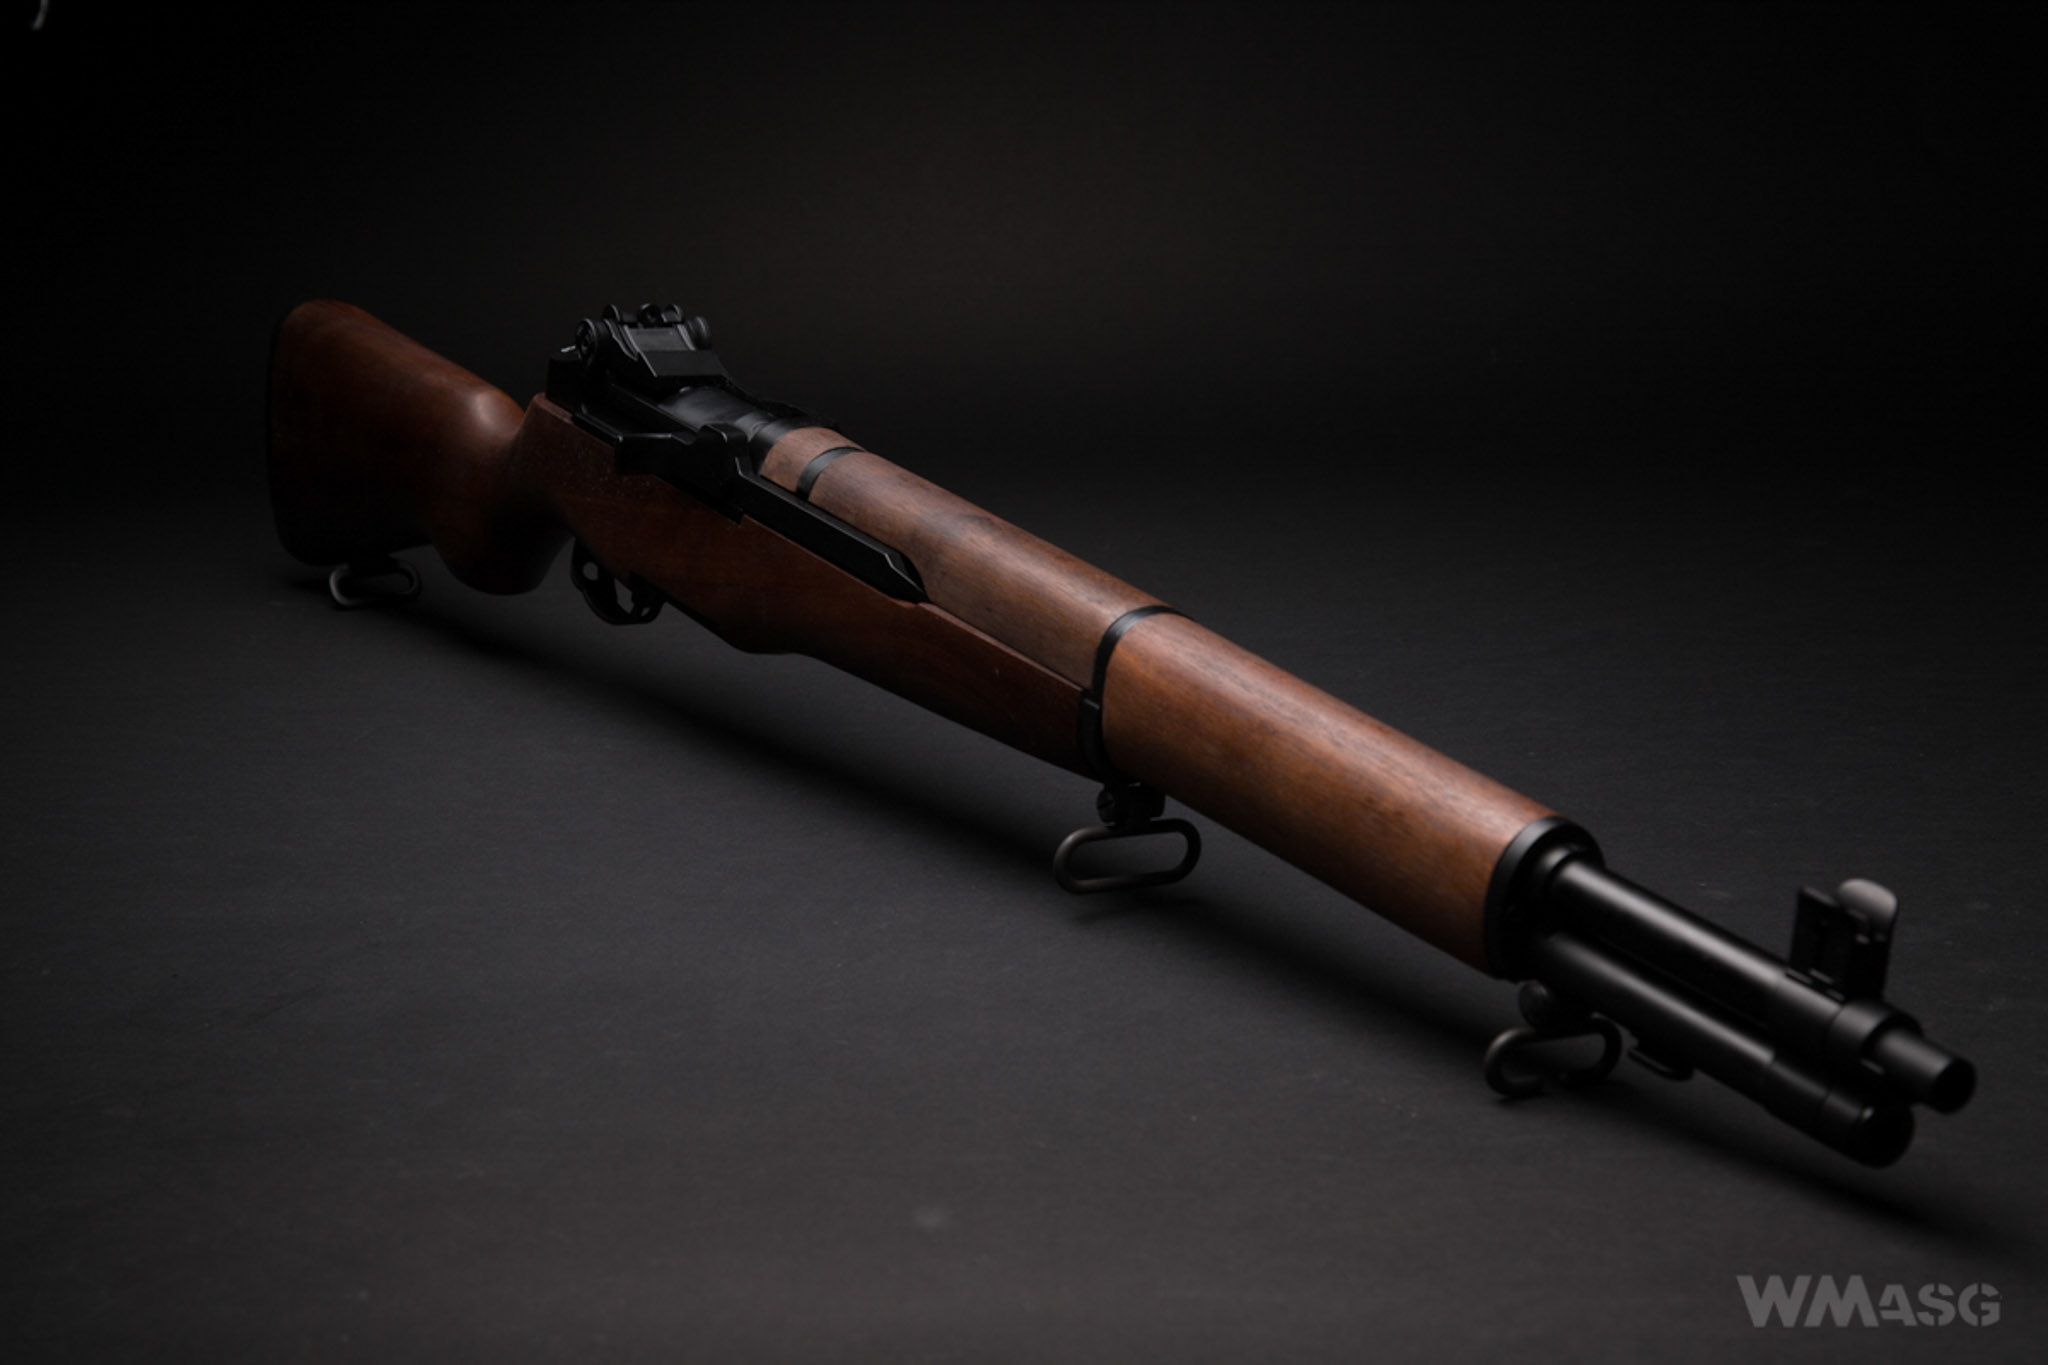
Wooden parts
ICS is proud of the fact that the wooden parts of each replica are made of single piece of wood using CNC machines. Though I can not verify it, I have my doubts about this statement because of the difference in the wood shade between the back of the barrel cover and other parts. I would expect that parts made from a single piece of wood will have the same color tone. But ... I have only this rifle at my disposal and cannot compare it with other units. In addition, I do not know if under the conditions of wartime production someone made sue that the wooden parts of each rifle were made of a single piece of wood. More important to me is the fact that the wooden parts fit perfectly and that they are not varnished but oiled. This is good news for people who want to add a little character to the replica. The wood itself is not overly or grossly soft. Yes, it can be scratched but it requires some force.
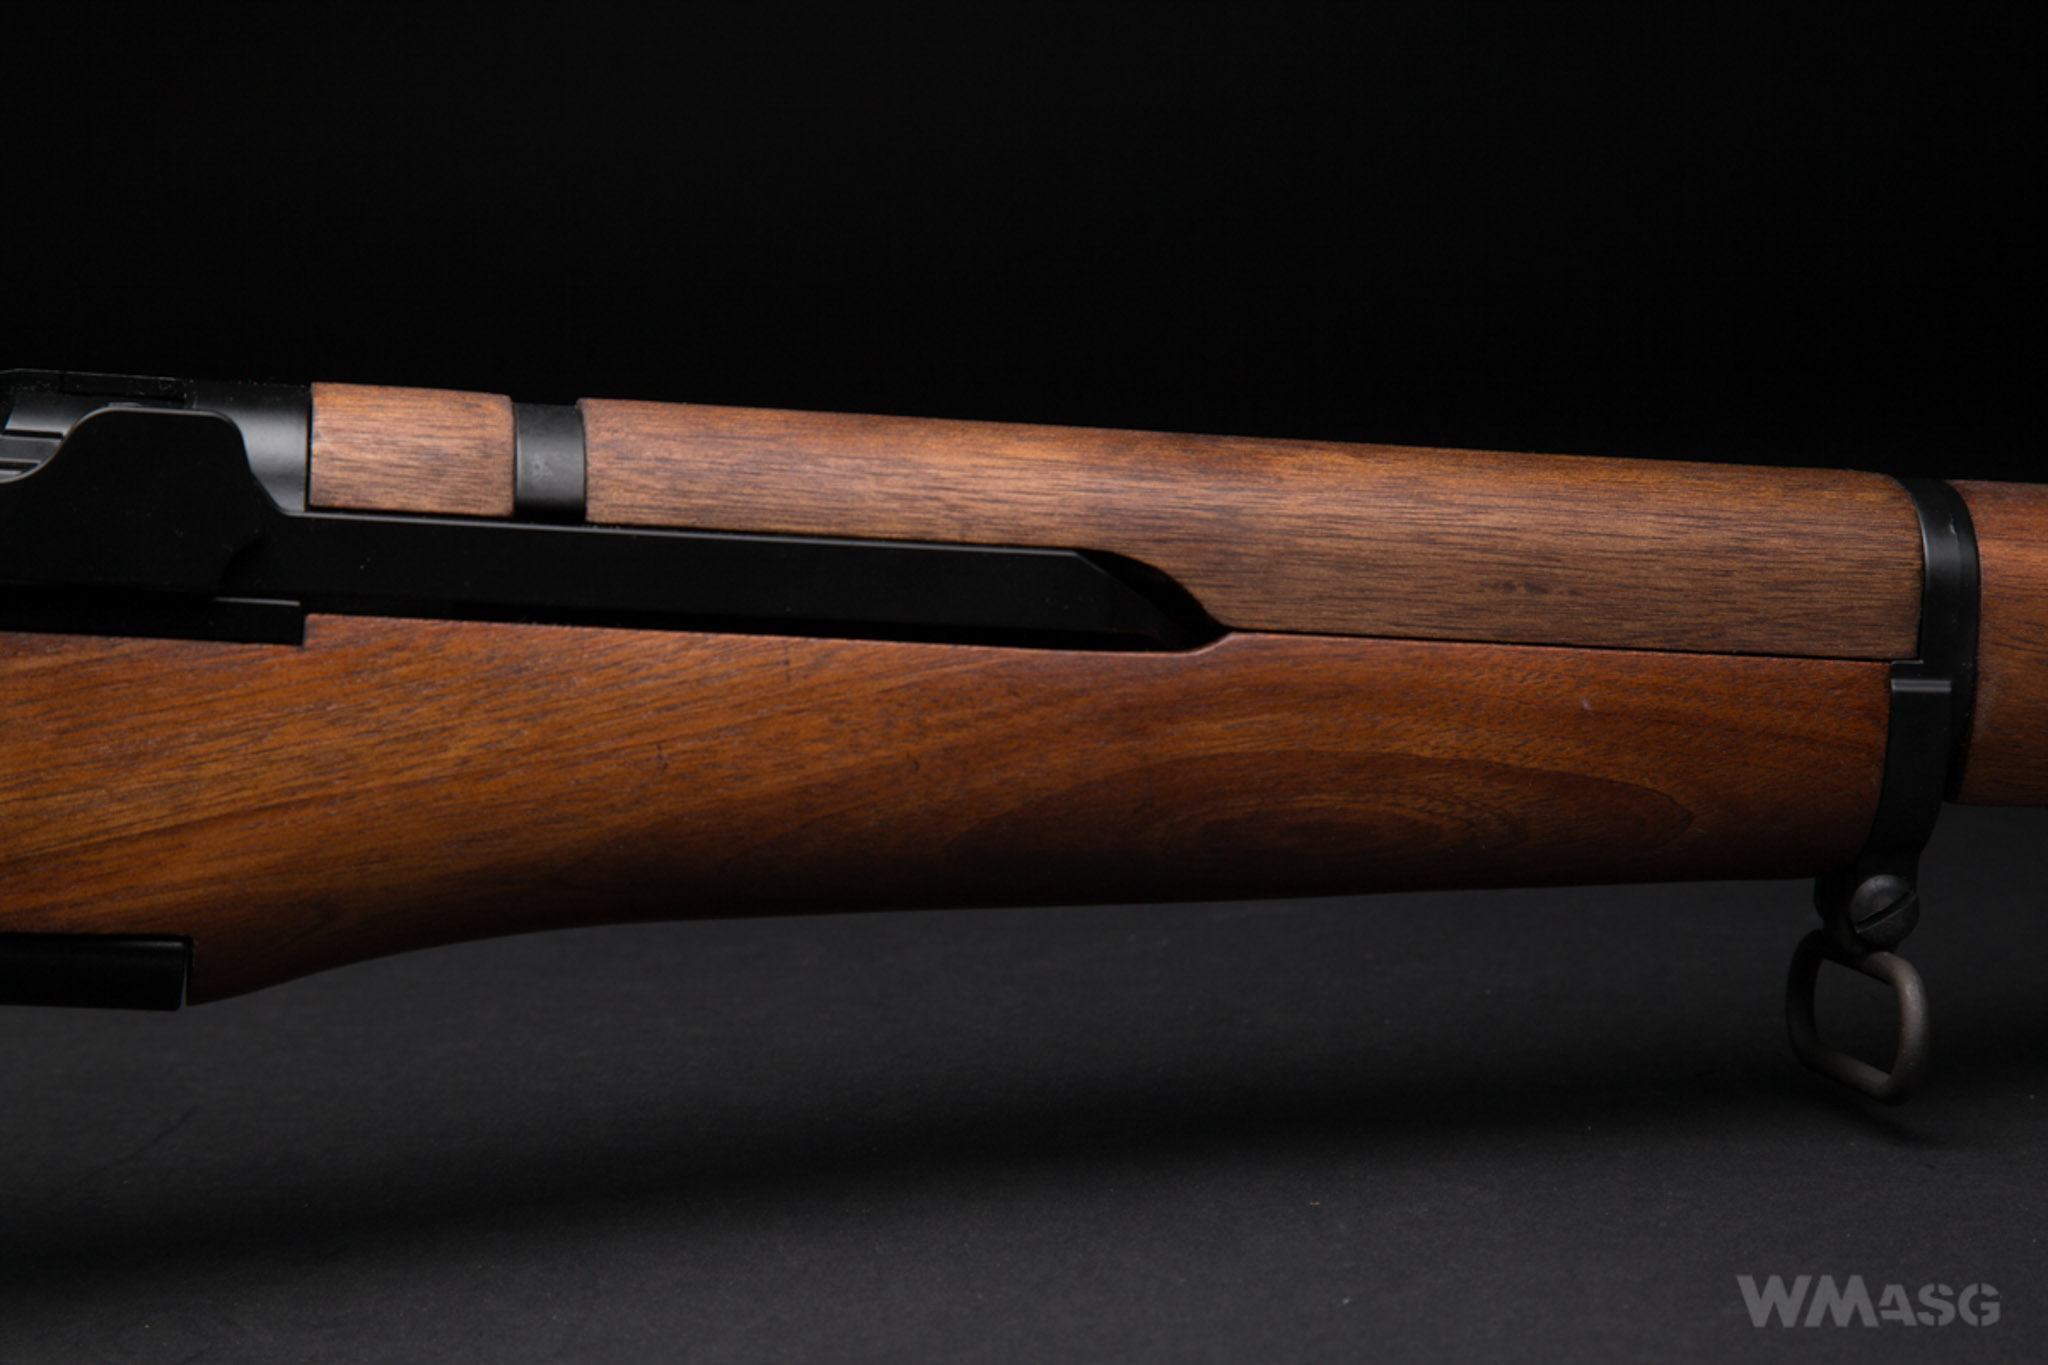
I could not to compare the ICS replica with a real firearm, so I cannot say how faithful it is, ot not. A man from the 2nd Ranger reenactment group, which uses a Garand replica made by a Spanish manufacturer, Denix, on a daily basis, said that the ICS replica has a slightly wider grip of the stock. Any possible scaling of this part is very likely - this is where the motor is located. The width of this part in the ICS rifle measured from the top is 42 mm, and measured from the side over 48 mm.
Metal parts
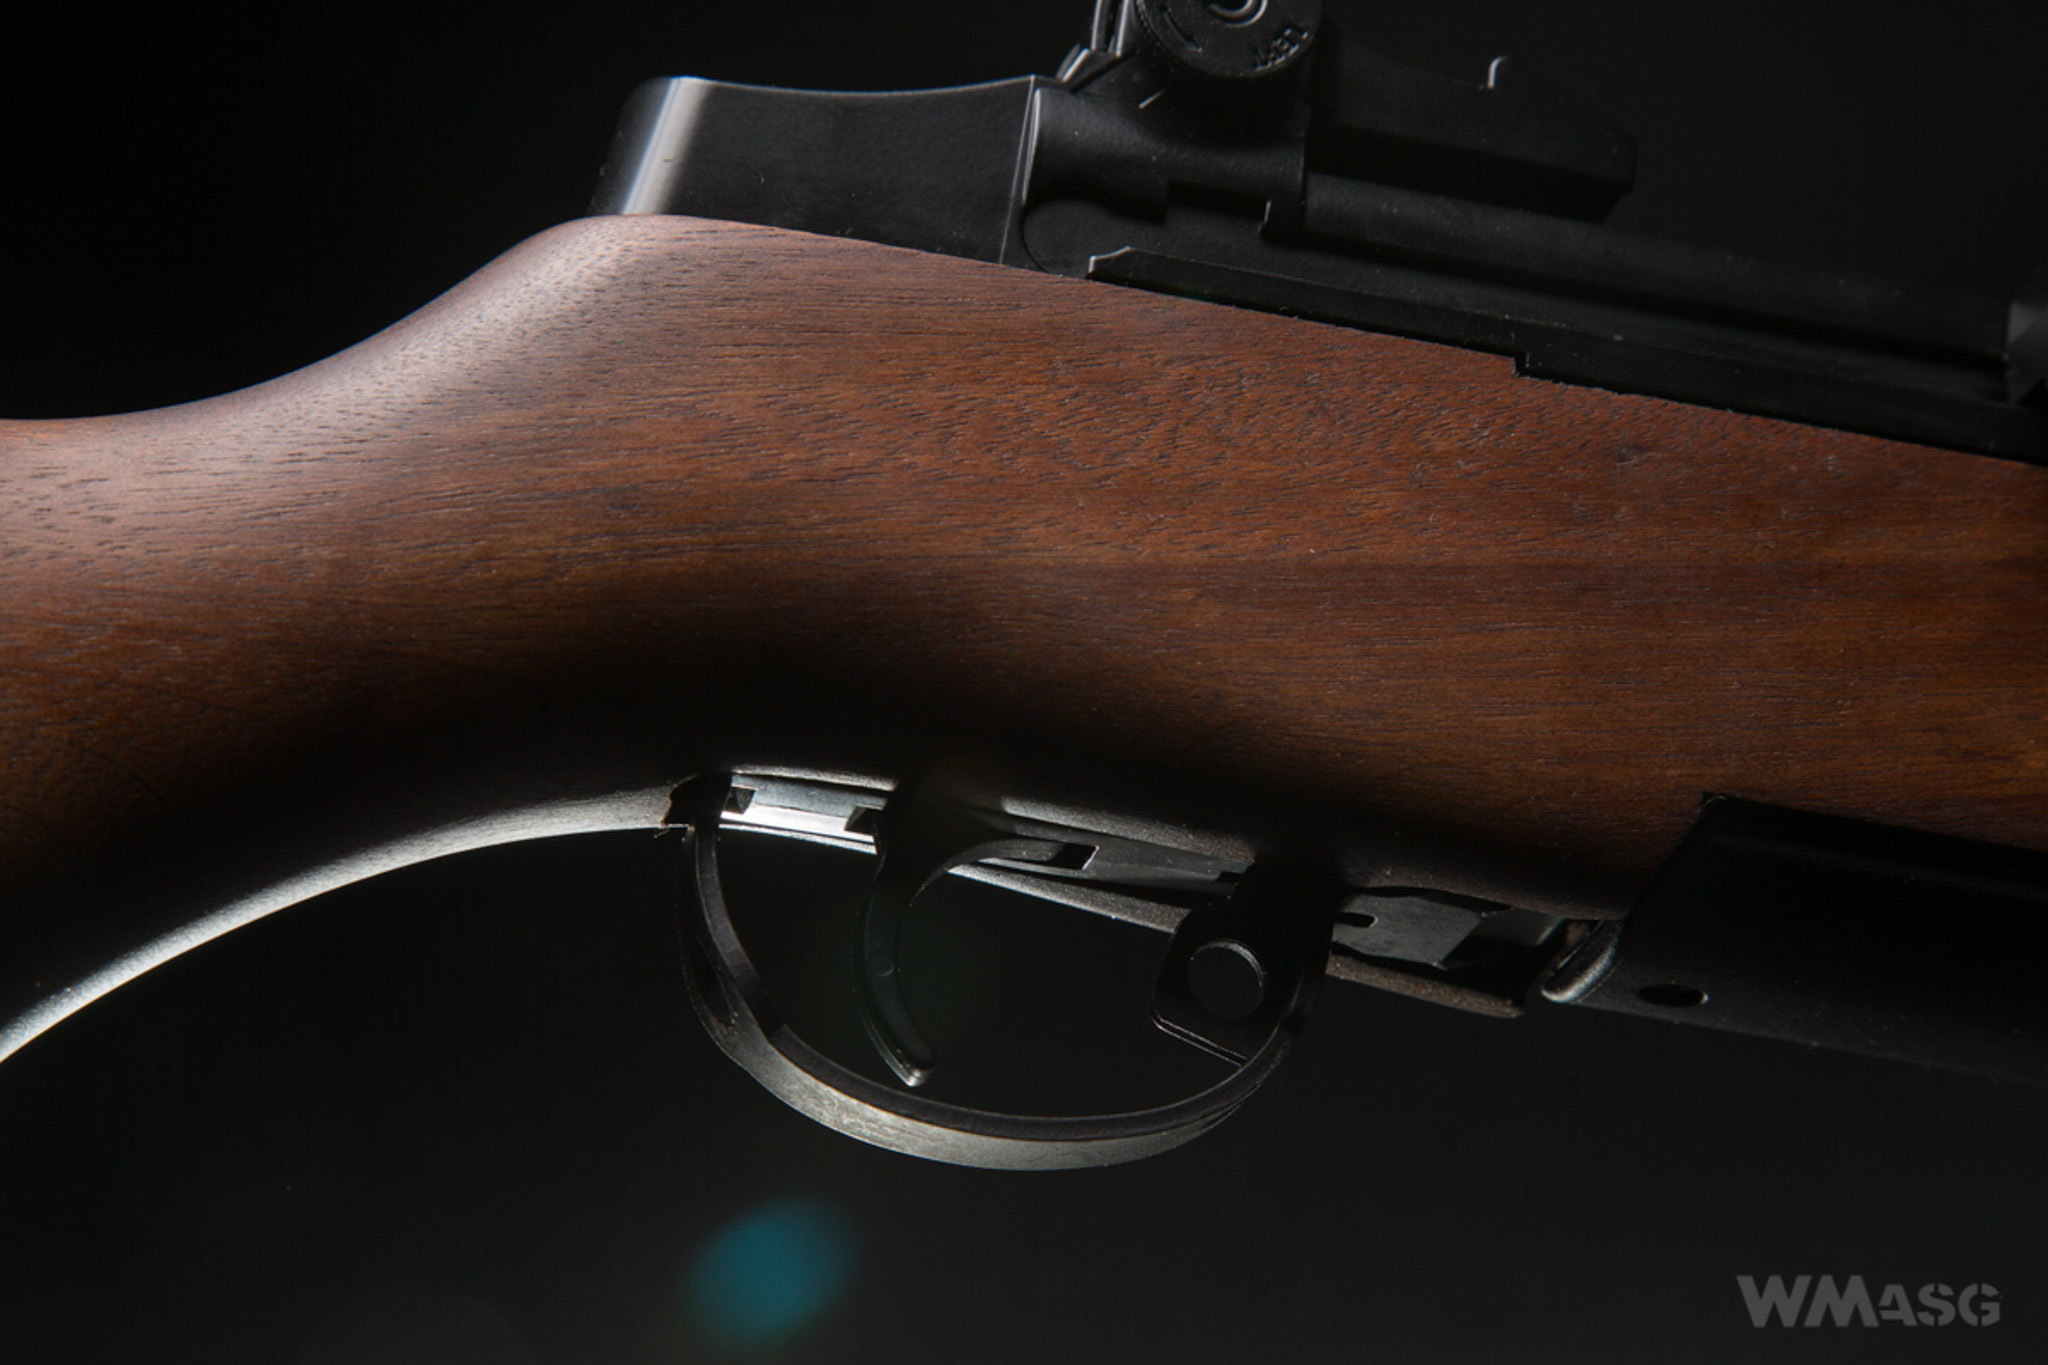
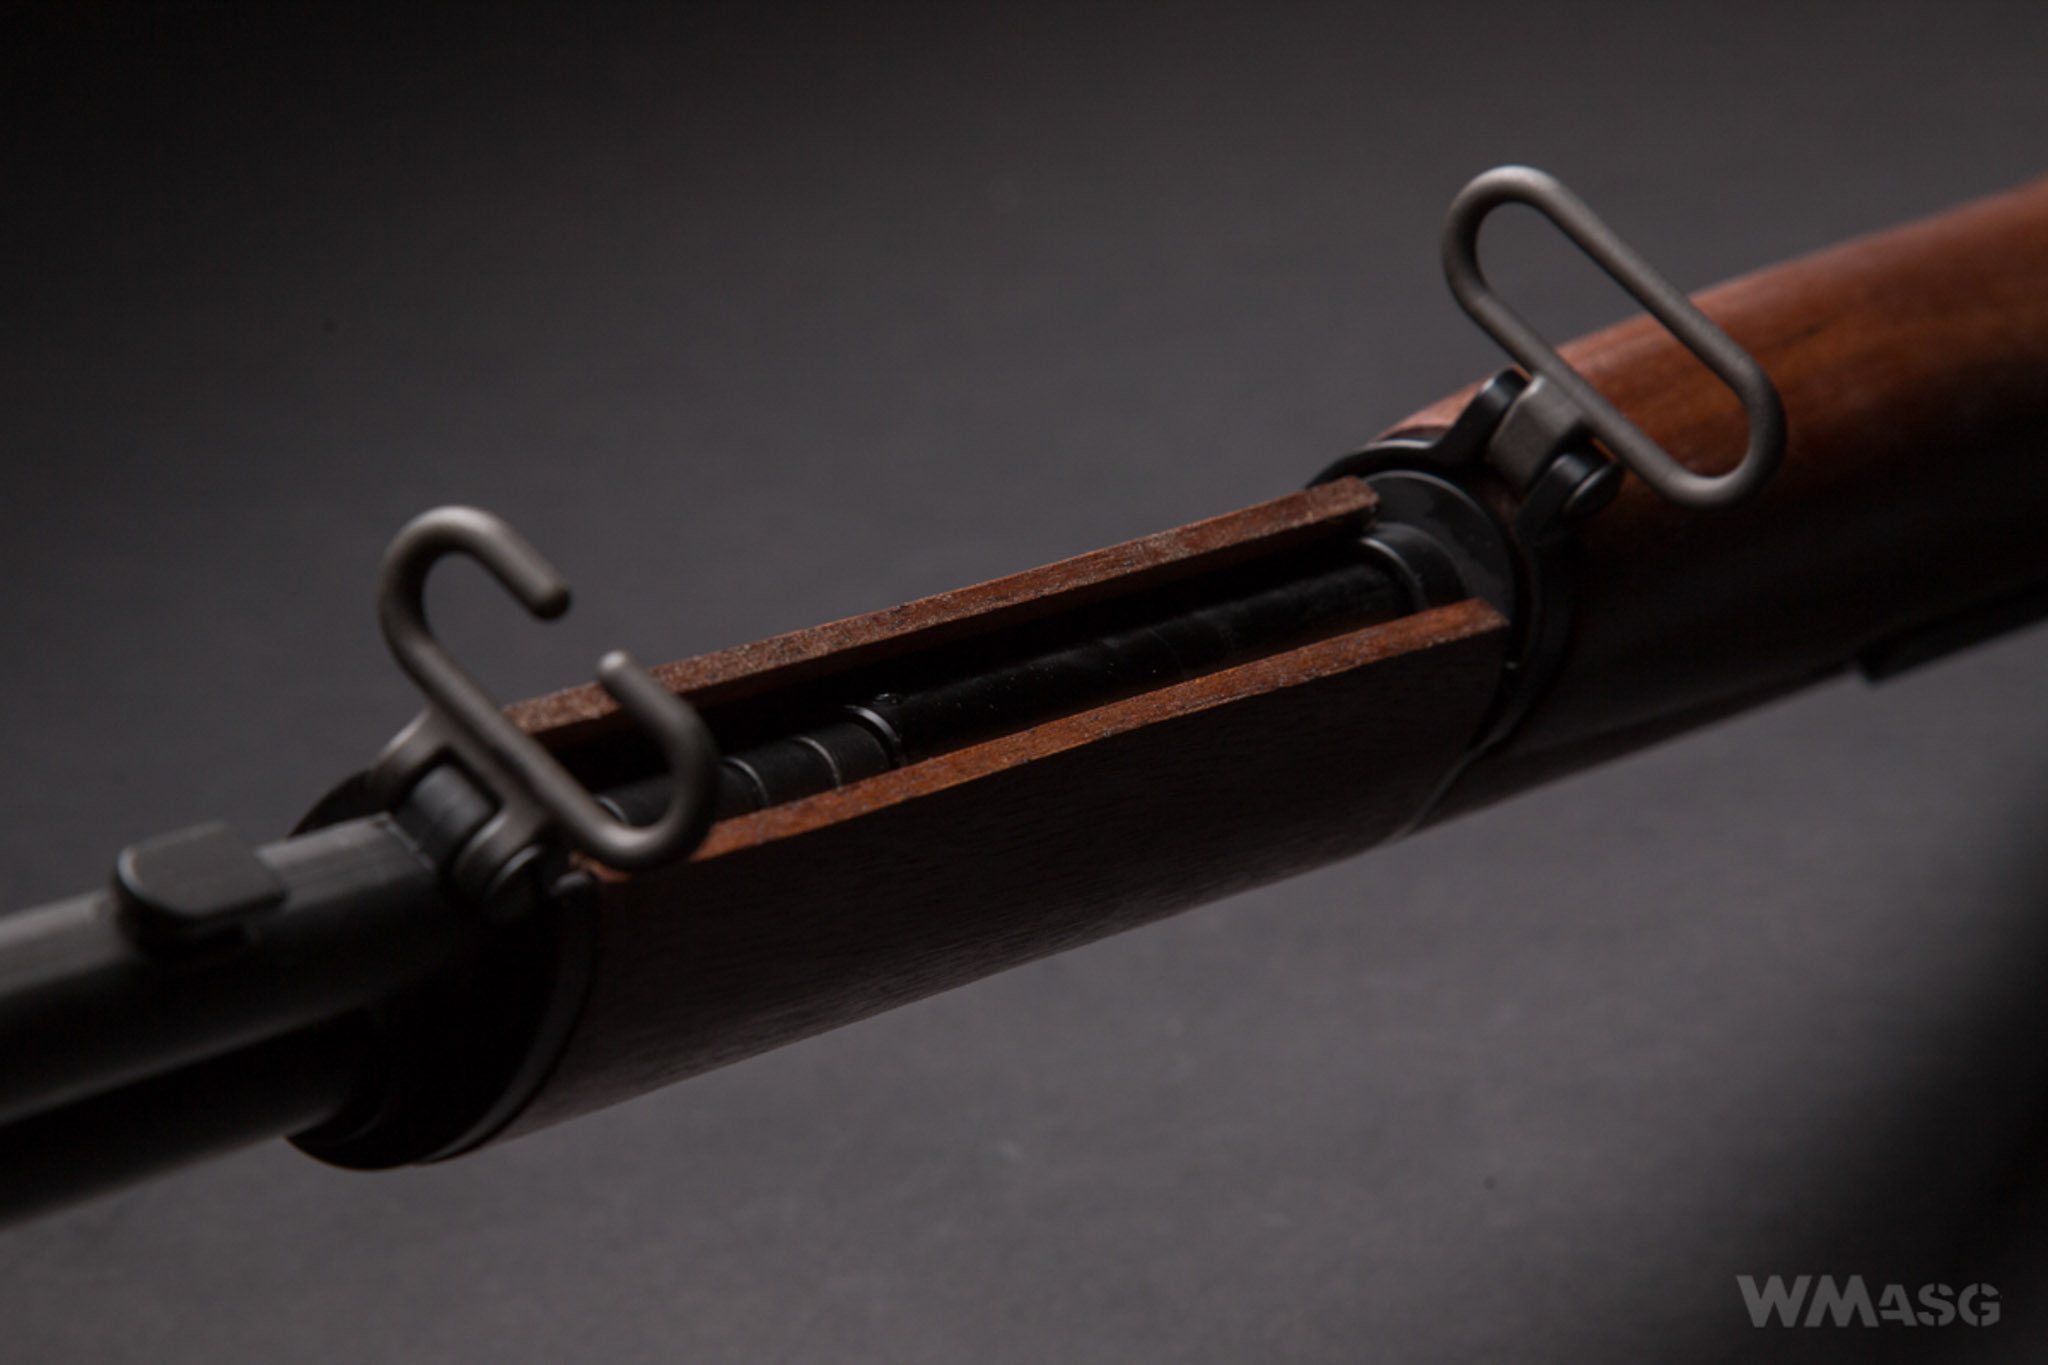
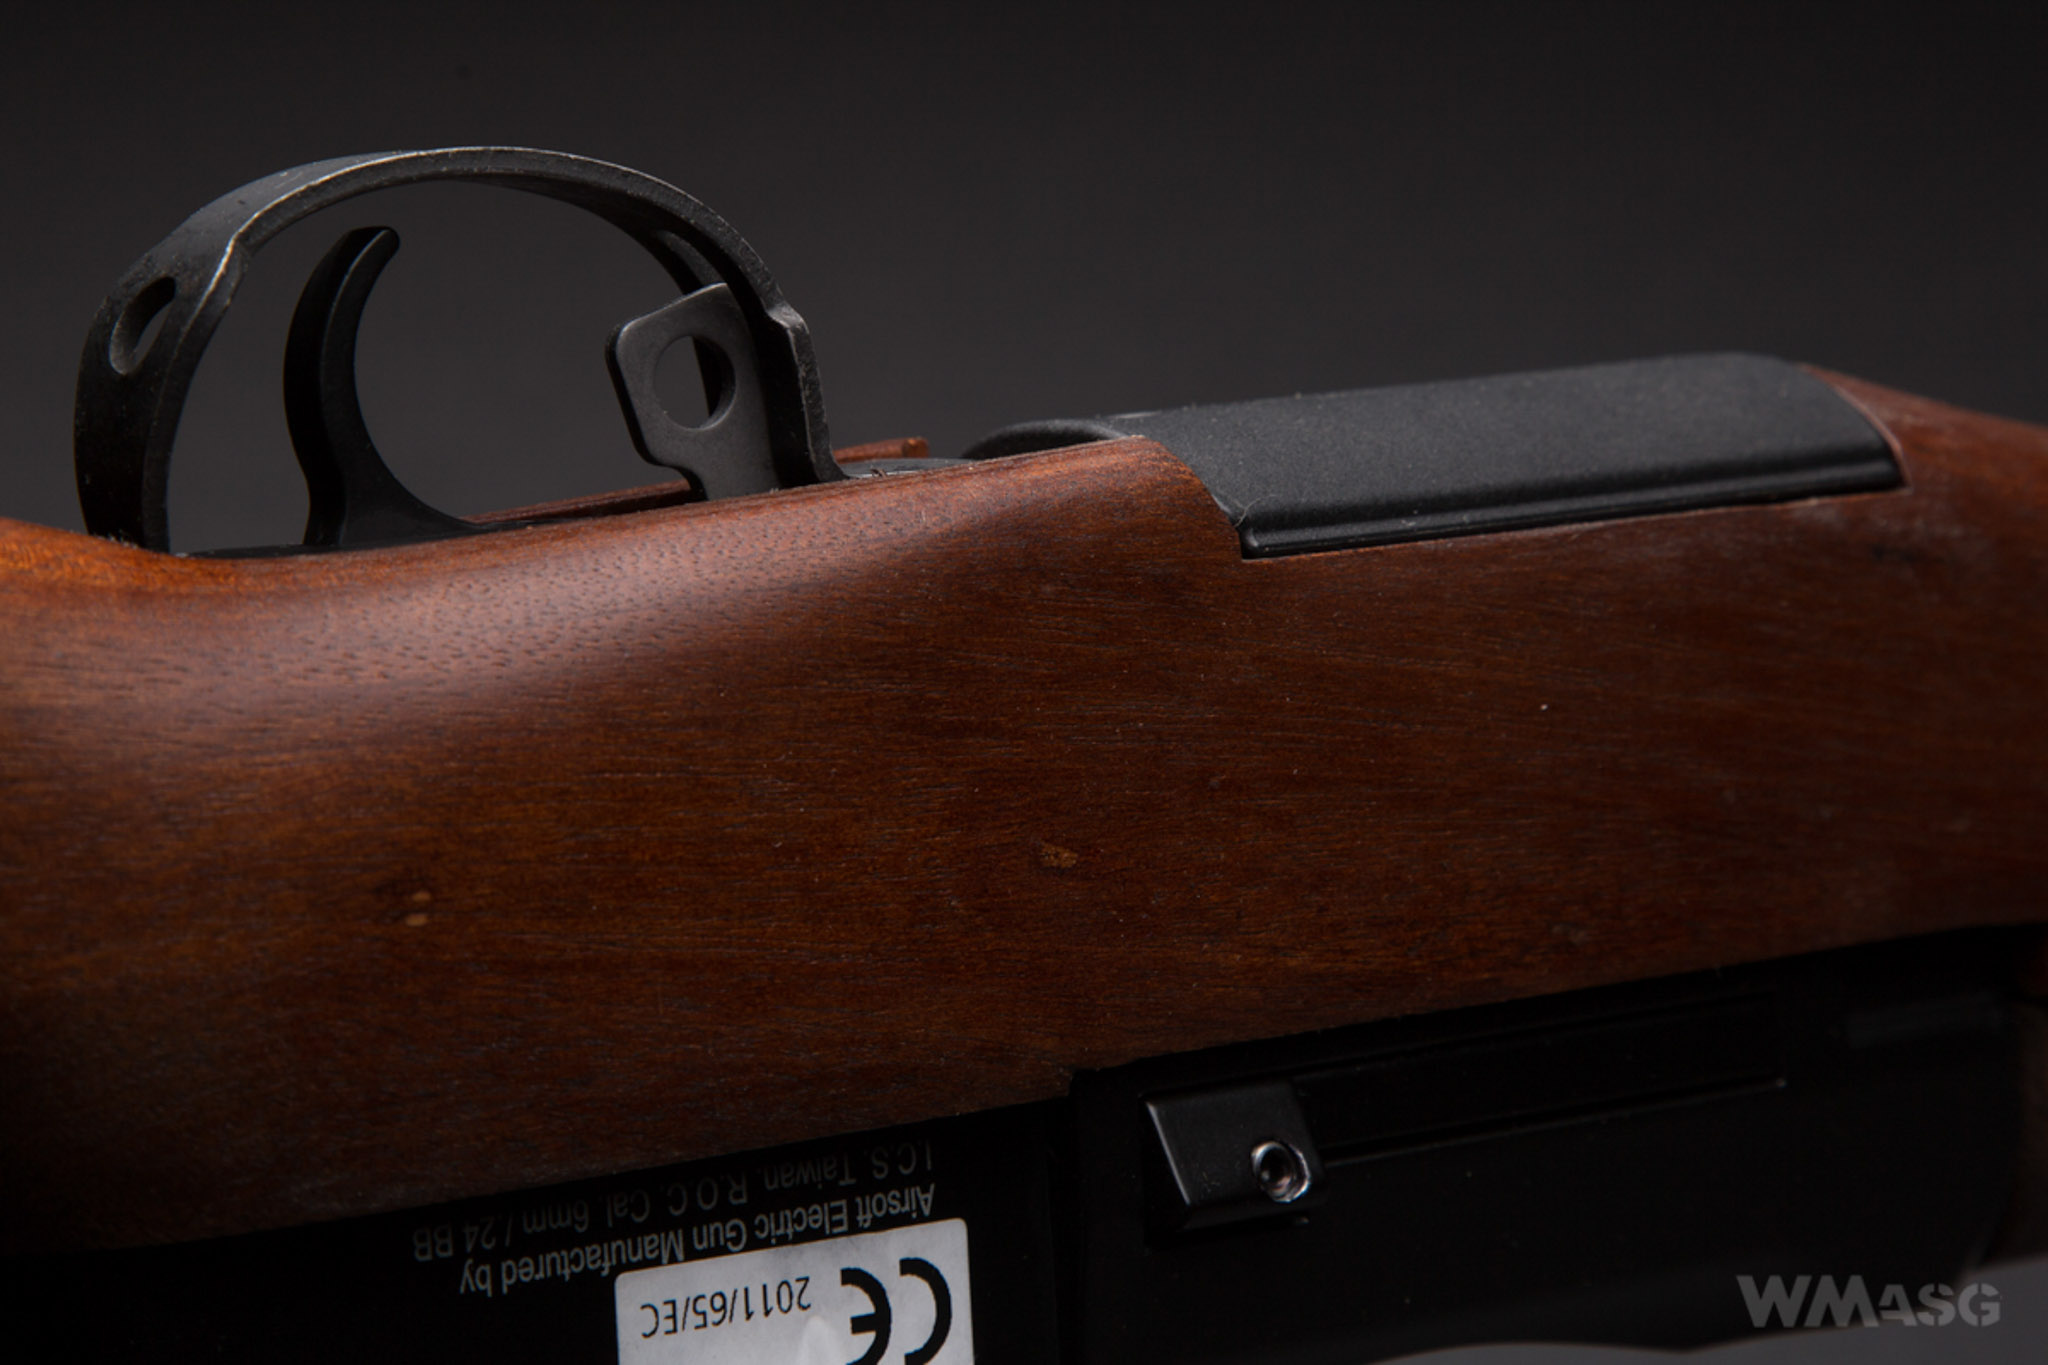
Most of the external metal parts are made of aluminum alloy and painted matte black. Steel parts are the two front sling swivels, the trigger guard, the safety switch, the dummy bolt and a few less significant parts. A side note: the trigger guard housed the safety switch shown on the photo below. It is on the safe position. Moving it forwards releases the safety.
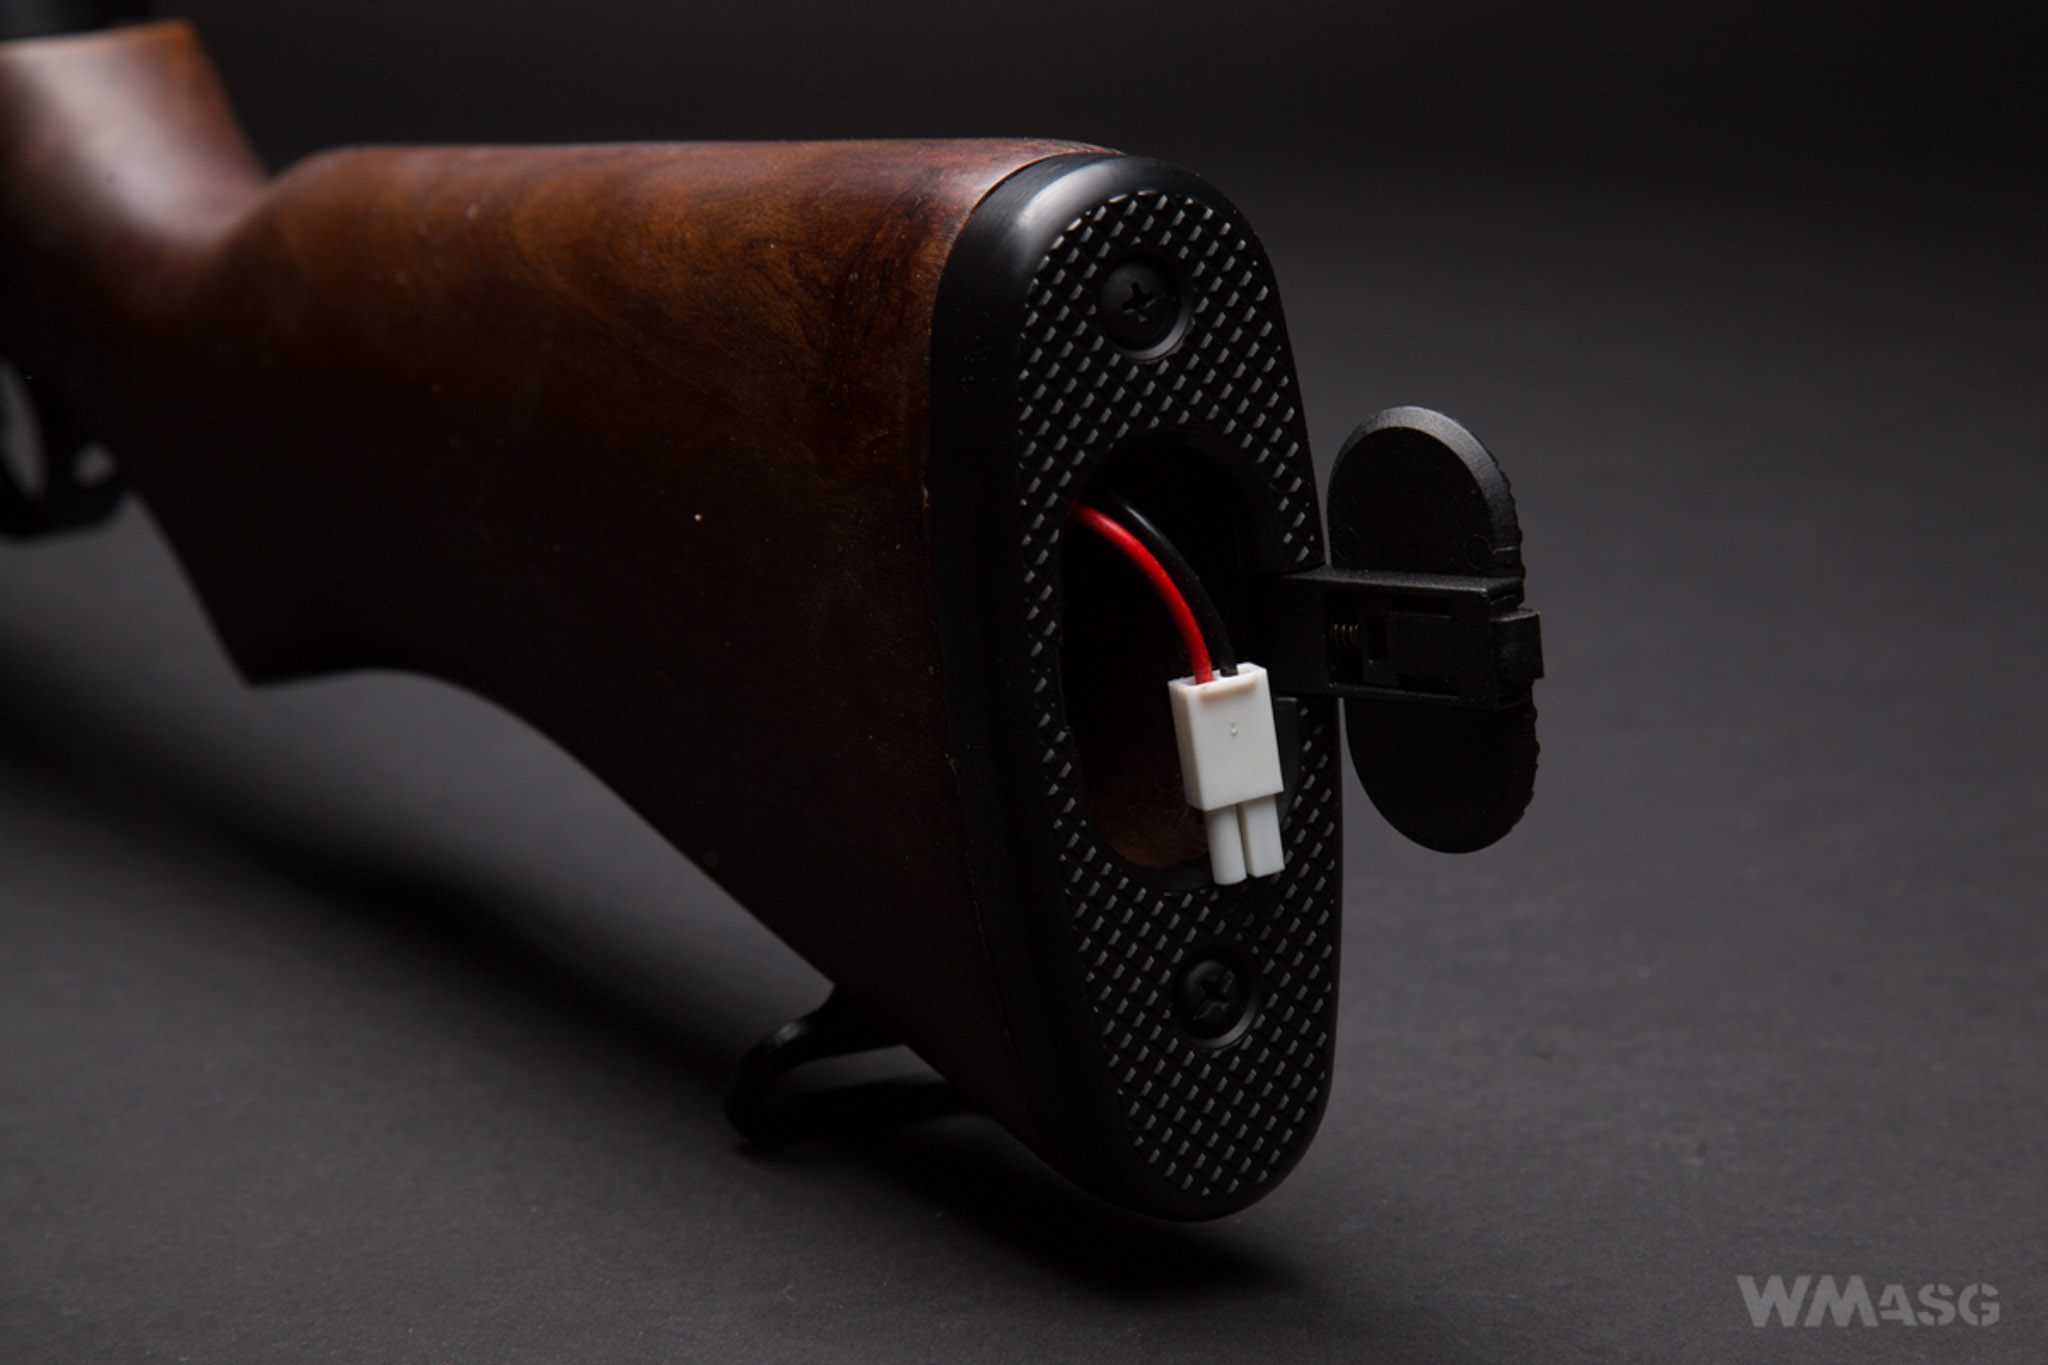
For me the plastic hatch in the buttstock plate is a complete misunderstanding.
The varnish coating is of very good quality. It is also mechanically resistant - during quite intensive tests we were unable to scratch it.
Markings
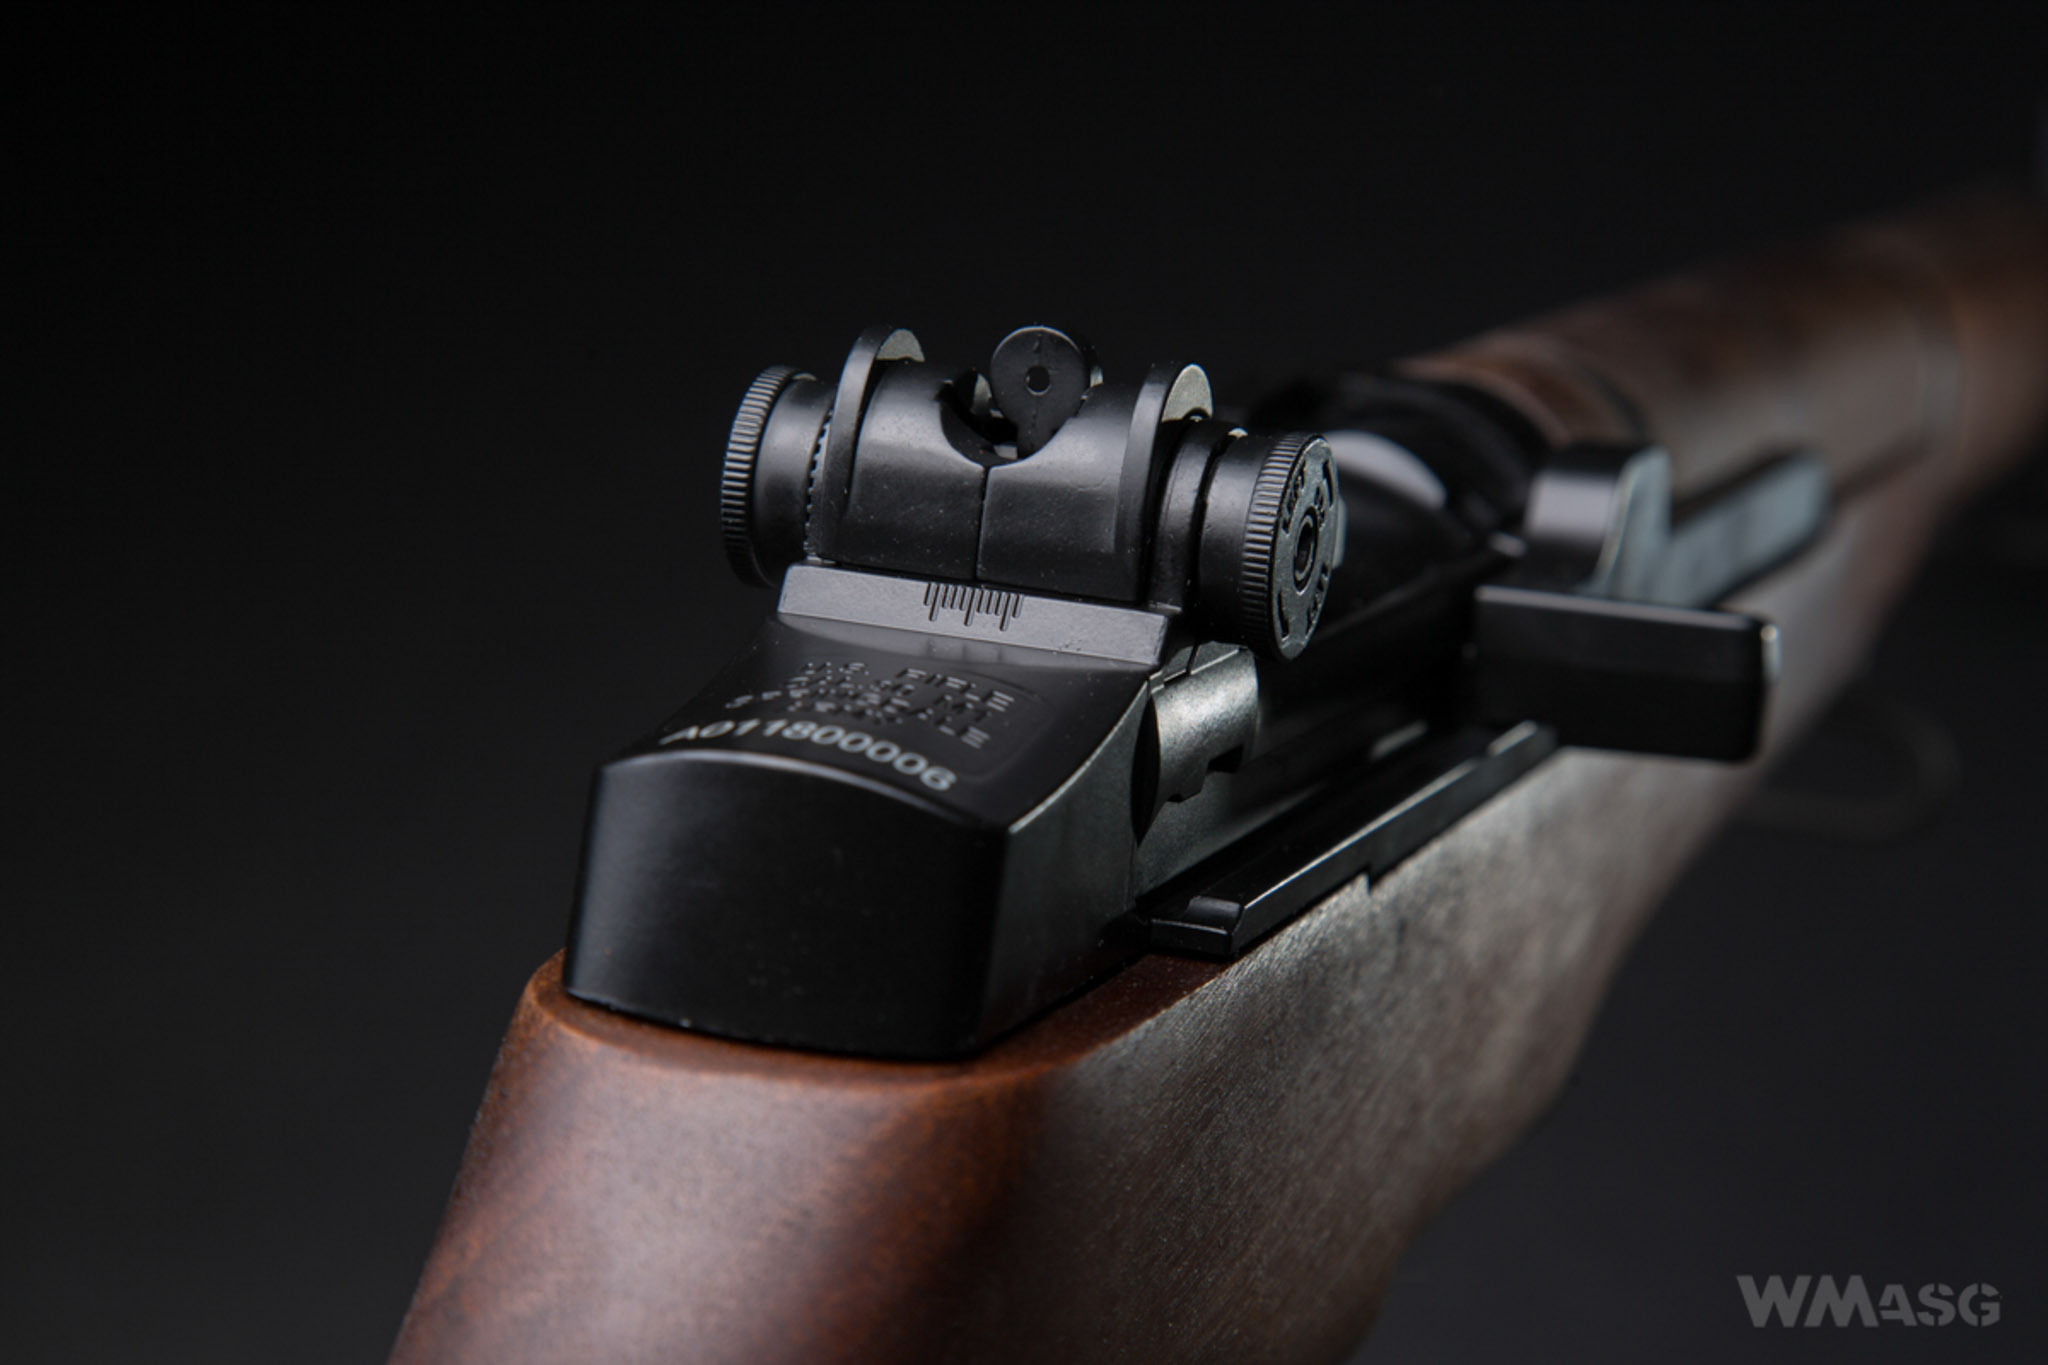
On the top of the rifle, next to the rear sight there are the following markings present:
U. S. RIFLE
CAL.30 M1
and…
SPRINGDALE ARMY.
I'm not an expert, but I was expecting the SPRINGFIELD ARMORY marking. Springdale Army? Which one? Wikipedia indicates in the United States there are 11 cities and 10 municipalities with this name. So...
Below is a laser engraved serial number of the unit.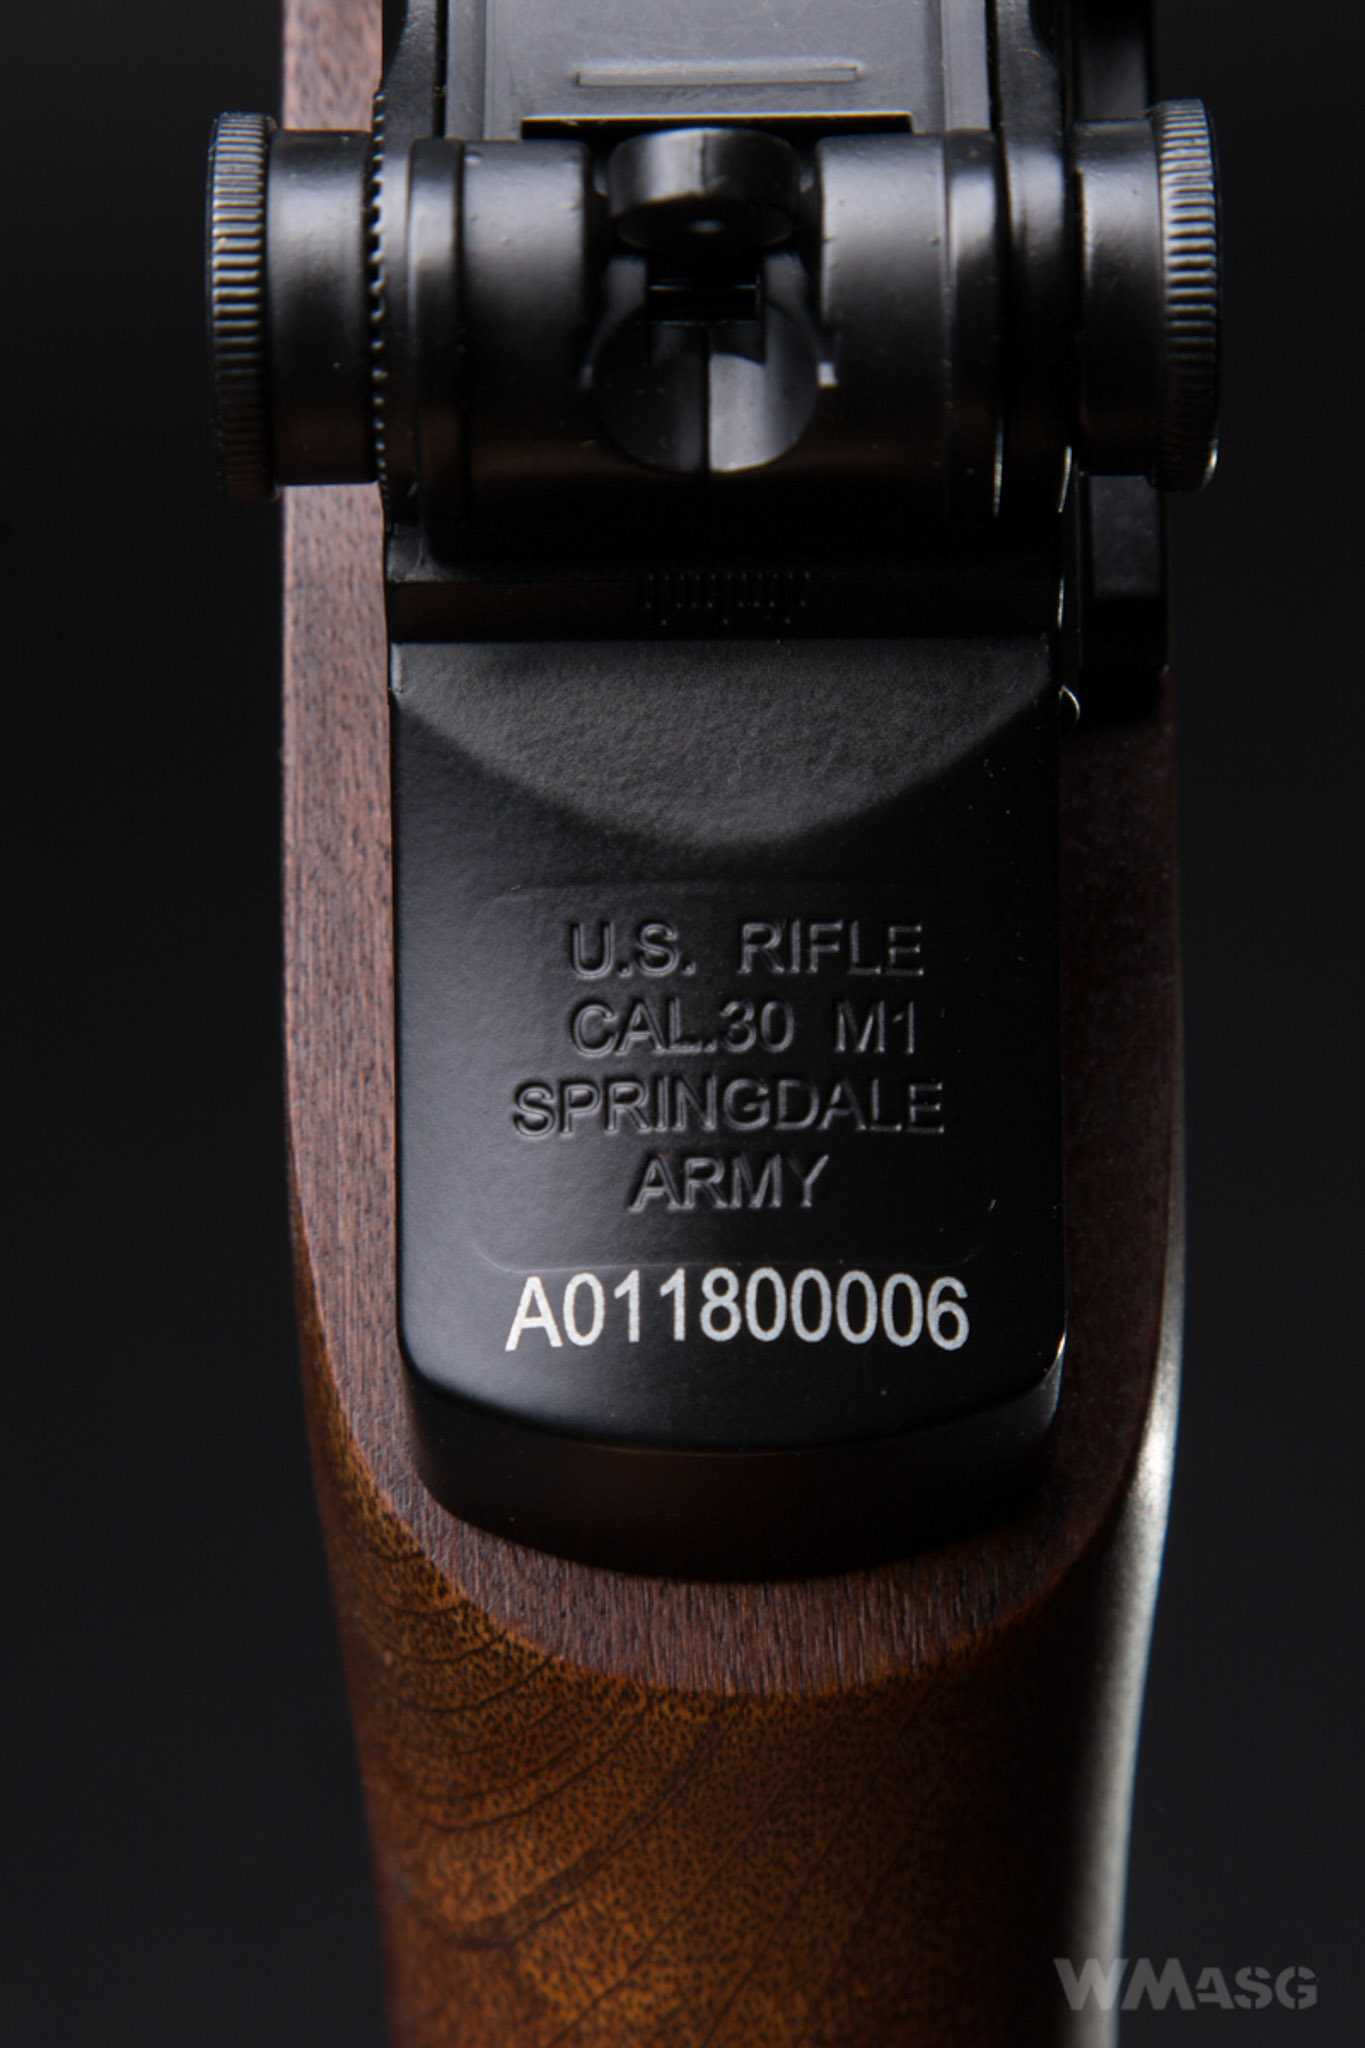
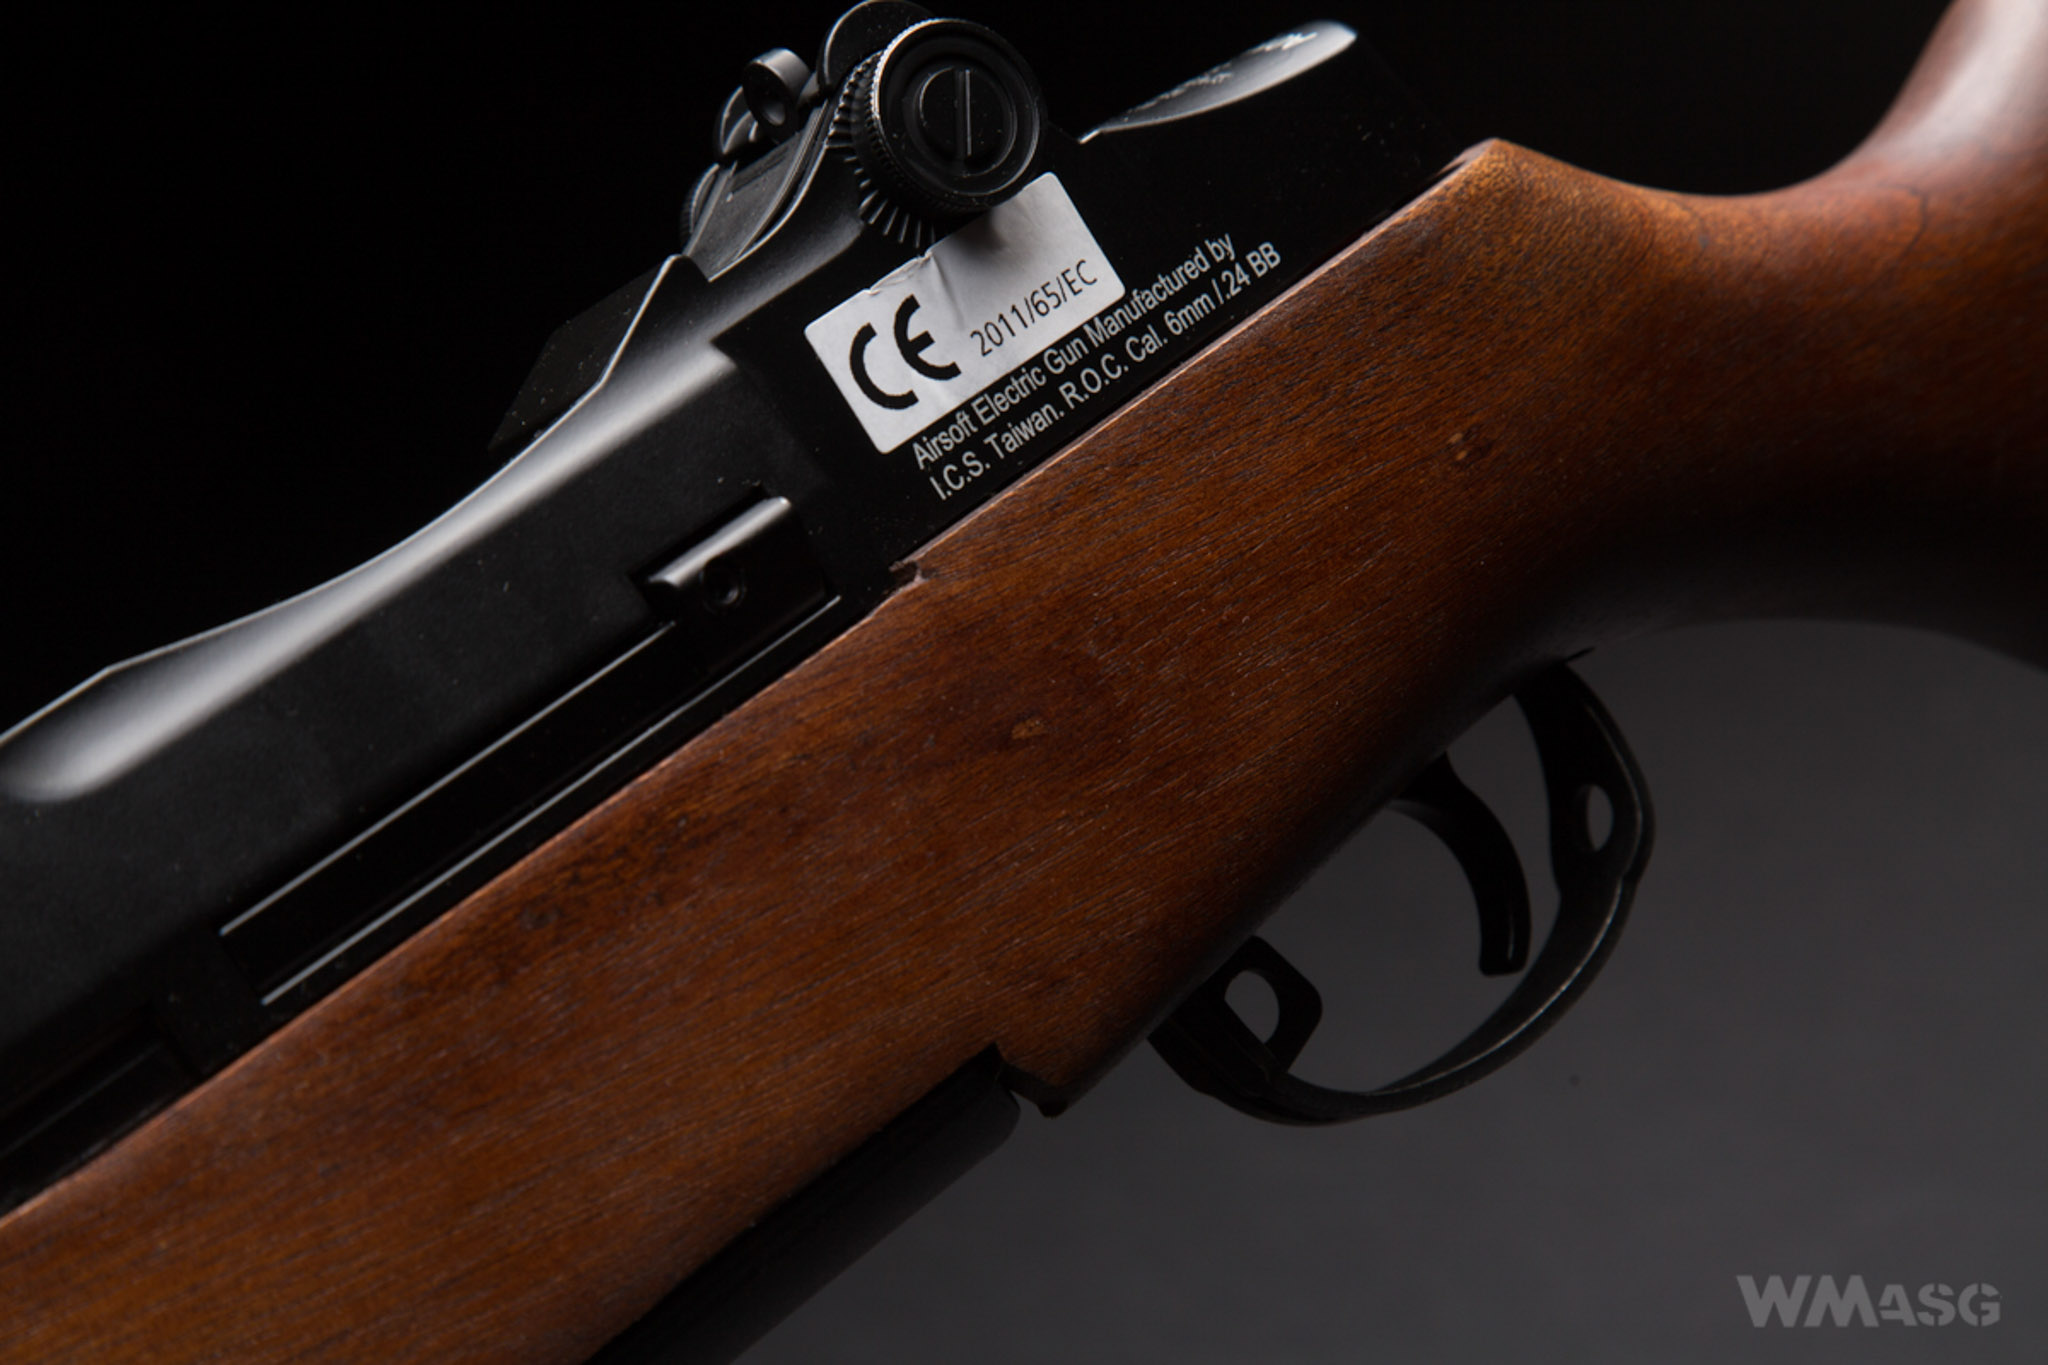
On the left side of the receiver, above the trigger there are also laser engraved markings of the manufacturer.
The sights
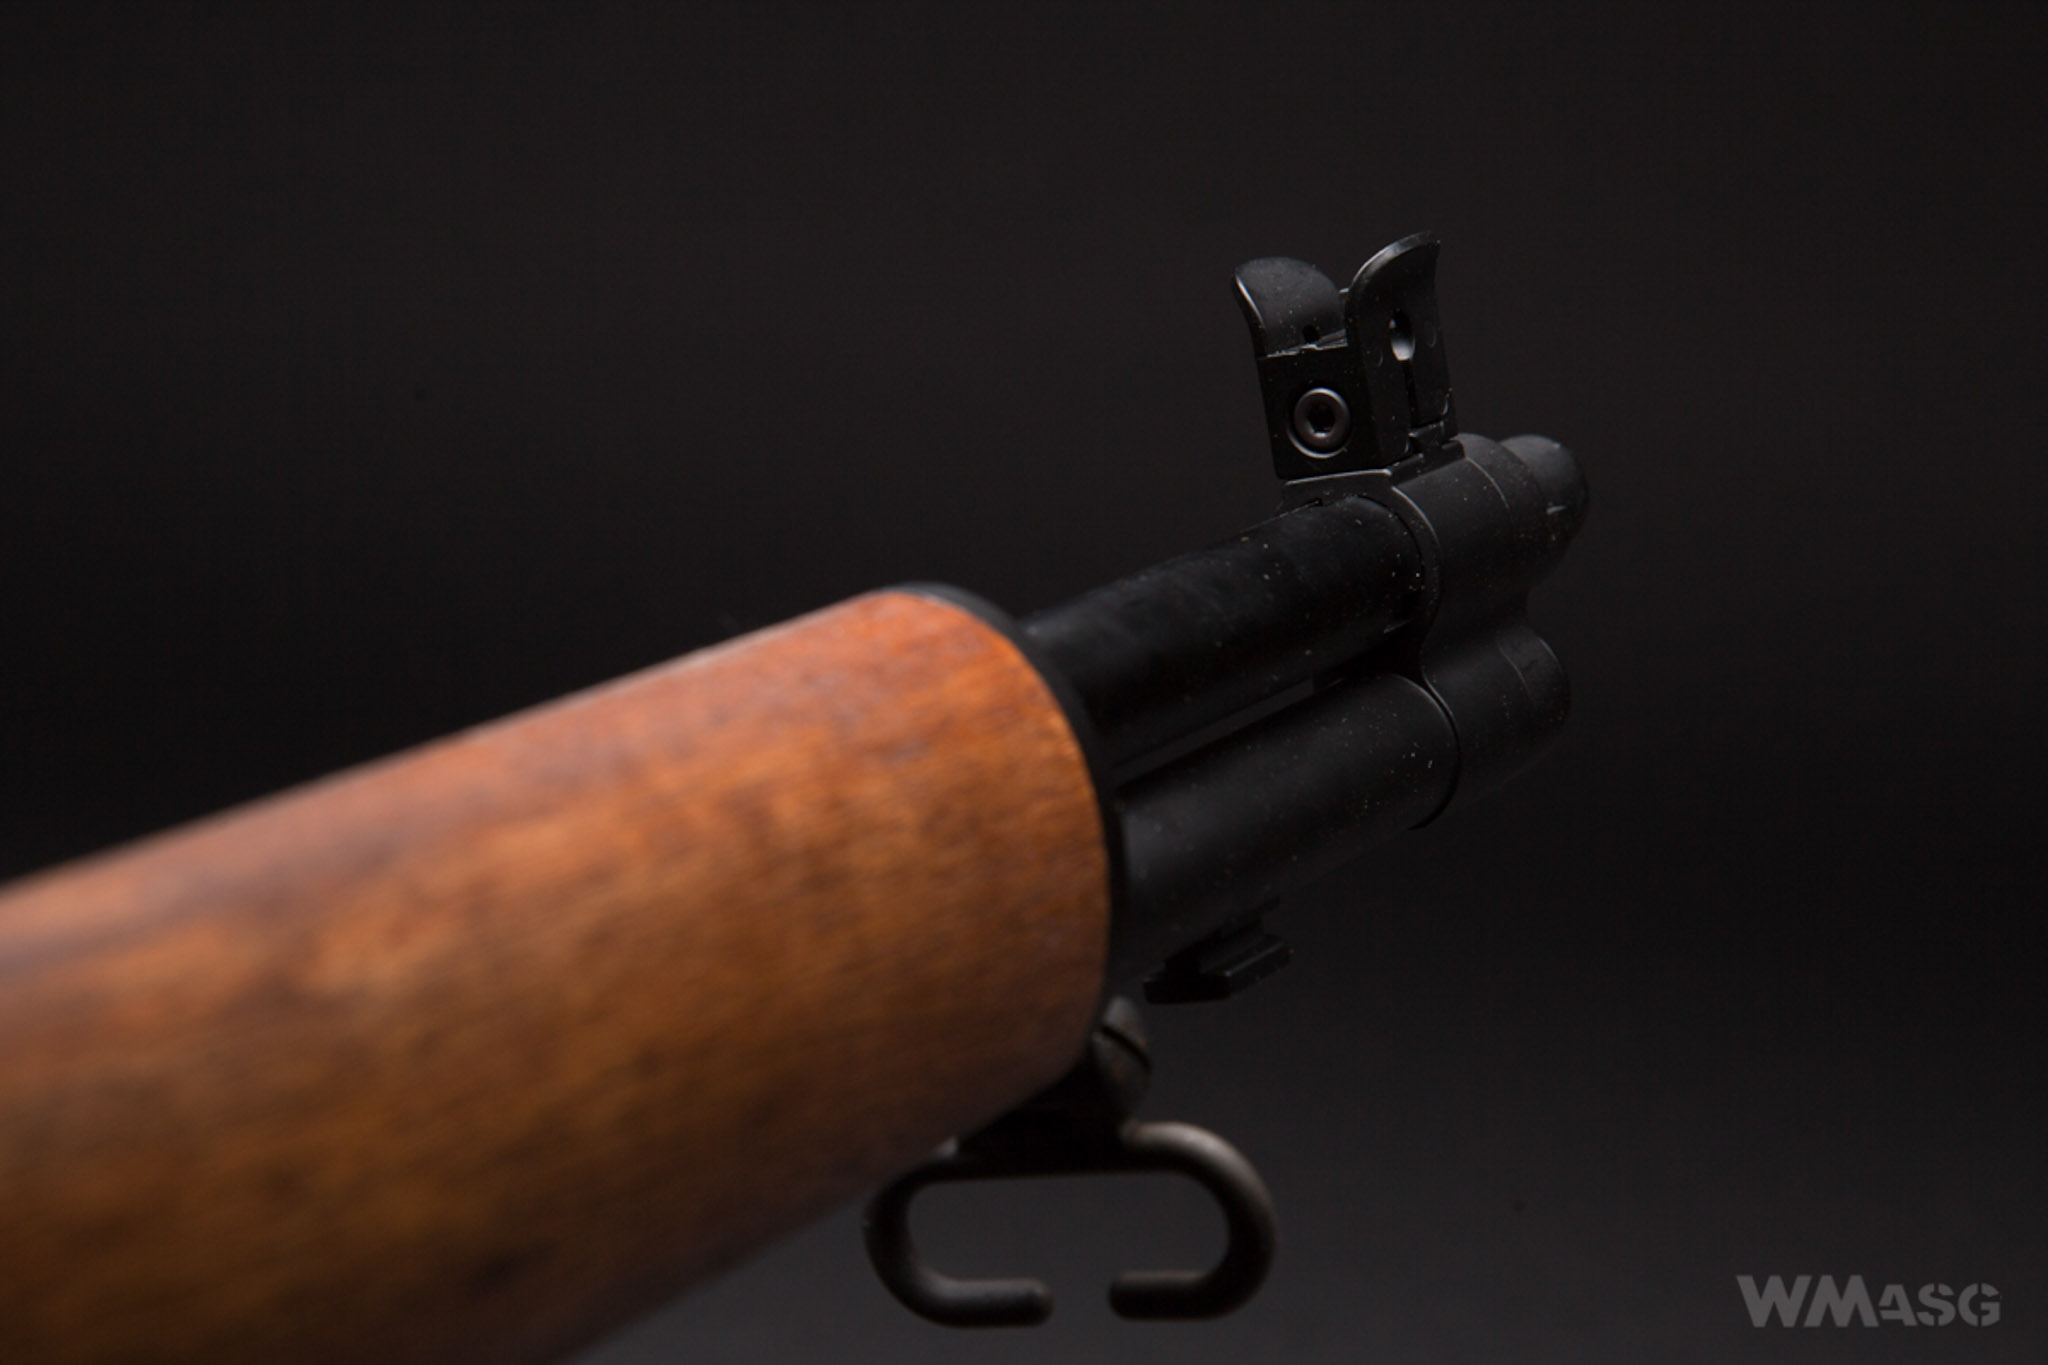
The rifle is equipped with iron sights. The front sight has a horizontal adjustment held in place by a 3 mm hex screw. The rear sight an adjustable aperture that can be set without tools. The knob on the left adjusts the vertical and the knob on the right to the horizontal position. The distance between the front and the rear sight is an impressive 700 mm, which certainly affects the effectiveness of shooting.
The magazine
Unlike the fire version, the rifle is not loaded with 8-round clip from the top. Neither after firing the last round he does it make the “PING" sound.
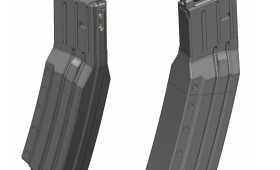
The set contains 2 low-cap magazines with a capacity of 42 BBs.
The magazines are inserted into the replica from the bottom, just in front of the trigger guard and work as a dummy bottom of the original, non-removable magazine. The bolt release button is used to release the magazine. While inserting the magazine, it's worth to tap it from the bottom so that the latch holding it will definitely move into place.
Despite the obvious differences in shape and size, the internal structure of the magazine is that of a typical for low and mid-cap magazines
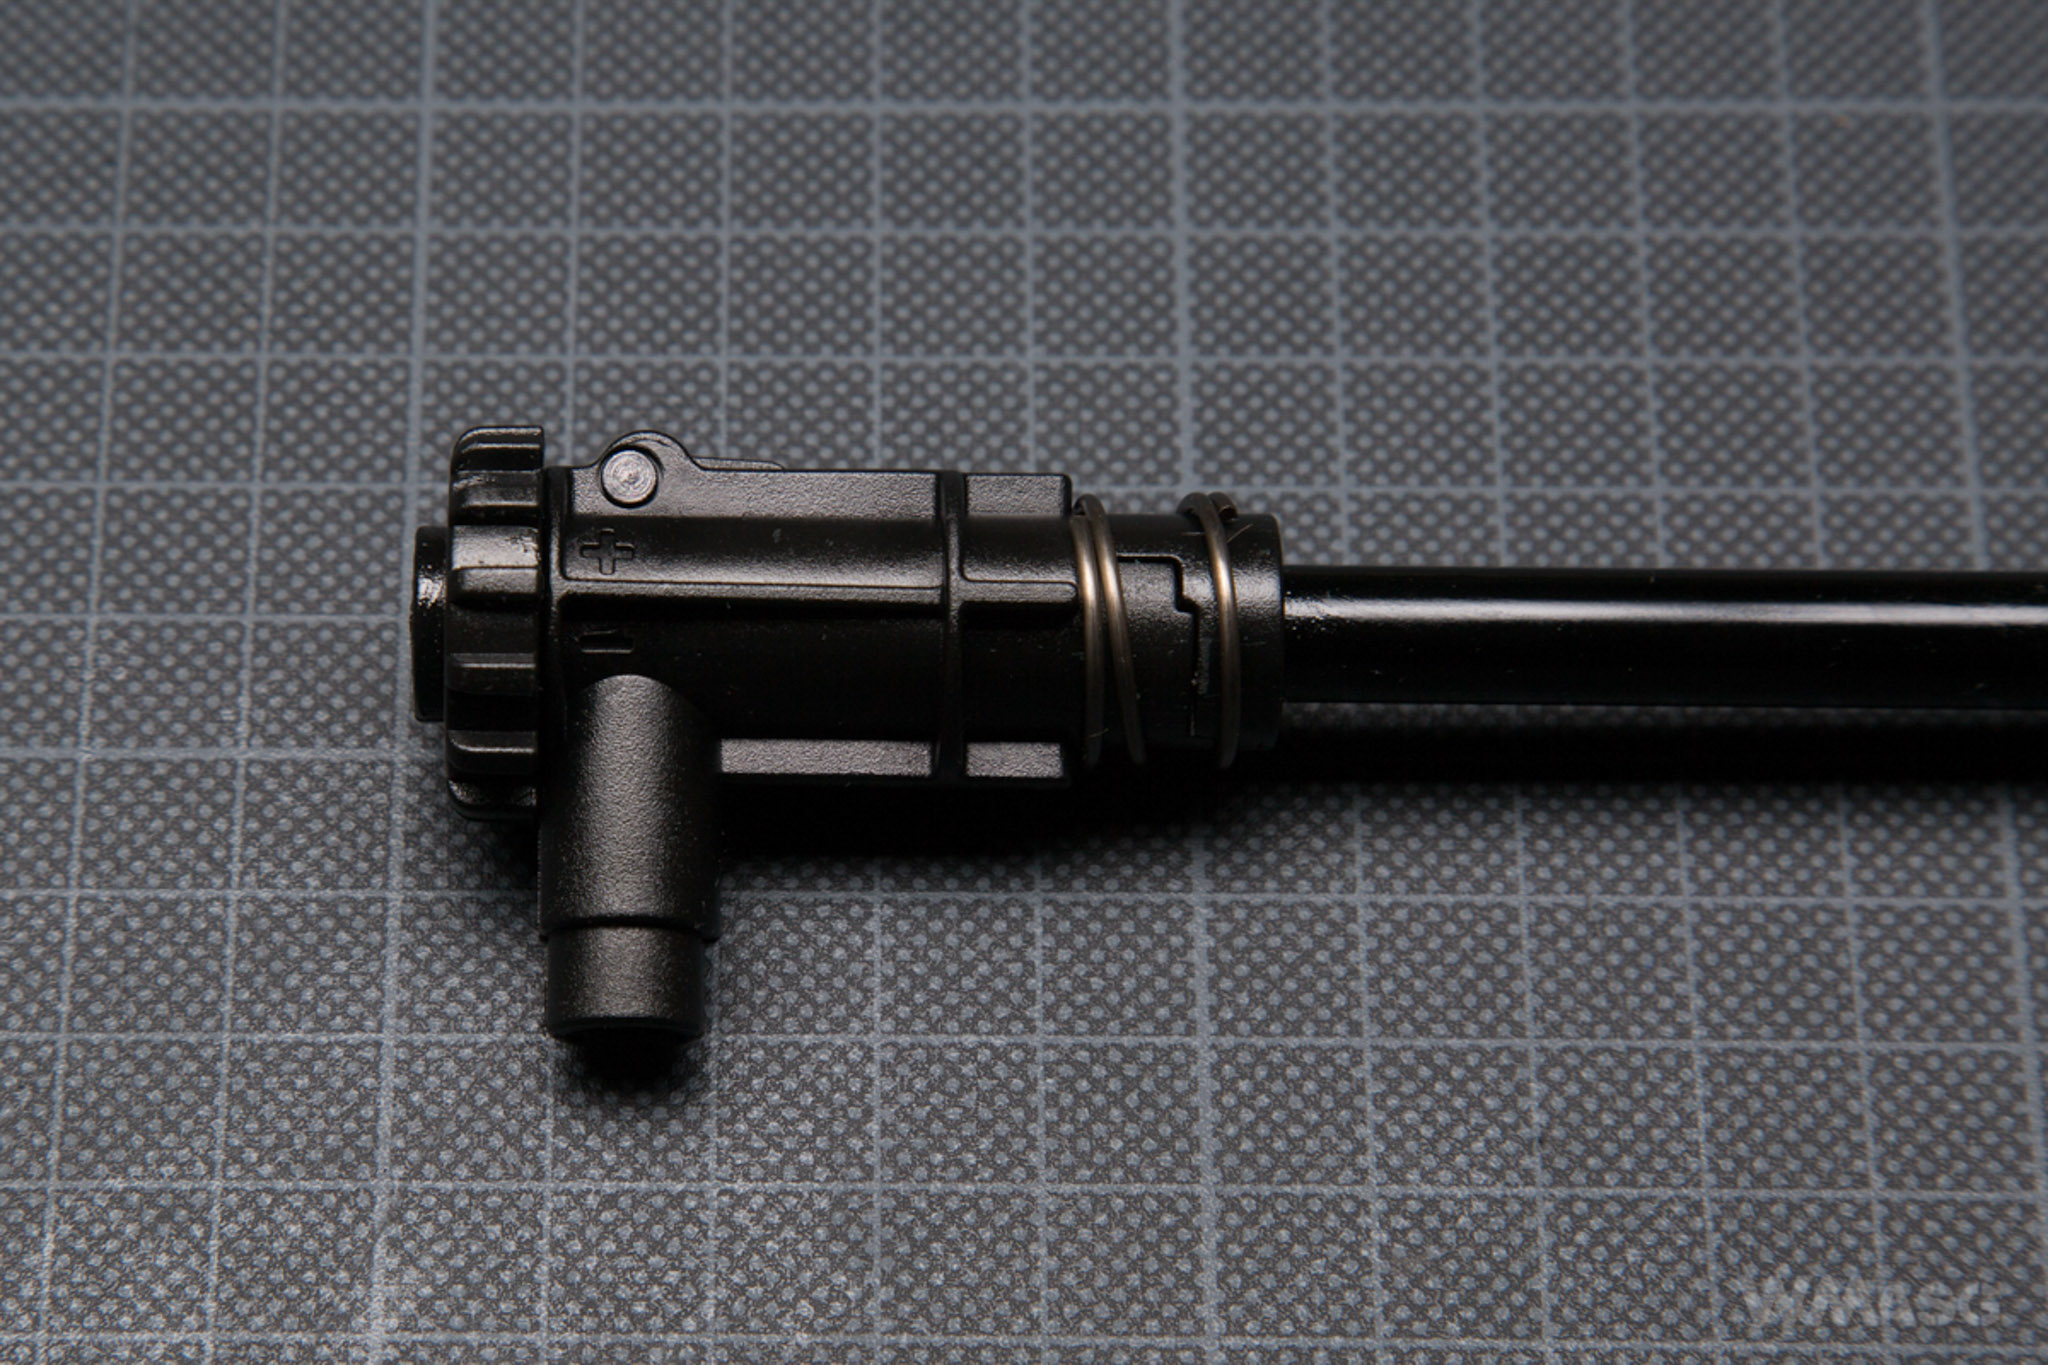
Hop-Up adjustment
Access to the Hop-Up adjustment is obtained by pulling the dummy bolt back. Theoretically, for ease of use, it can be locked in the rear position by pushing the upper part of the bolt catch. It's just that it simultaneously serves as the magazine release. That is, by locking the bolt in the rear position, at the same time the magazine drops out. Nice isn’t it? Of course, it is possible to adjust the Hop-Up this way - you have to (for right-handed shooters) hold the rifle from the bottom, putting your hand on the magazine, pressing the bolt catch with your thumb to lock the bolt. For me, after many attempts, another method proved more convenient. I do not touch the bolt catch. With my right hand, I pull back and hold the bolt in the rear position, and adjust the Hop-Up with the thumb of my left hand, which holds the rifle from the bottom.

Turn the adjustment ring up - stronger Hop-Up, turn it down – weaker Hop-Up.
Releasing the bolt locked from the rear position takes place by means of slightly pulling it back and releasing, or by pulling the bolt catch button (NOTE: hold the magazine!). The bolt, coming back to the forward position, makes a cool “CLING" sound!
Disassembling the replica
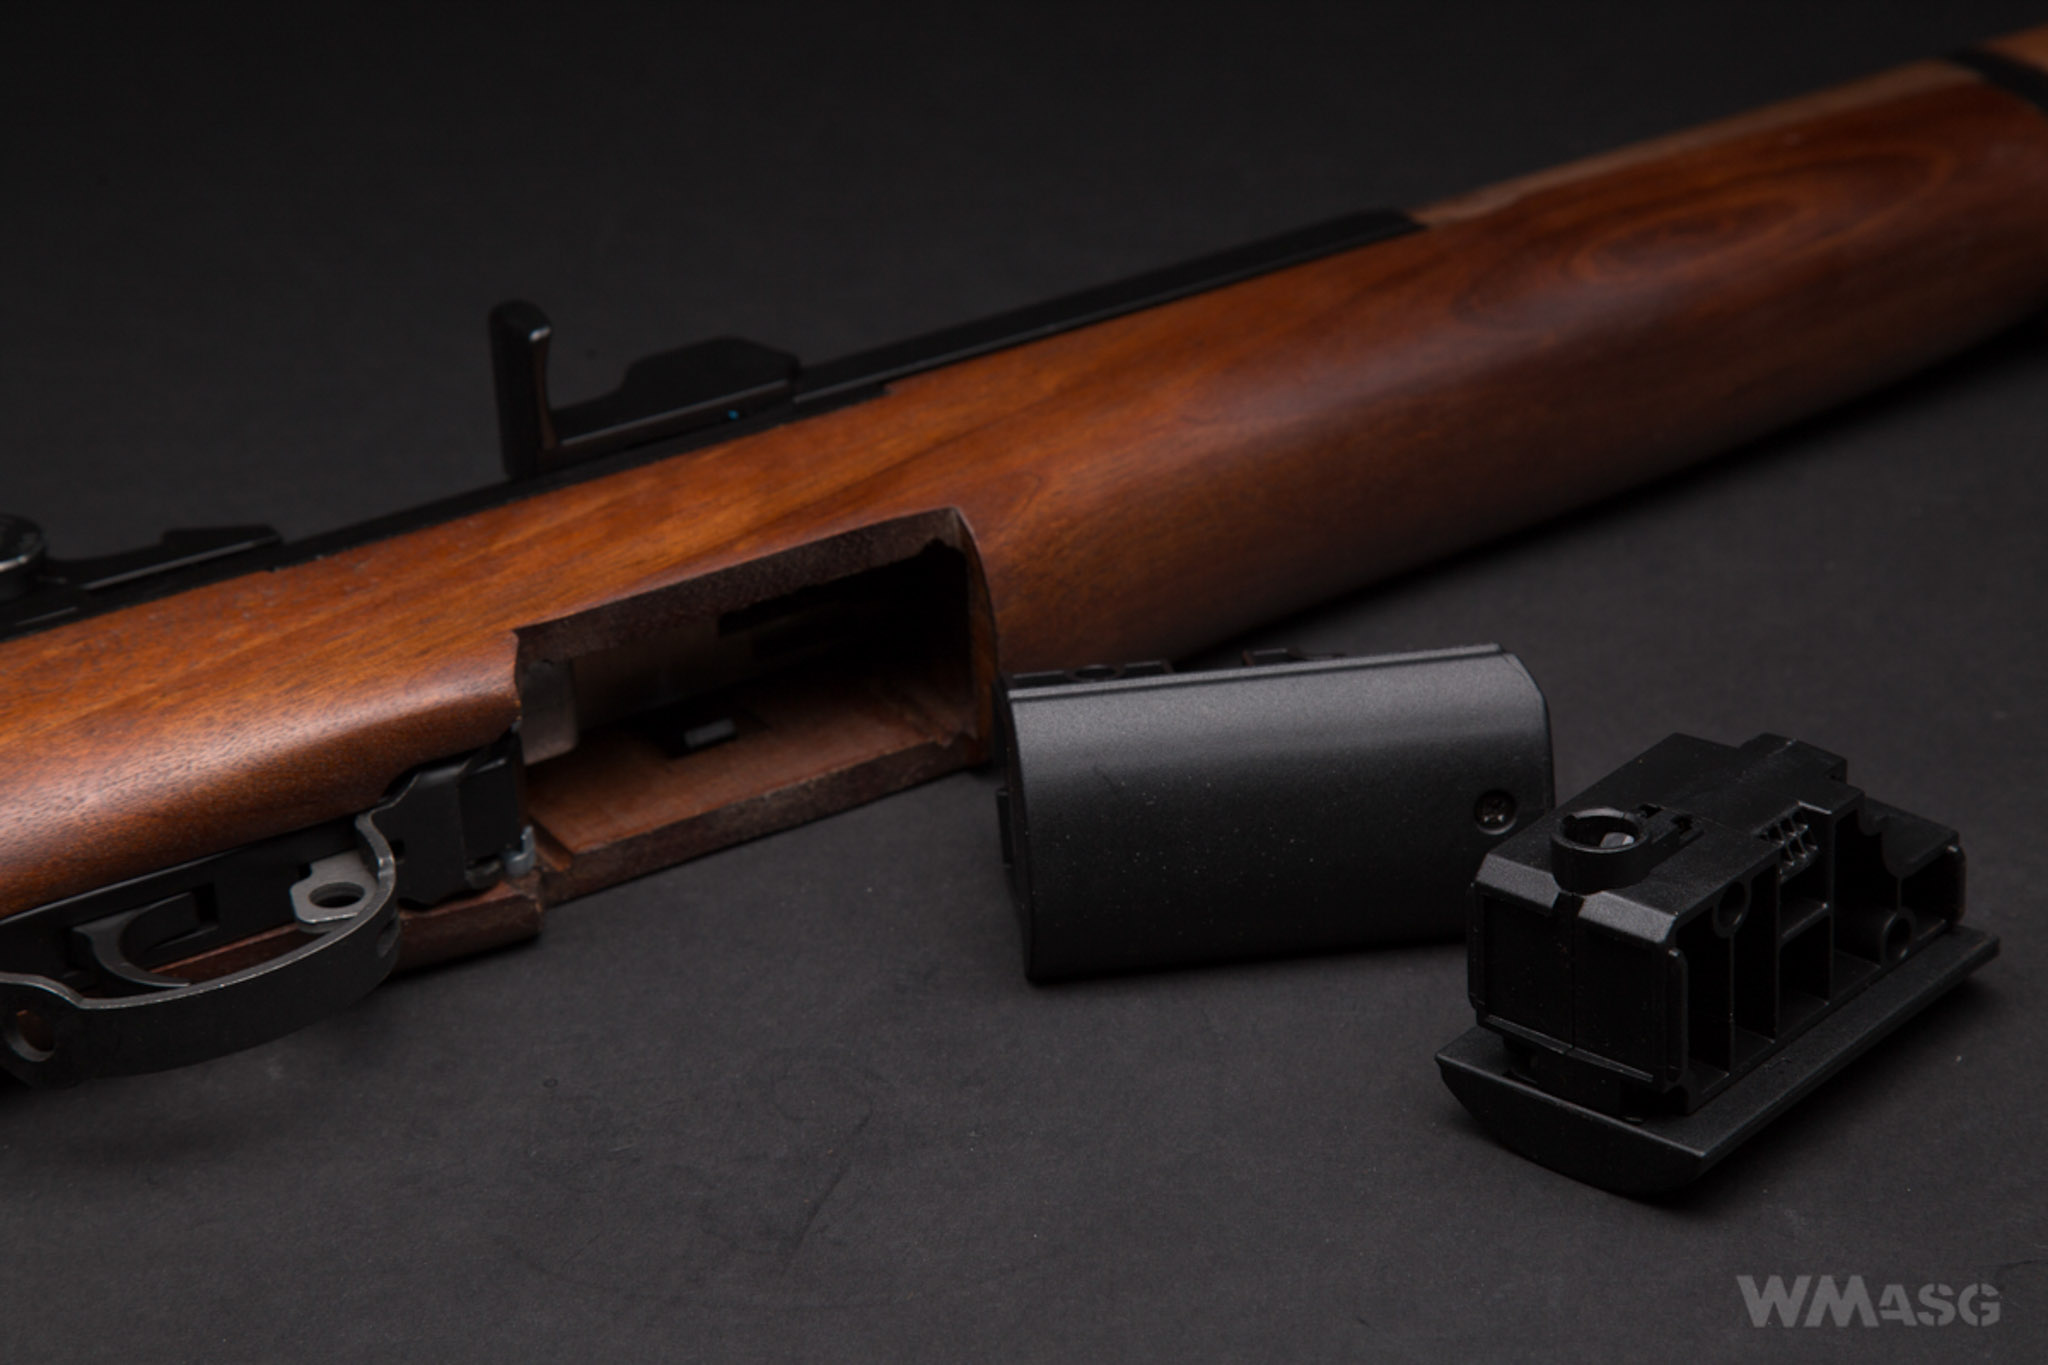
The method of disassembling the replica has been clearly illustrated in the manual. To take it apart (with the magazine removed and the battery disconnected): disassemble the trigger guard and the safety switch, disassemble and disconnect the front sight by completely unscrewing the screw. We unscrew (pr loosen) the set screw in the base of the front sight. We take off the dummy gas tube. We take off both wooden covers. By pulling forward and upward we take off the external barrel together with the cocking handle and the gearbox from the stock. You can make it easy by gently prying the back of the receiver.
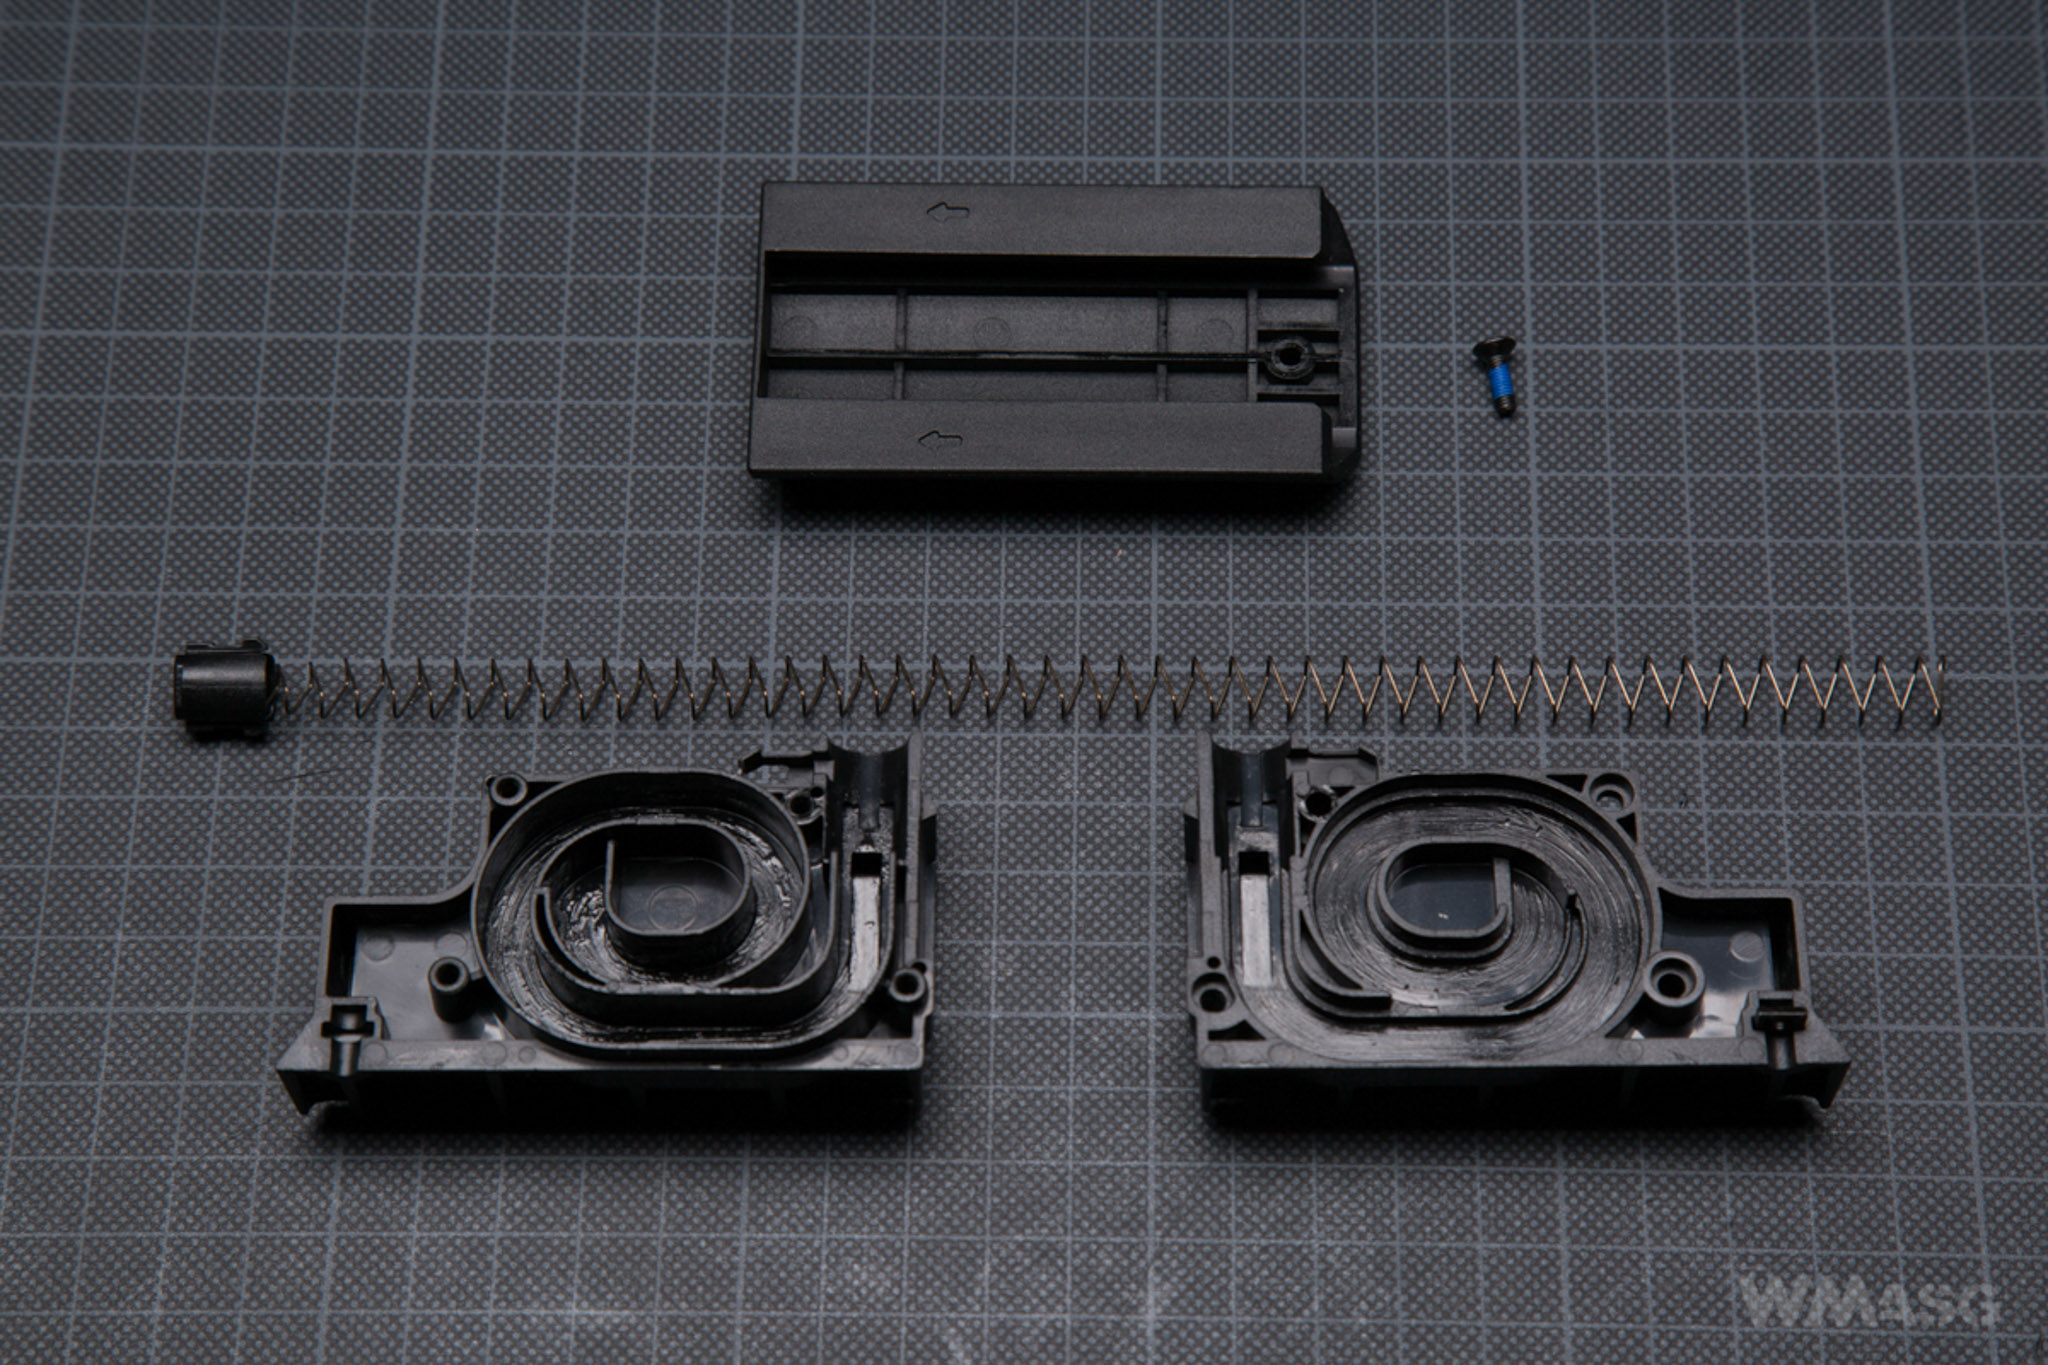
Next, we pull out the spring of the cocking handle with the guide rod and take out the rod’s stopping pin. From underneath, we unscrew 2 Phillips screws in front of the Hop-Up chamber. Then the external barrel, the inner barrel with the Hop-Up chamber and the cocking handle can be moved forward. The gearbox remains in receiver.
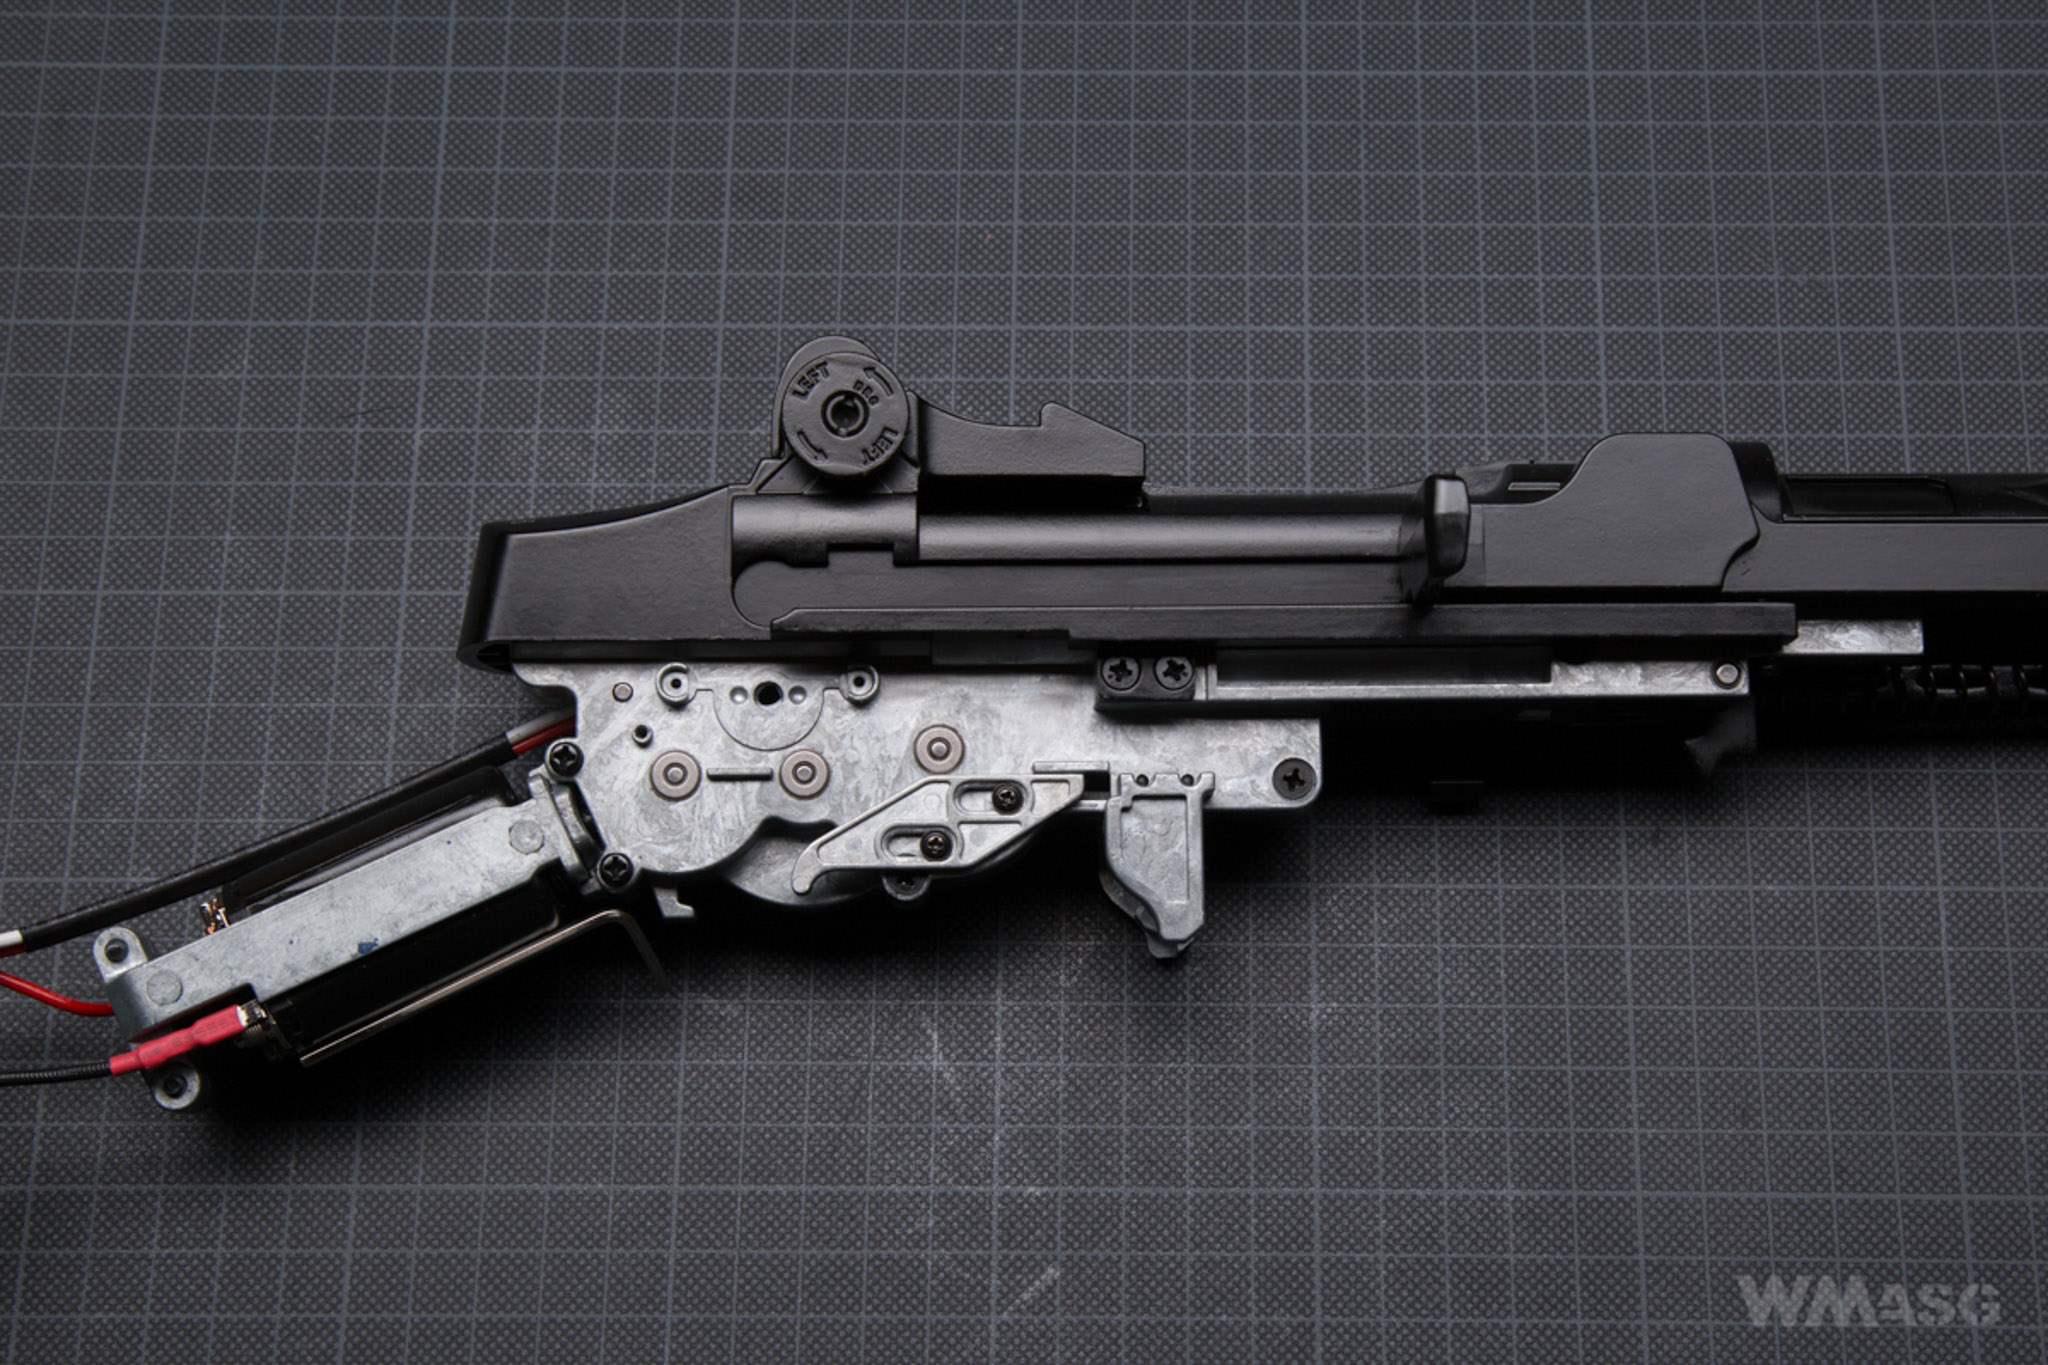
After unscrewing the last 3 screws holding receiver with the gearbox (2 on the right, 1 on the left) and we can the removed gearbox (the picture below shows it with a disassemble trigger plate).
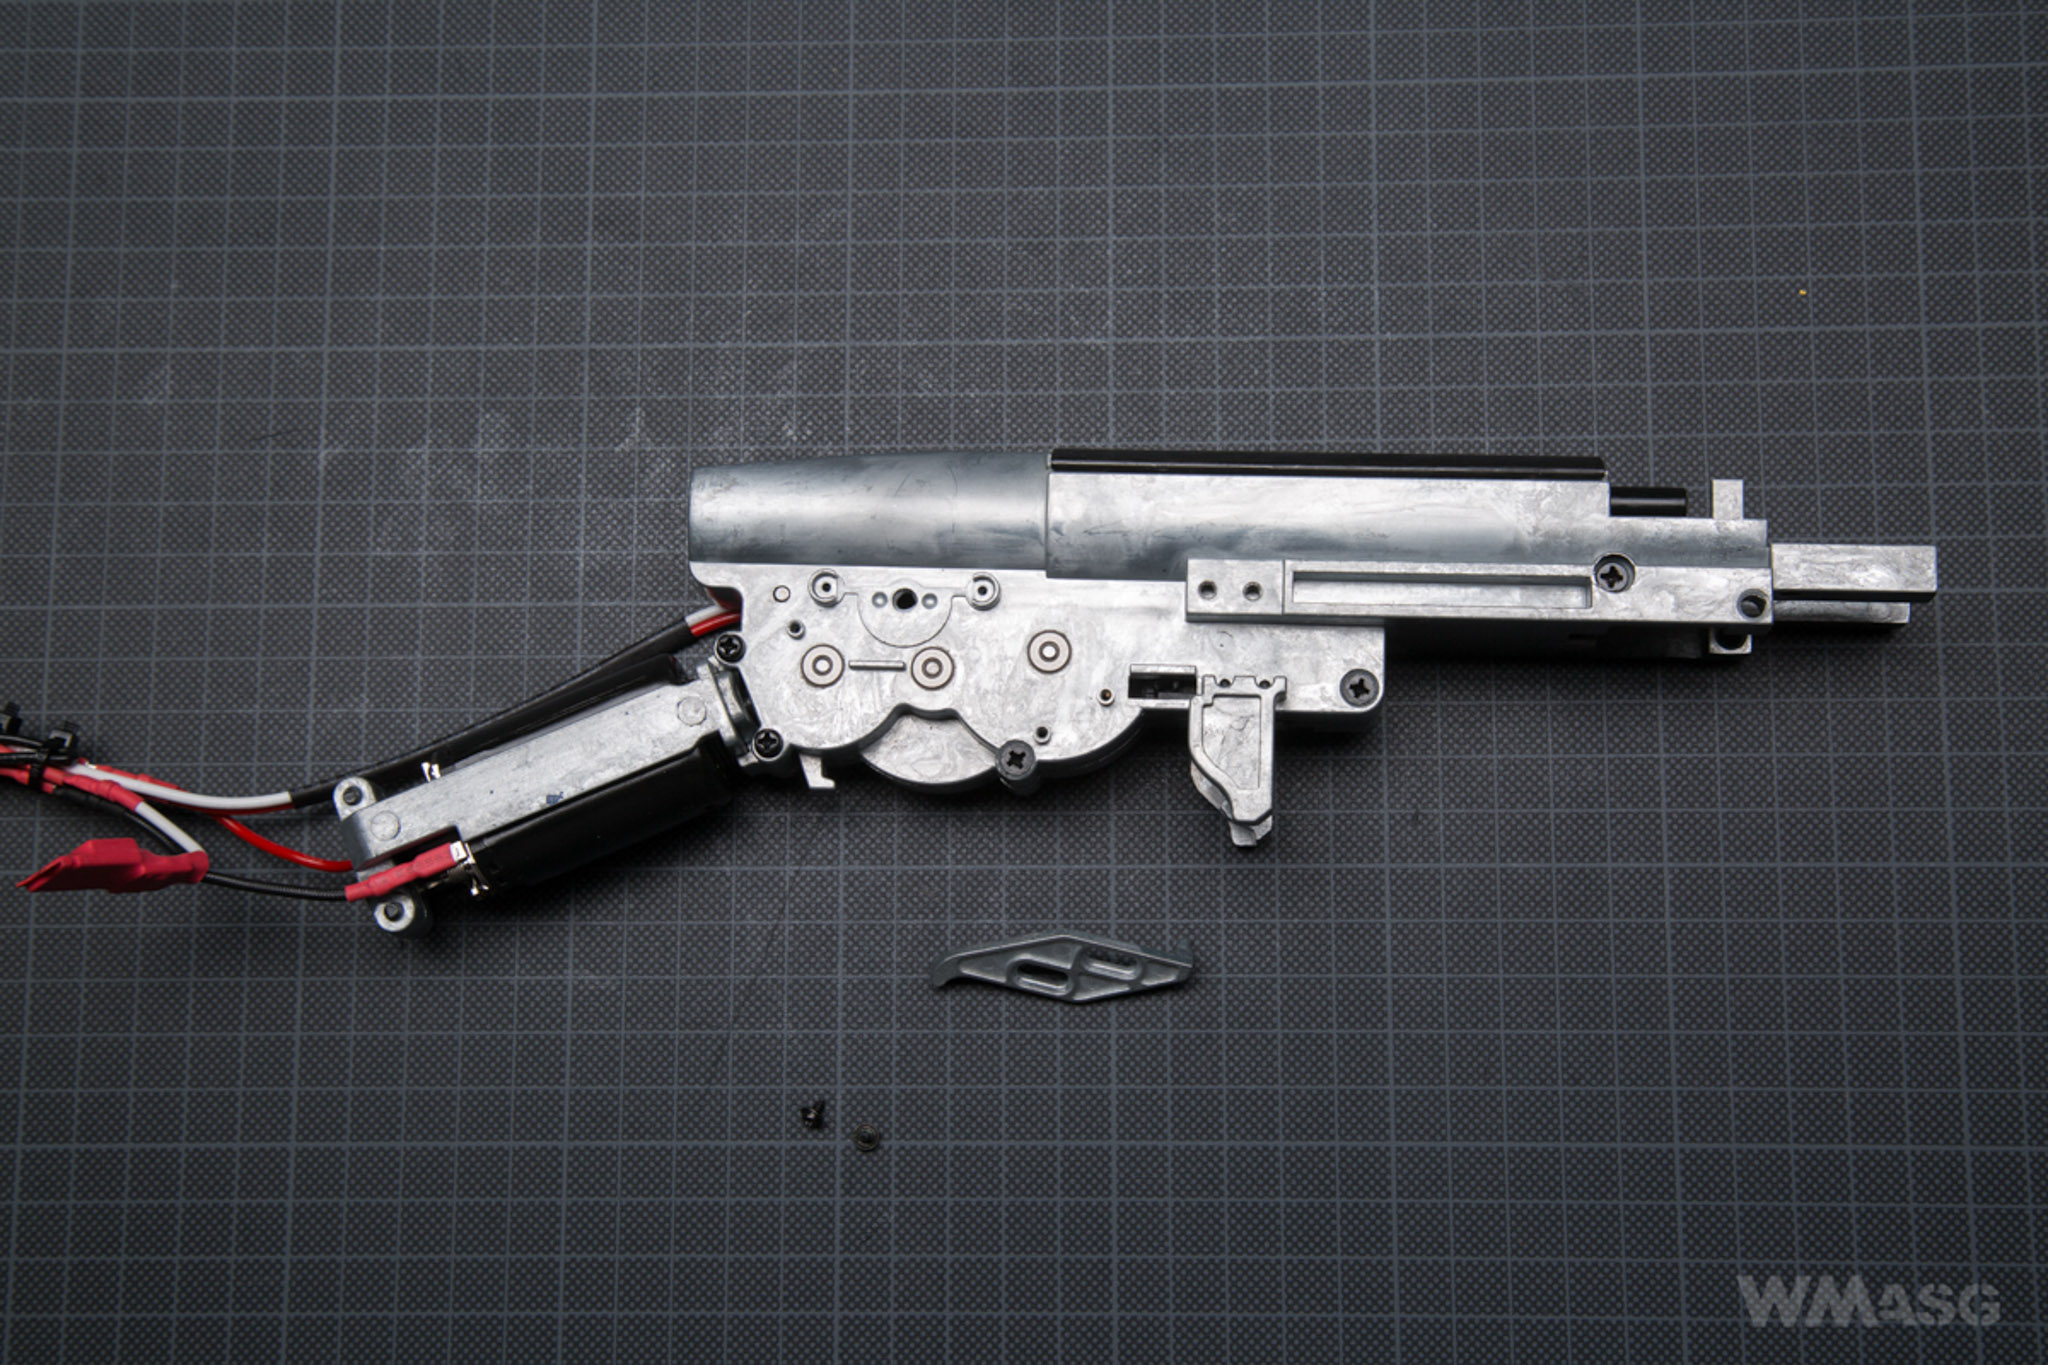
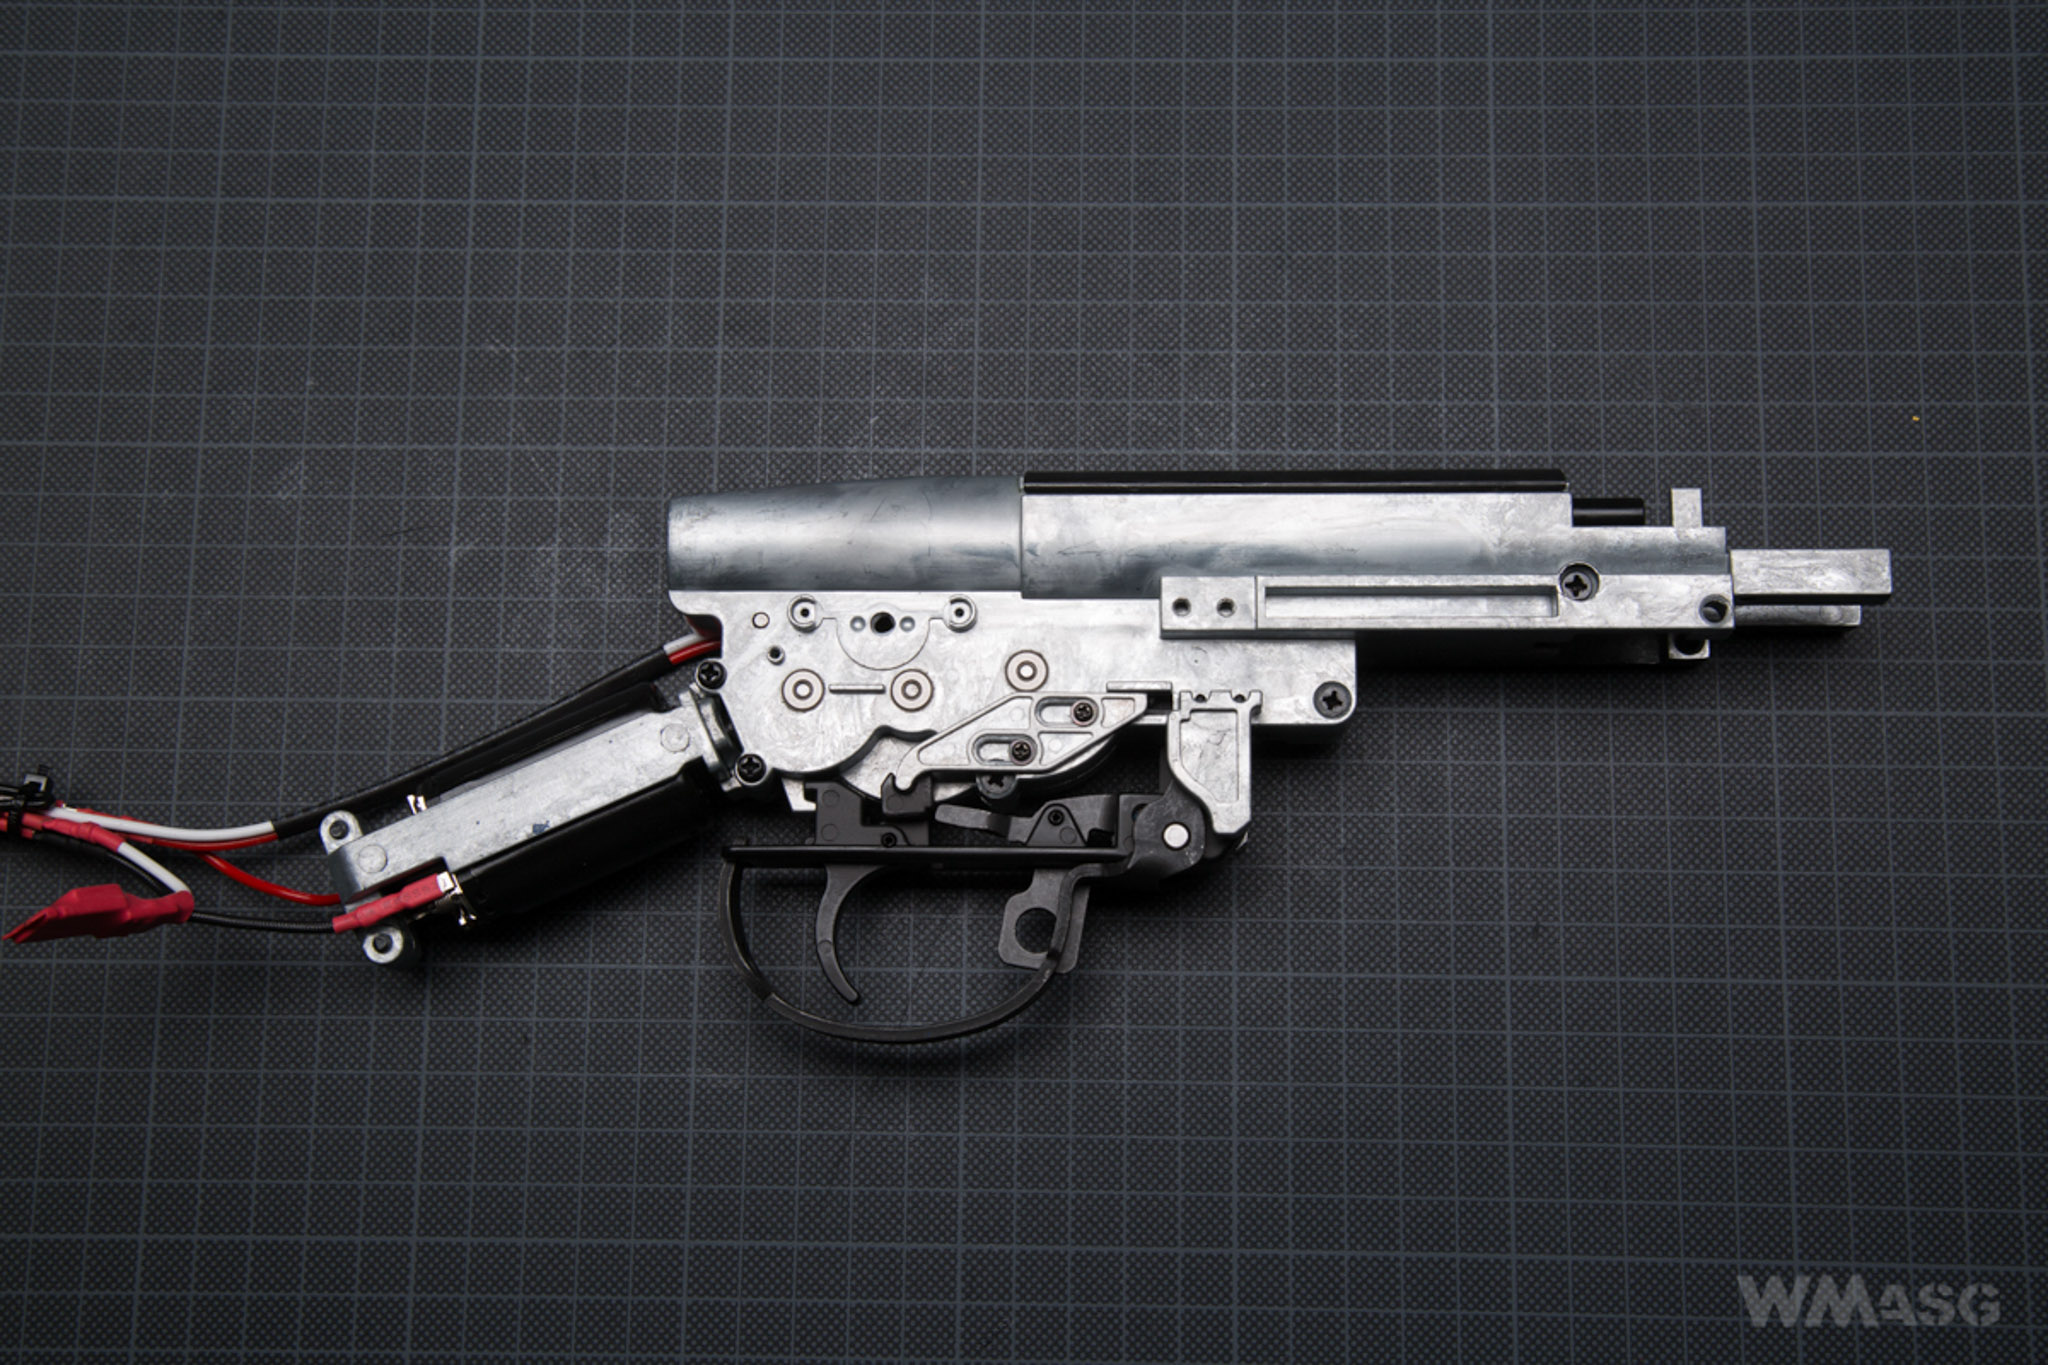
It is worth noting that when working / experimenting with the gearbox, it is possible to attach a trigger with a safety switch and trigger guard for convenience.
Internal parts
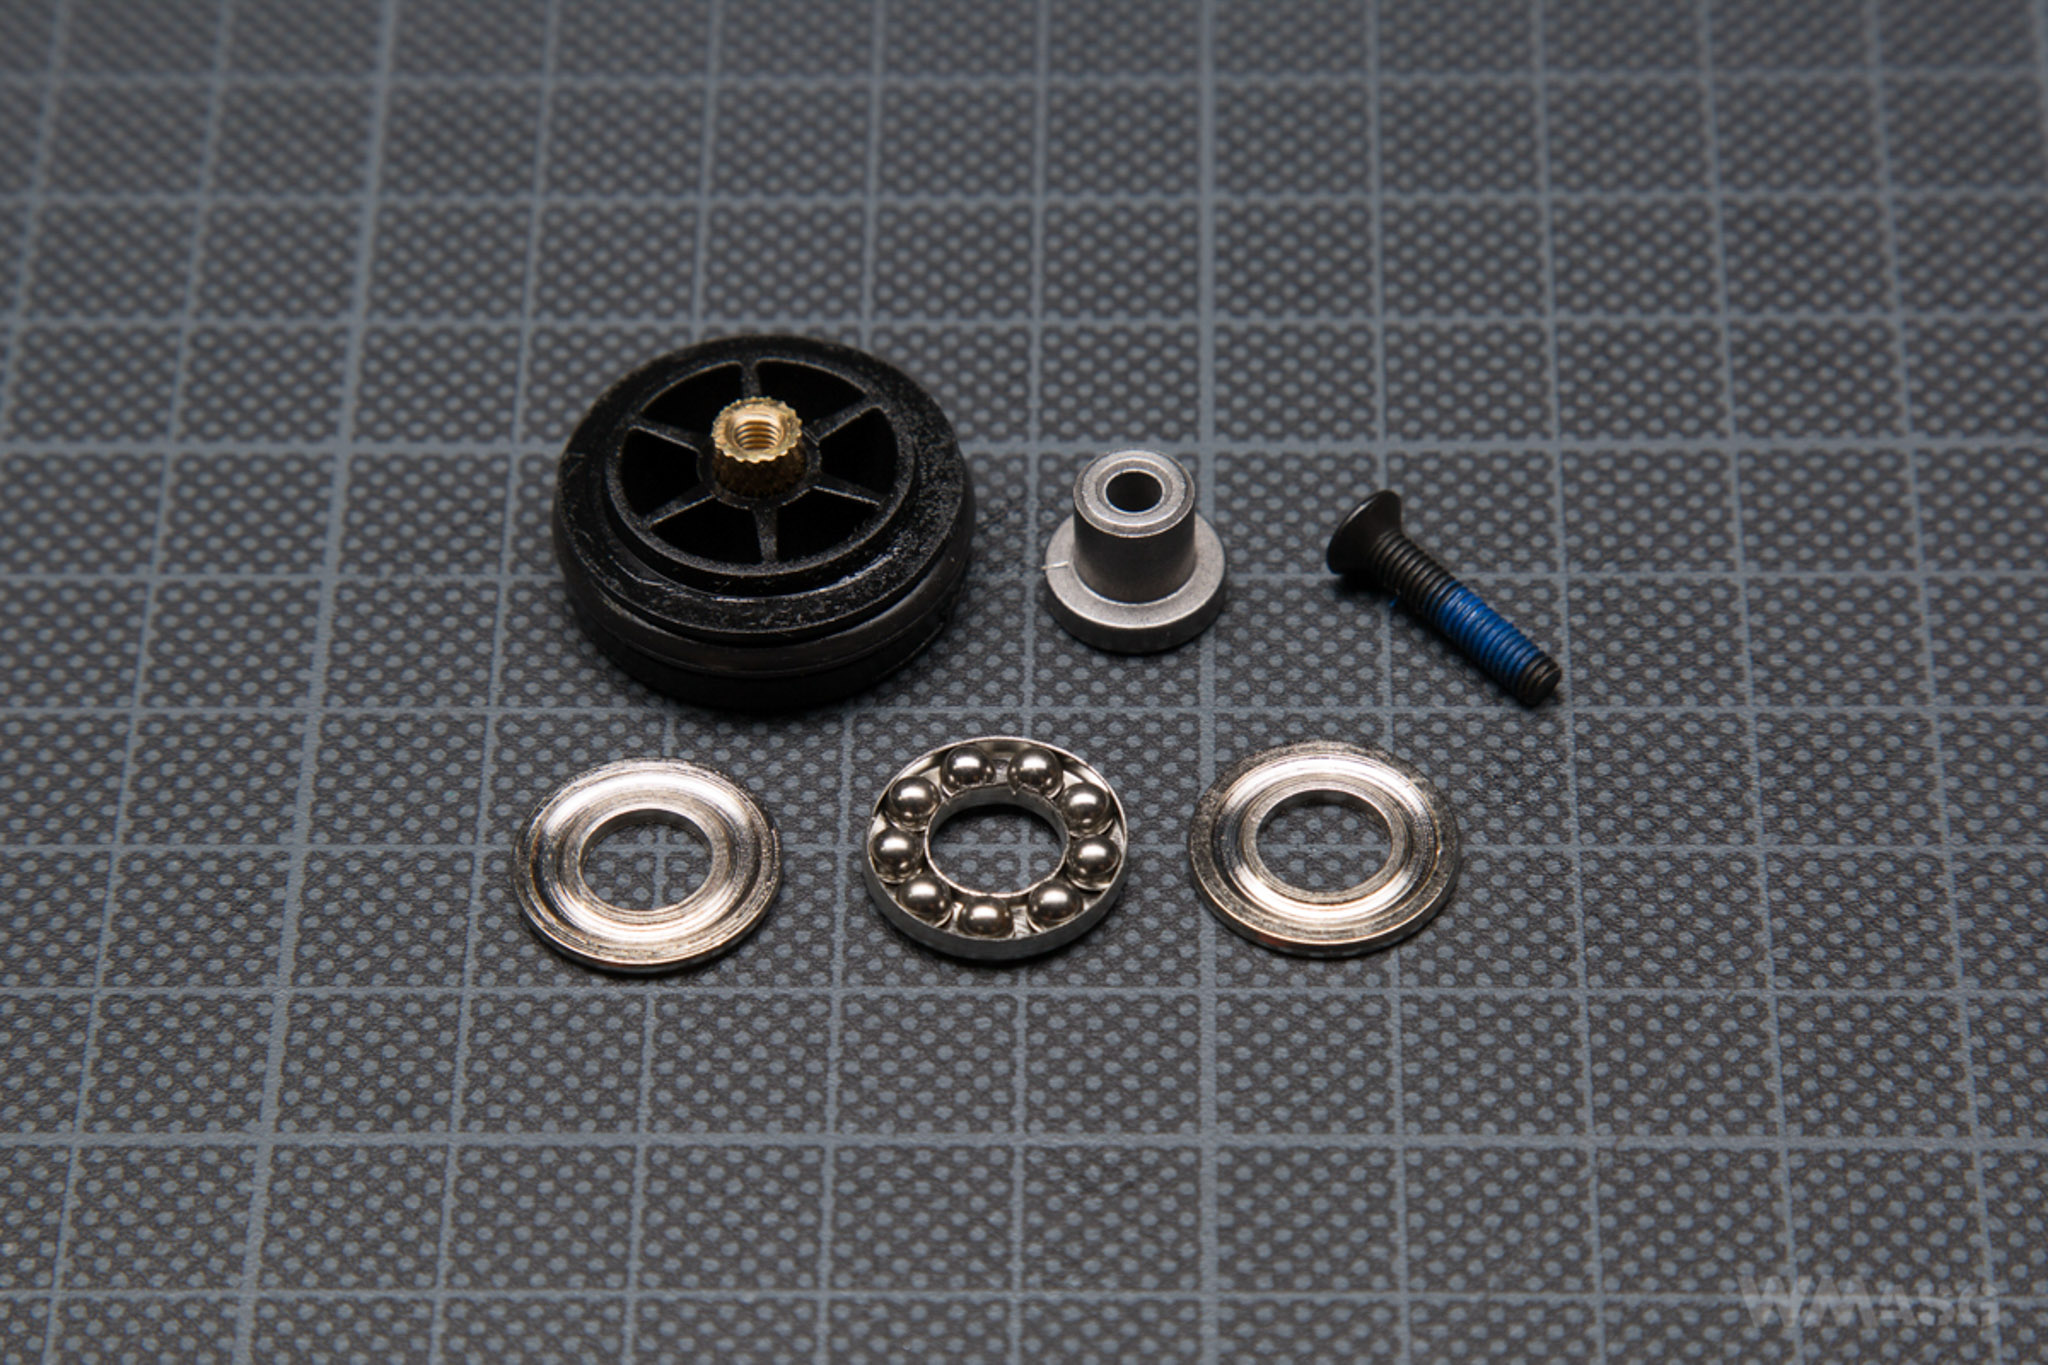
The gearbox’s frame is uniquely designed for the Garand. Areas where the gearbox is exposed to the highest mechanical stress have been reinforced. It uses 8 mm bearings.
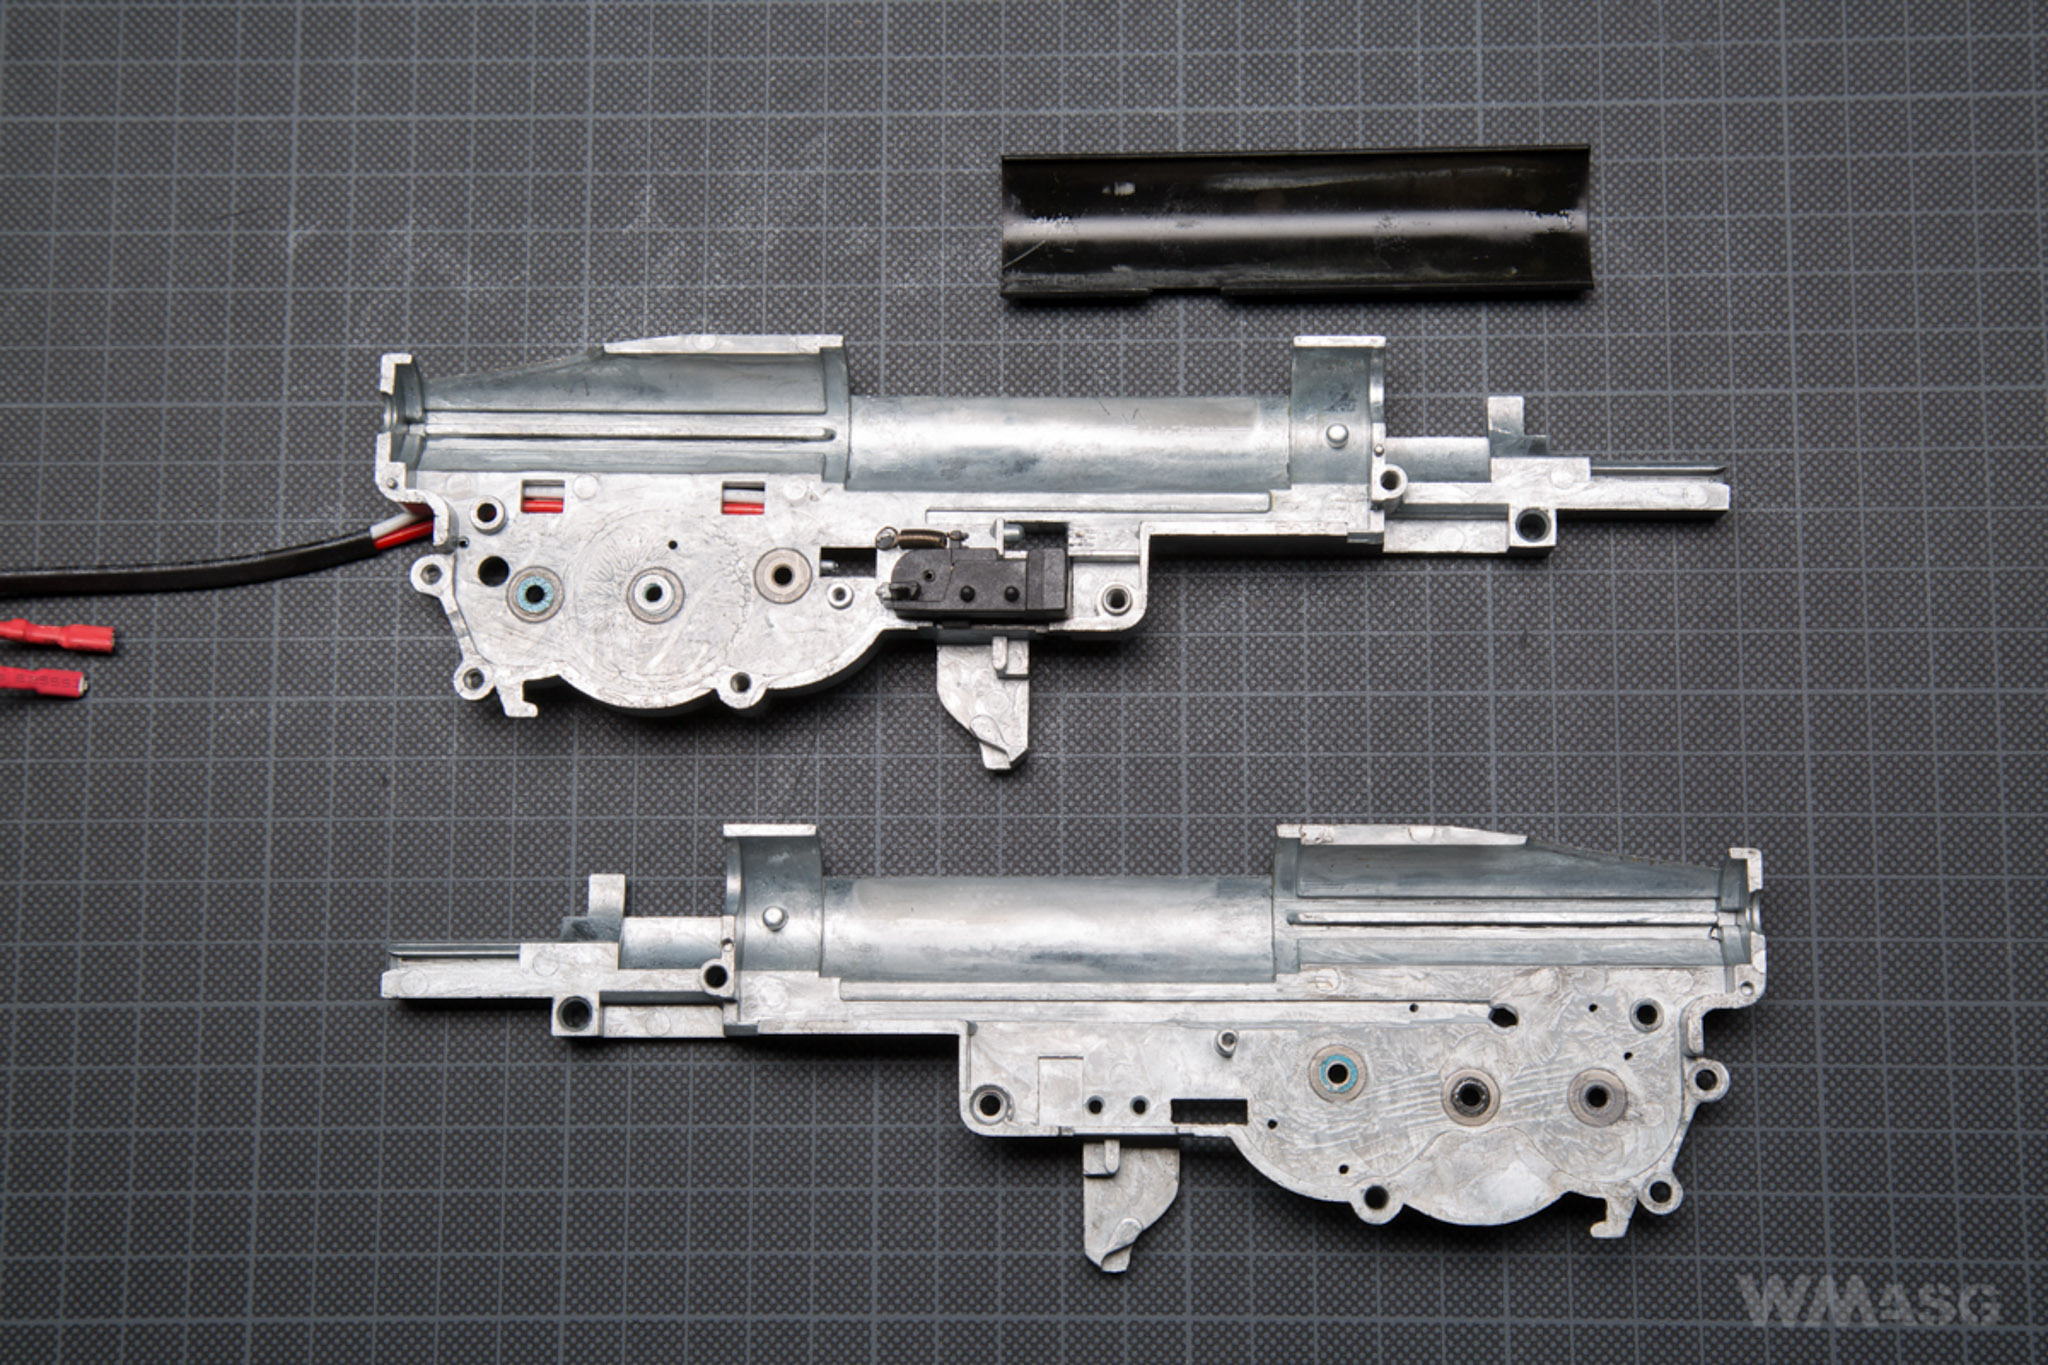
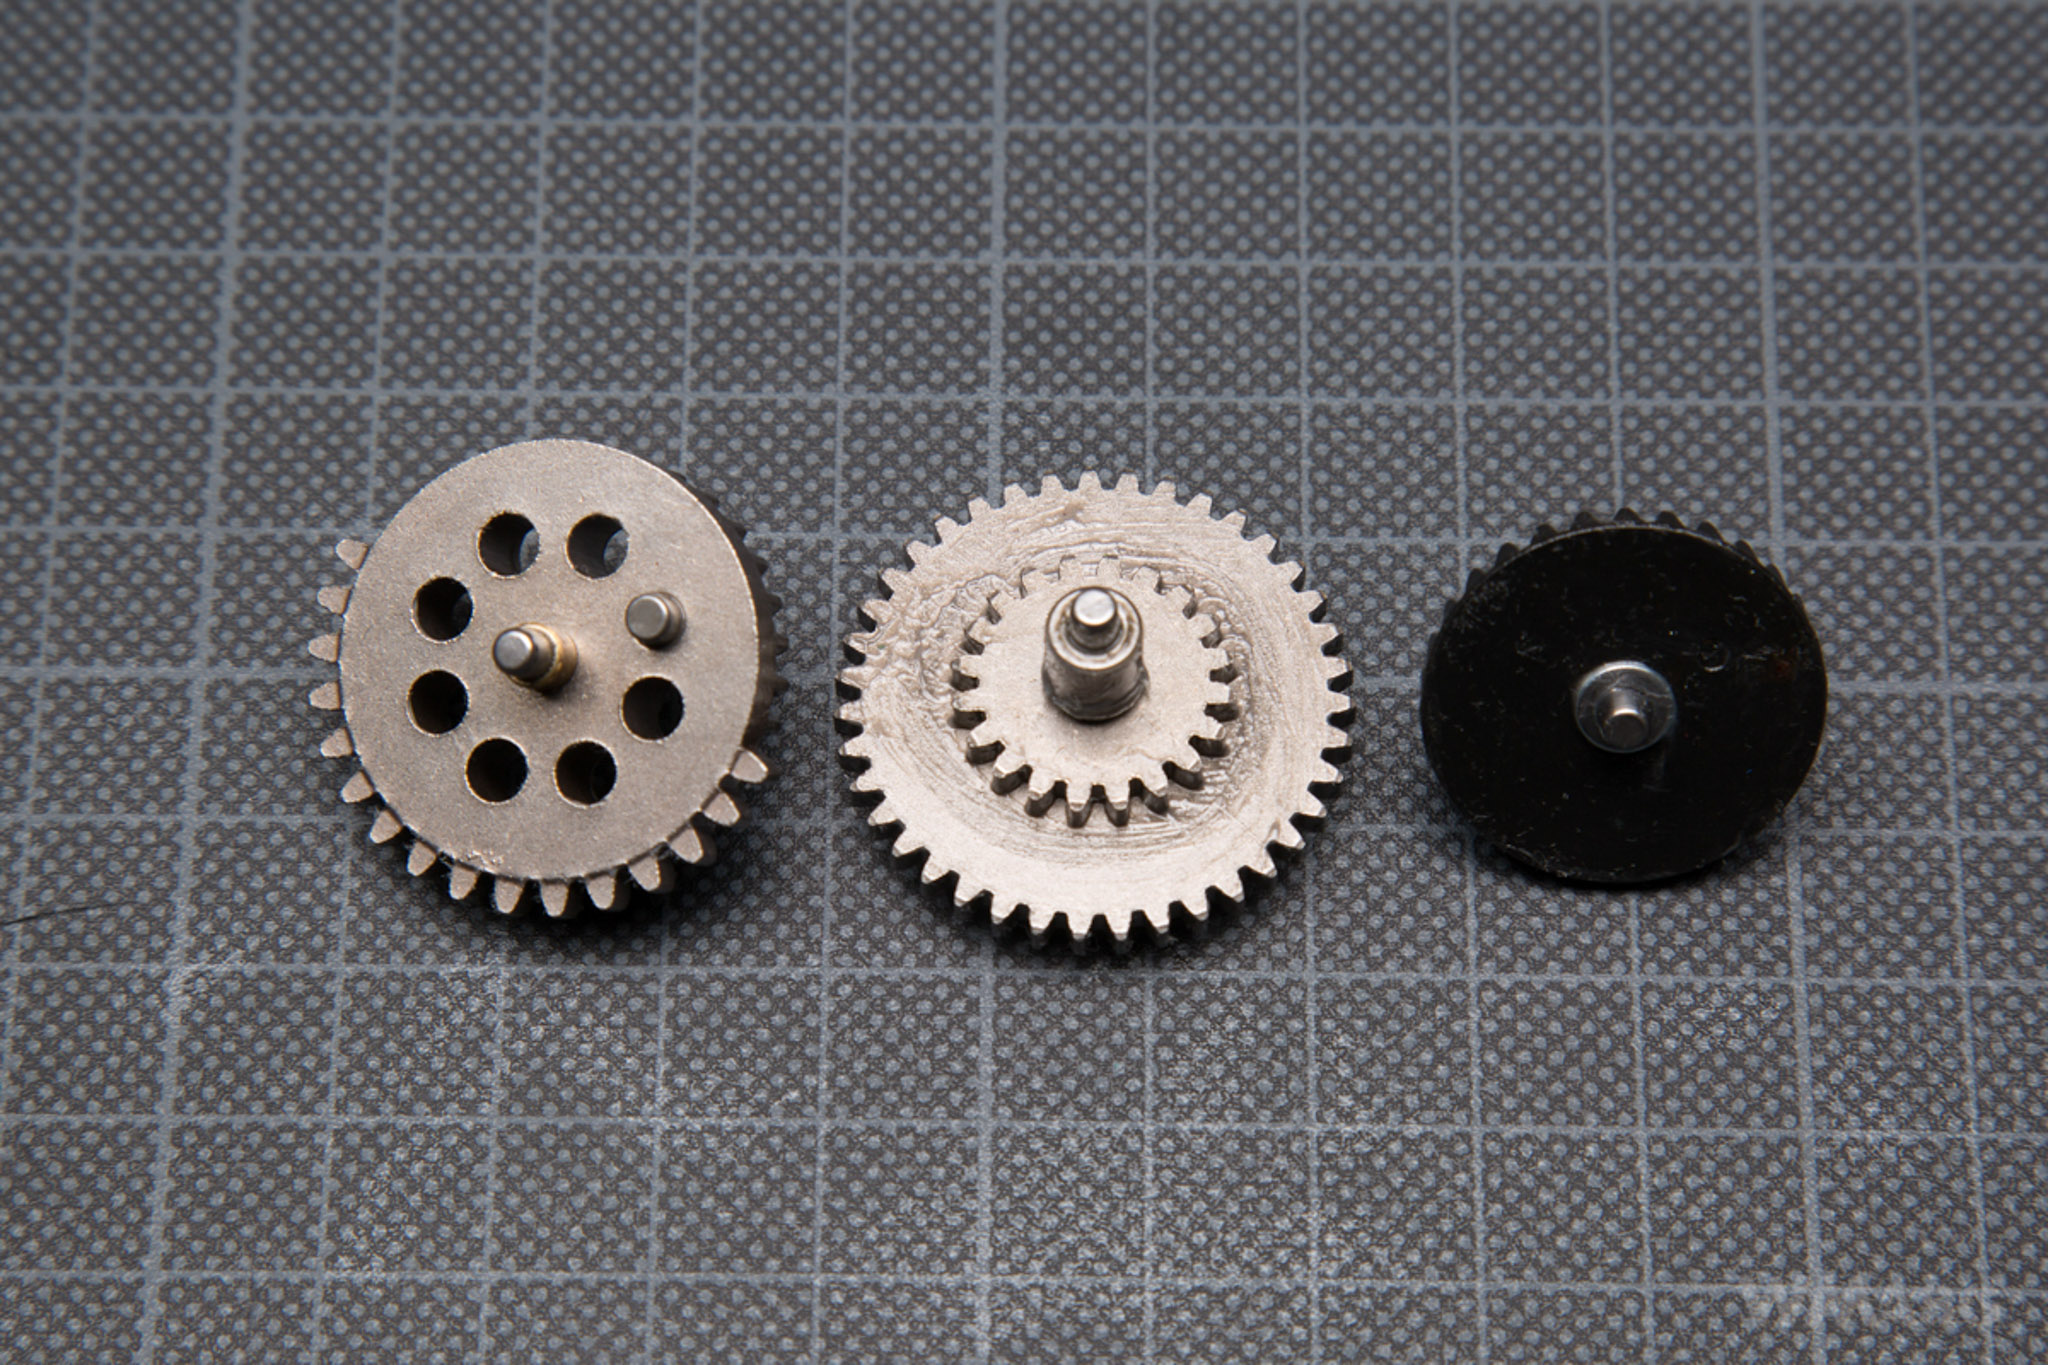
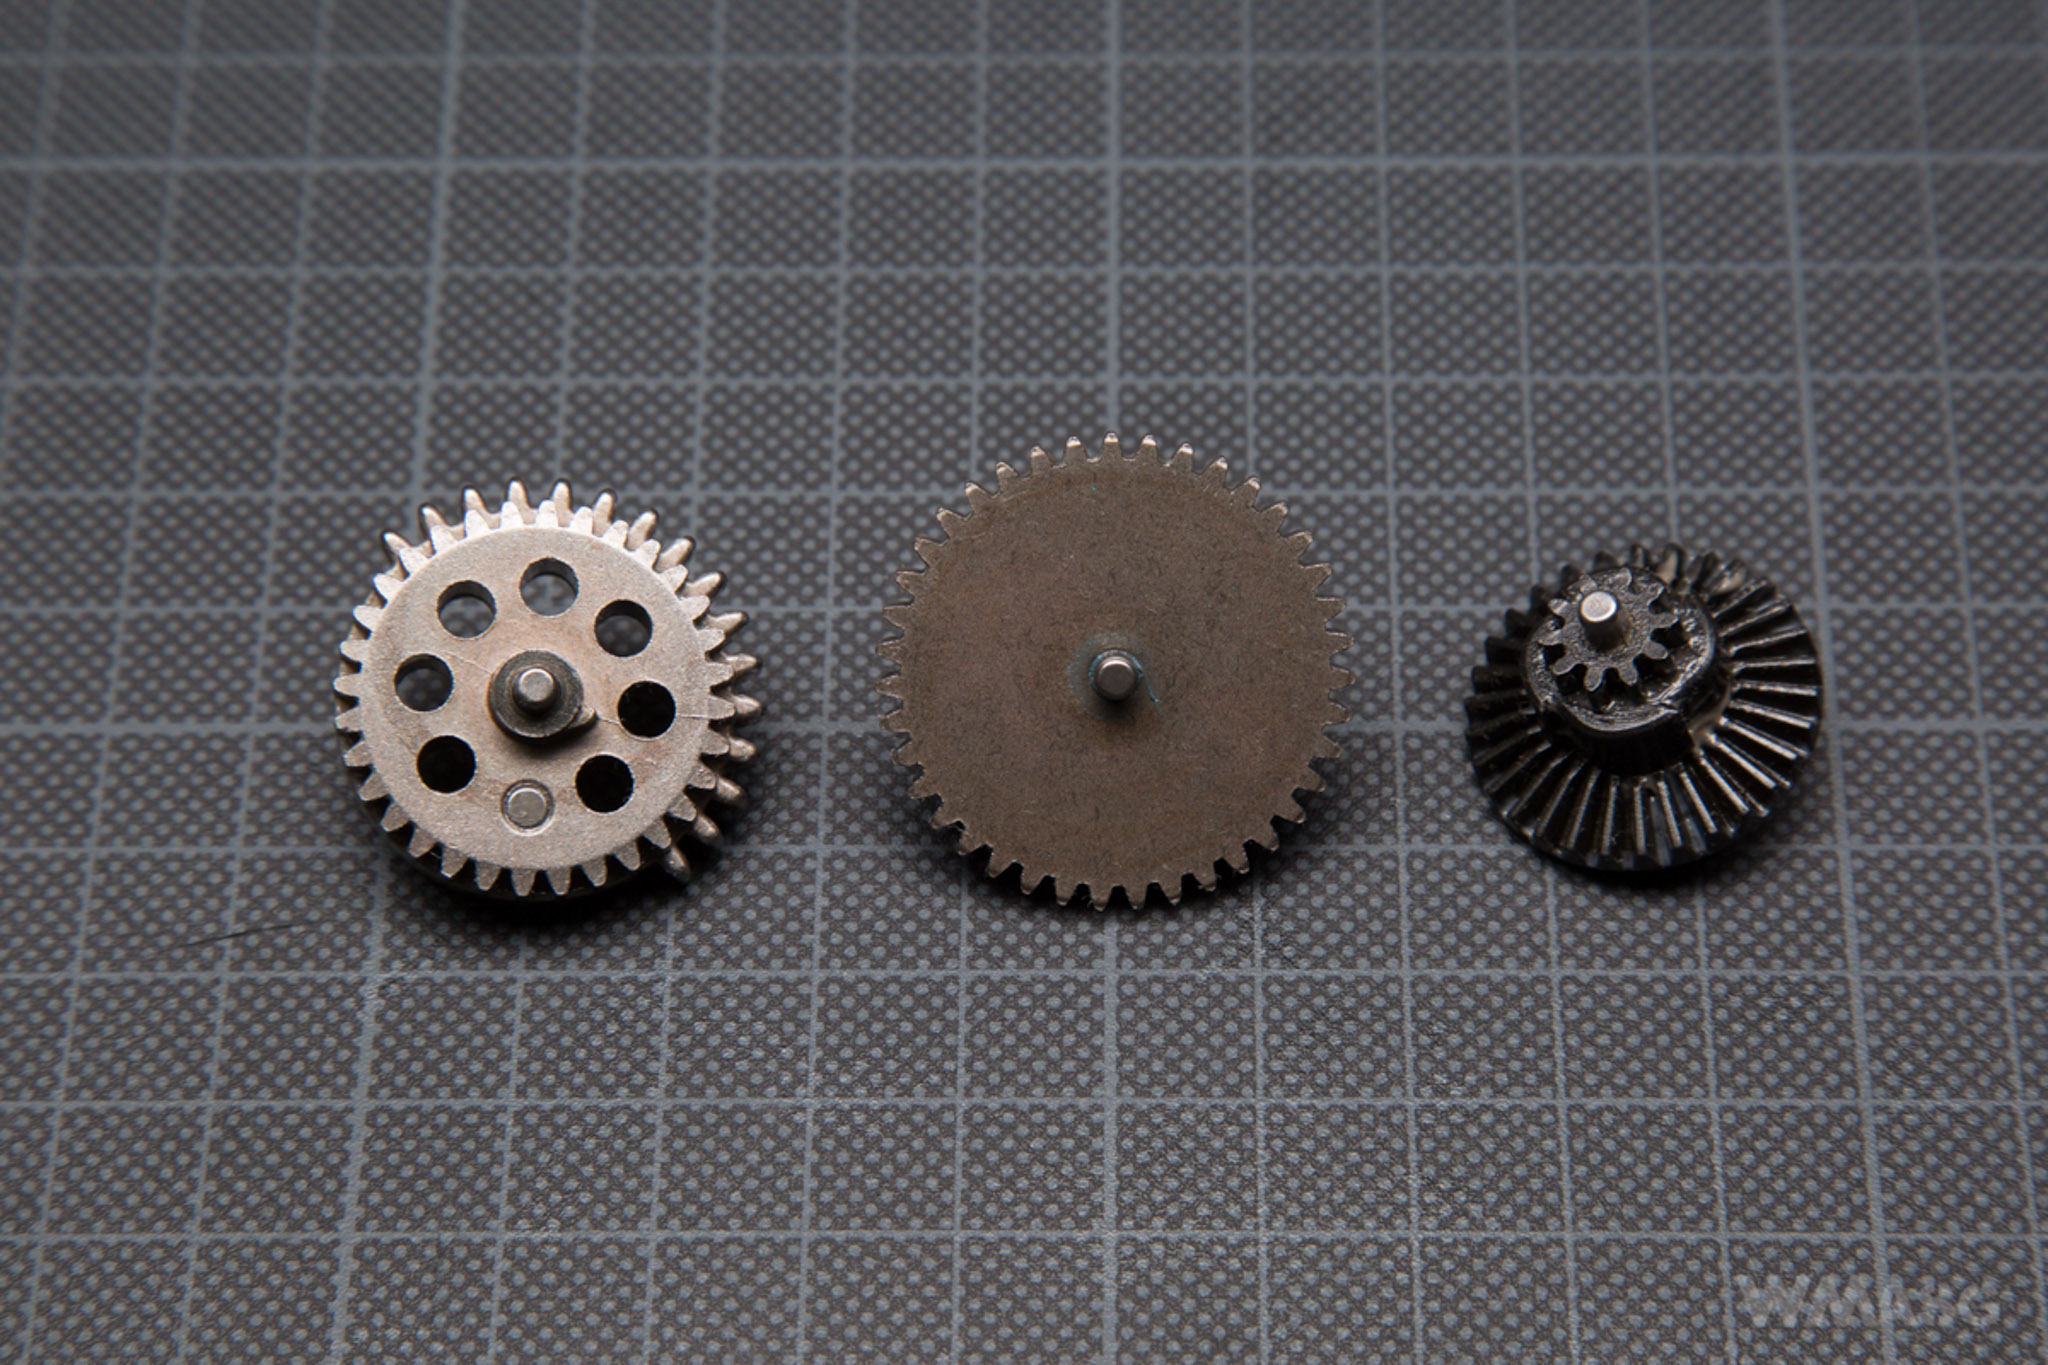
The gears are described in promotional materials as made of steel, reinforced and made using CNC machines. They look very durable. They are factory-mounted on steel bearings.
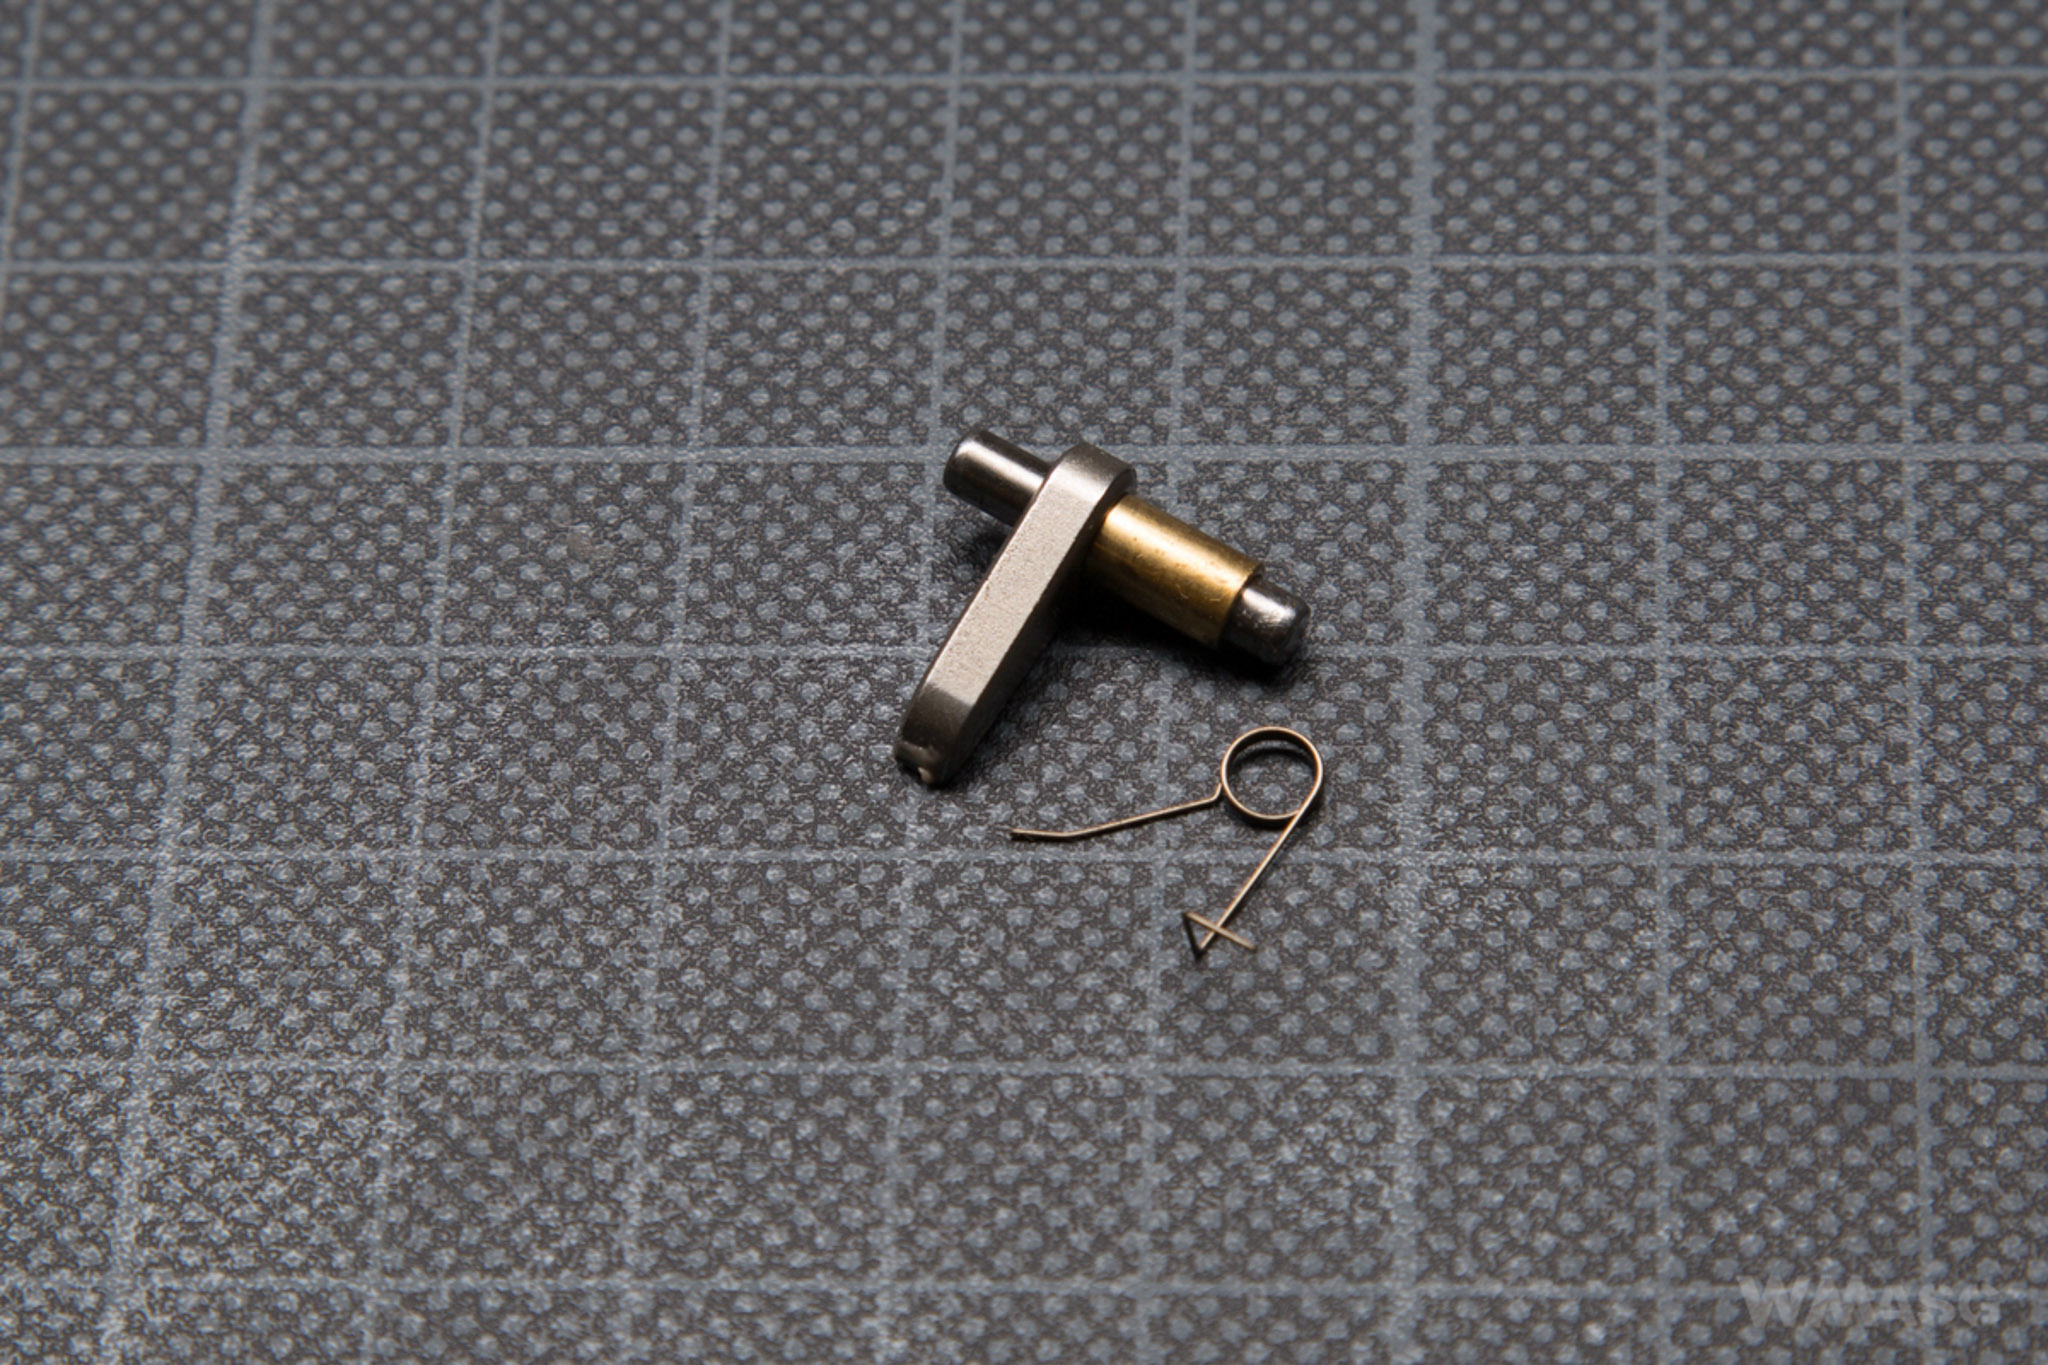
The anti-reversal latch is standard V2 gearbox type.
The pneumatic system
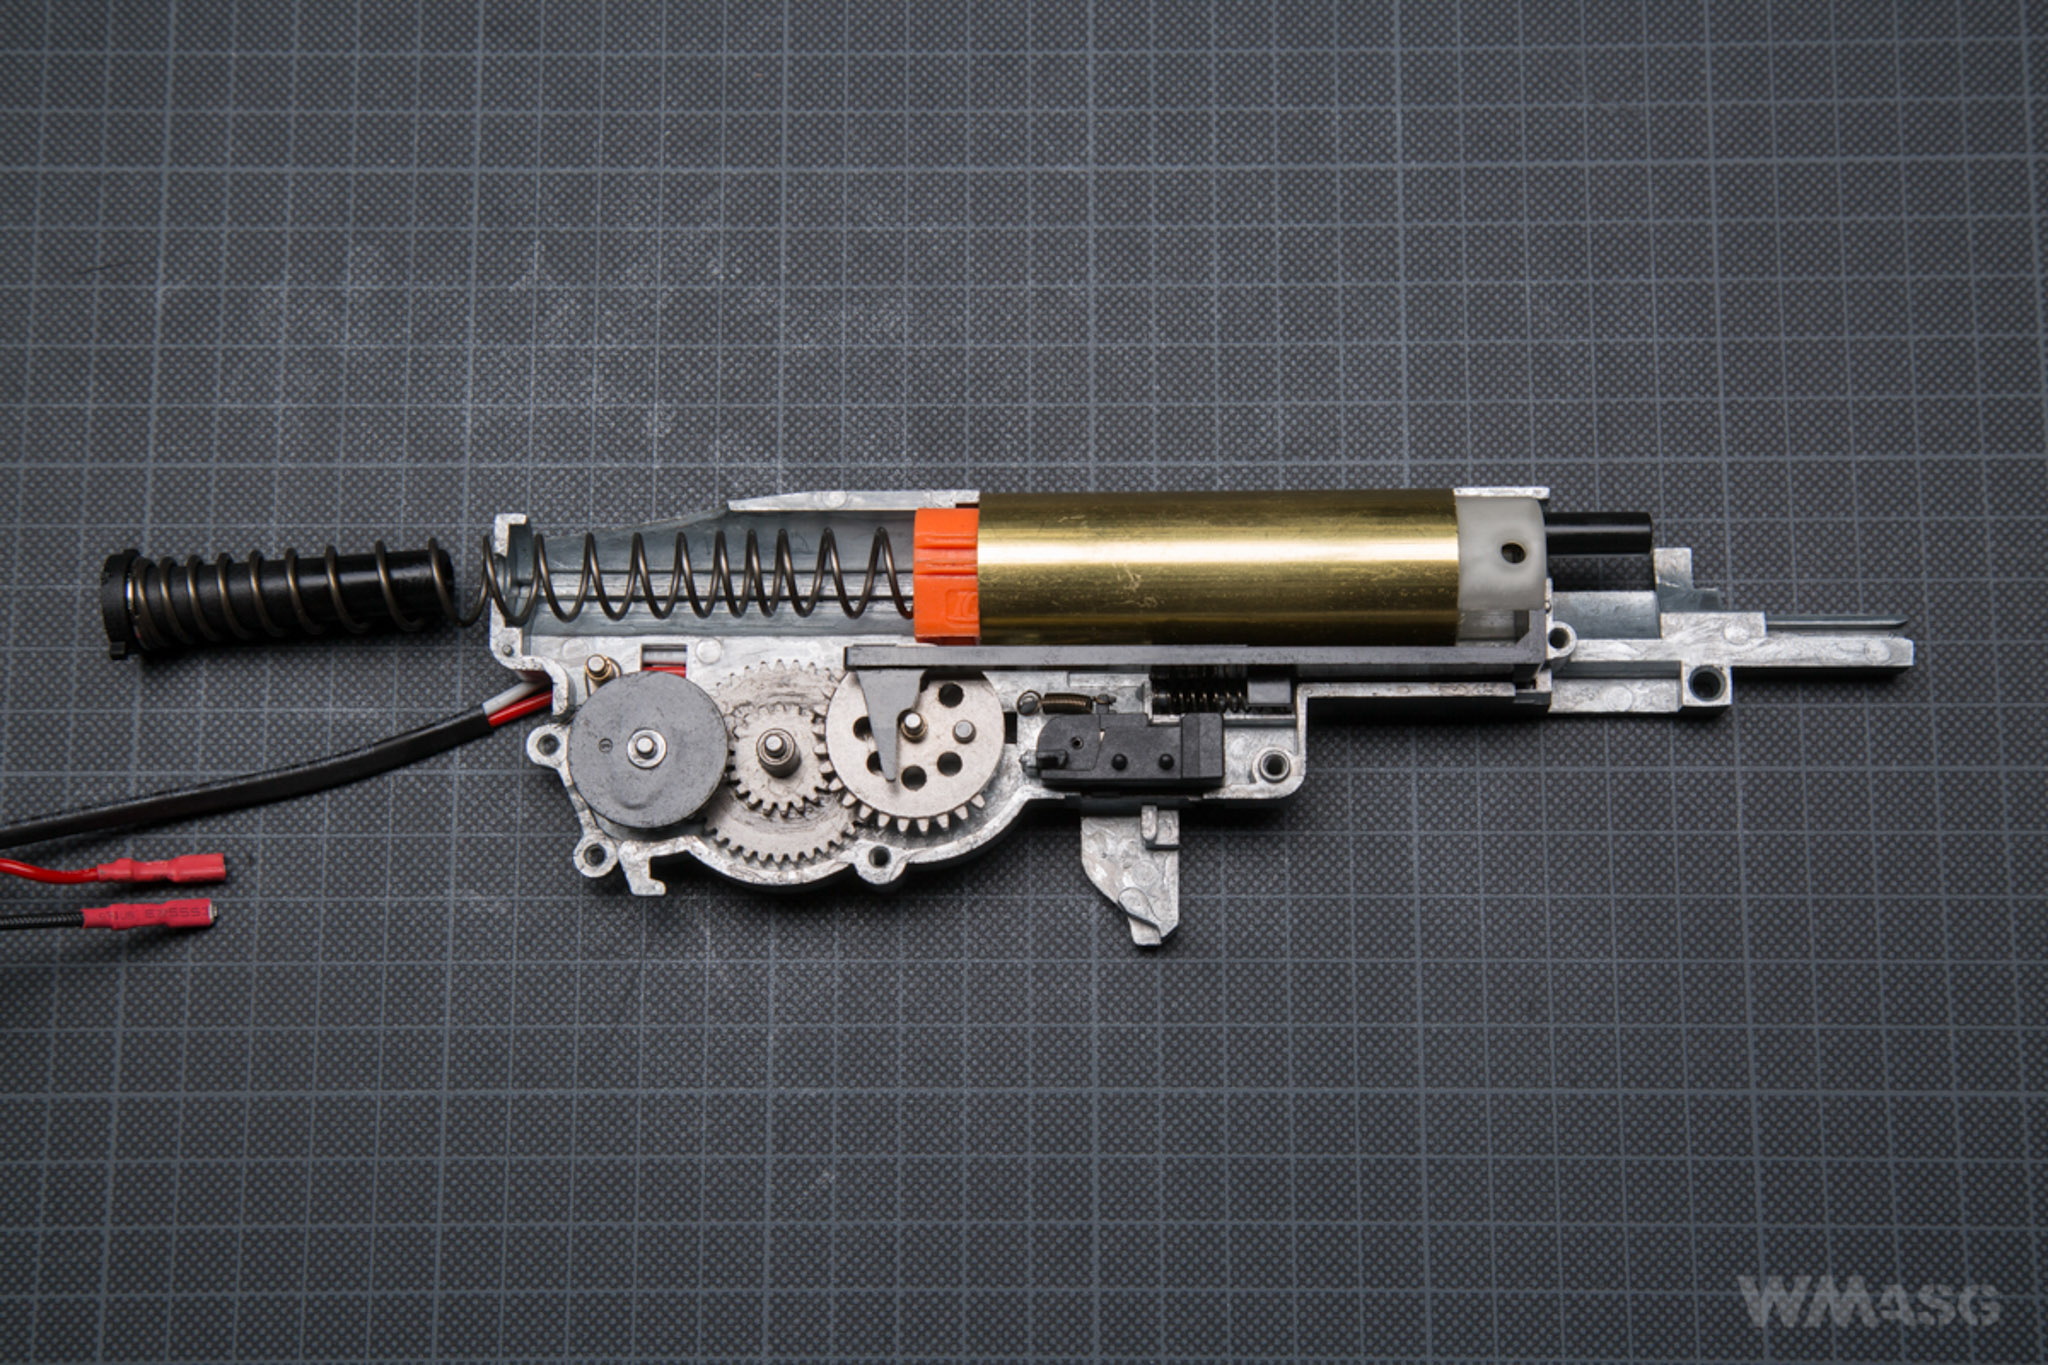
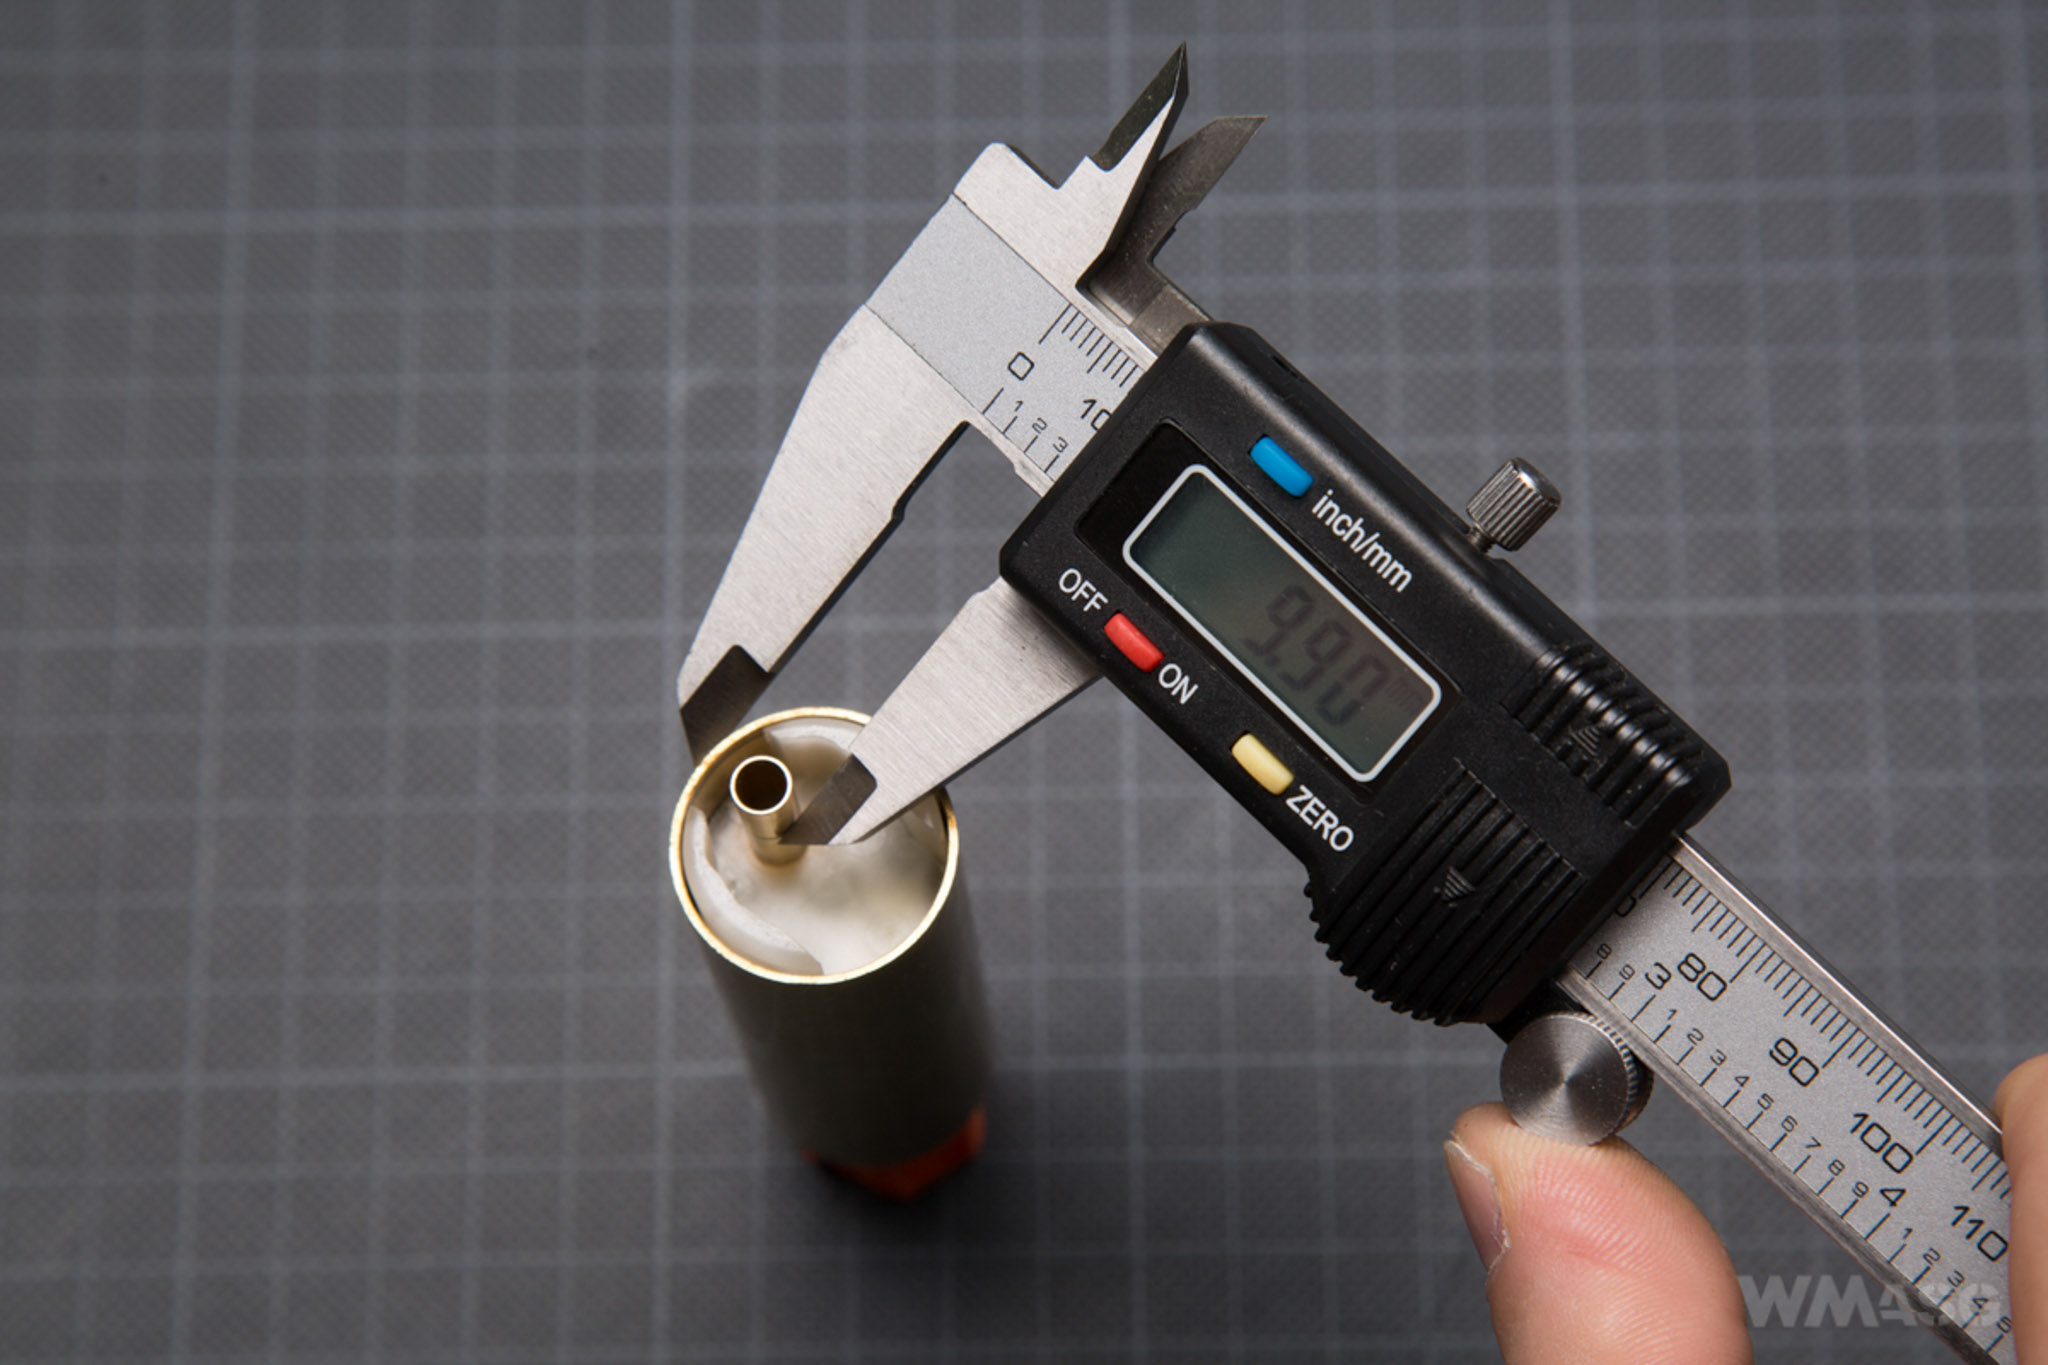
The system is airtight. The cylinder is a type 0 made from brass. The cylinder head is made of plastic and has a flat bumper.
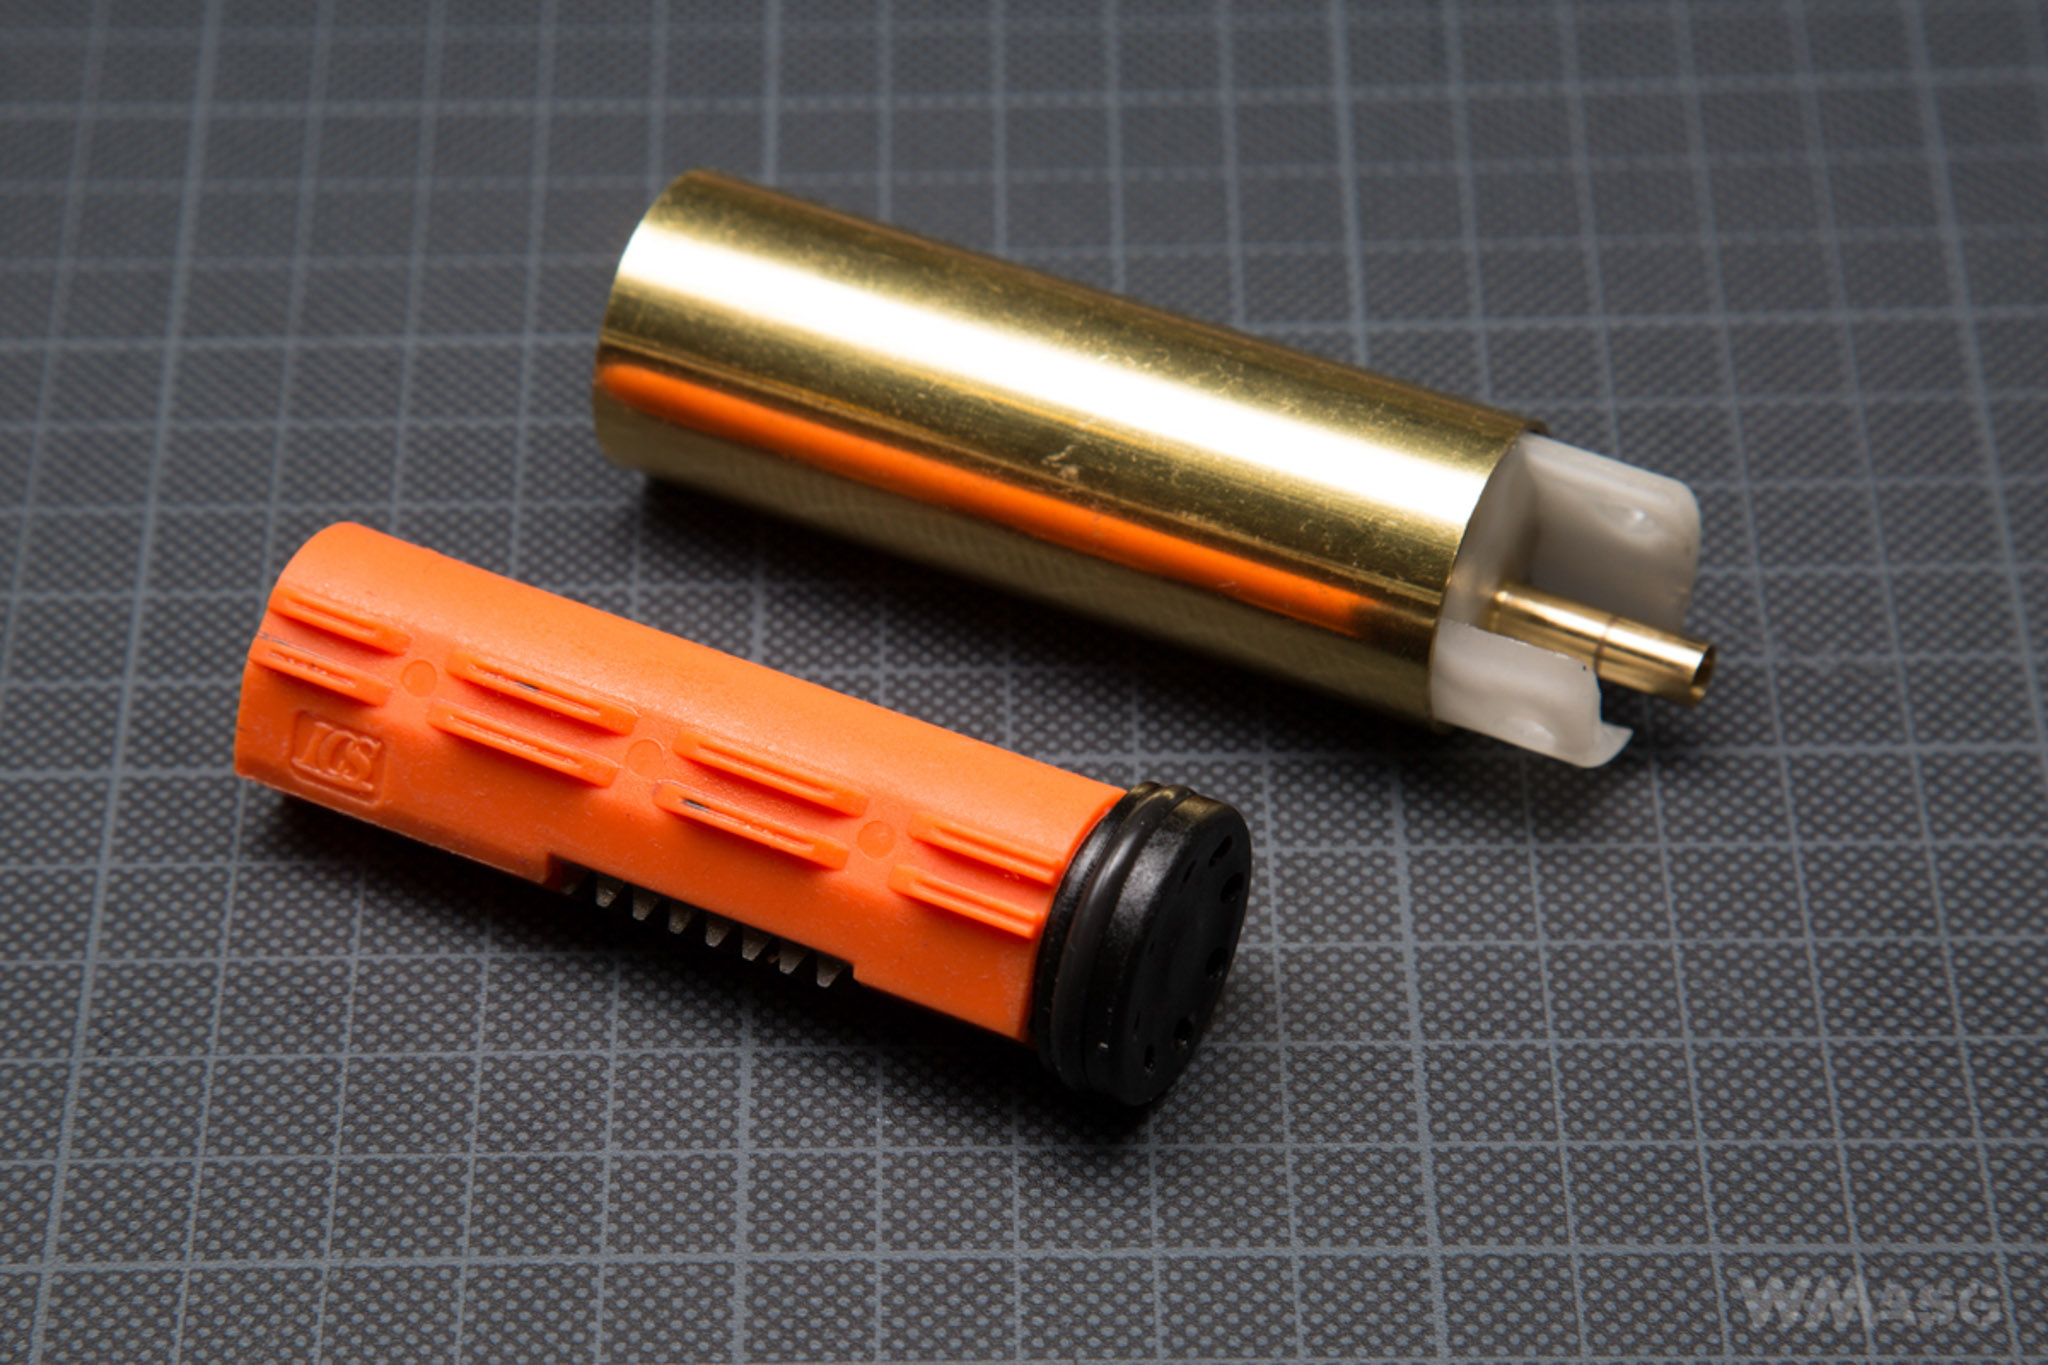
Despite the similarity to the V7 gearbox type, the cylinder head it is not standard.
The reviewed unit had a while cylinder head. There are photos online which show ones made off black plastic.
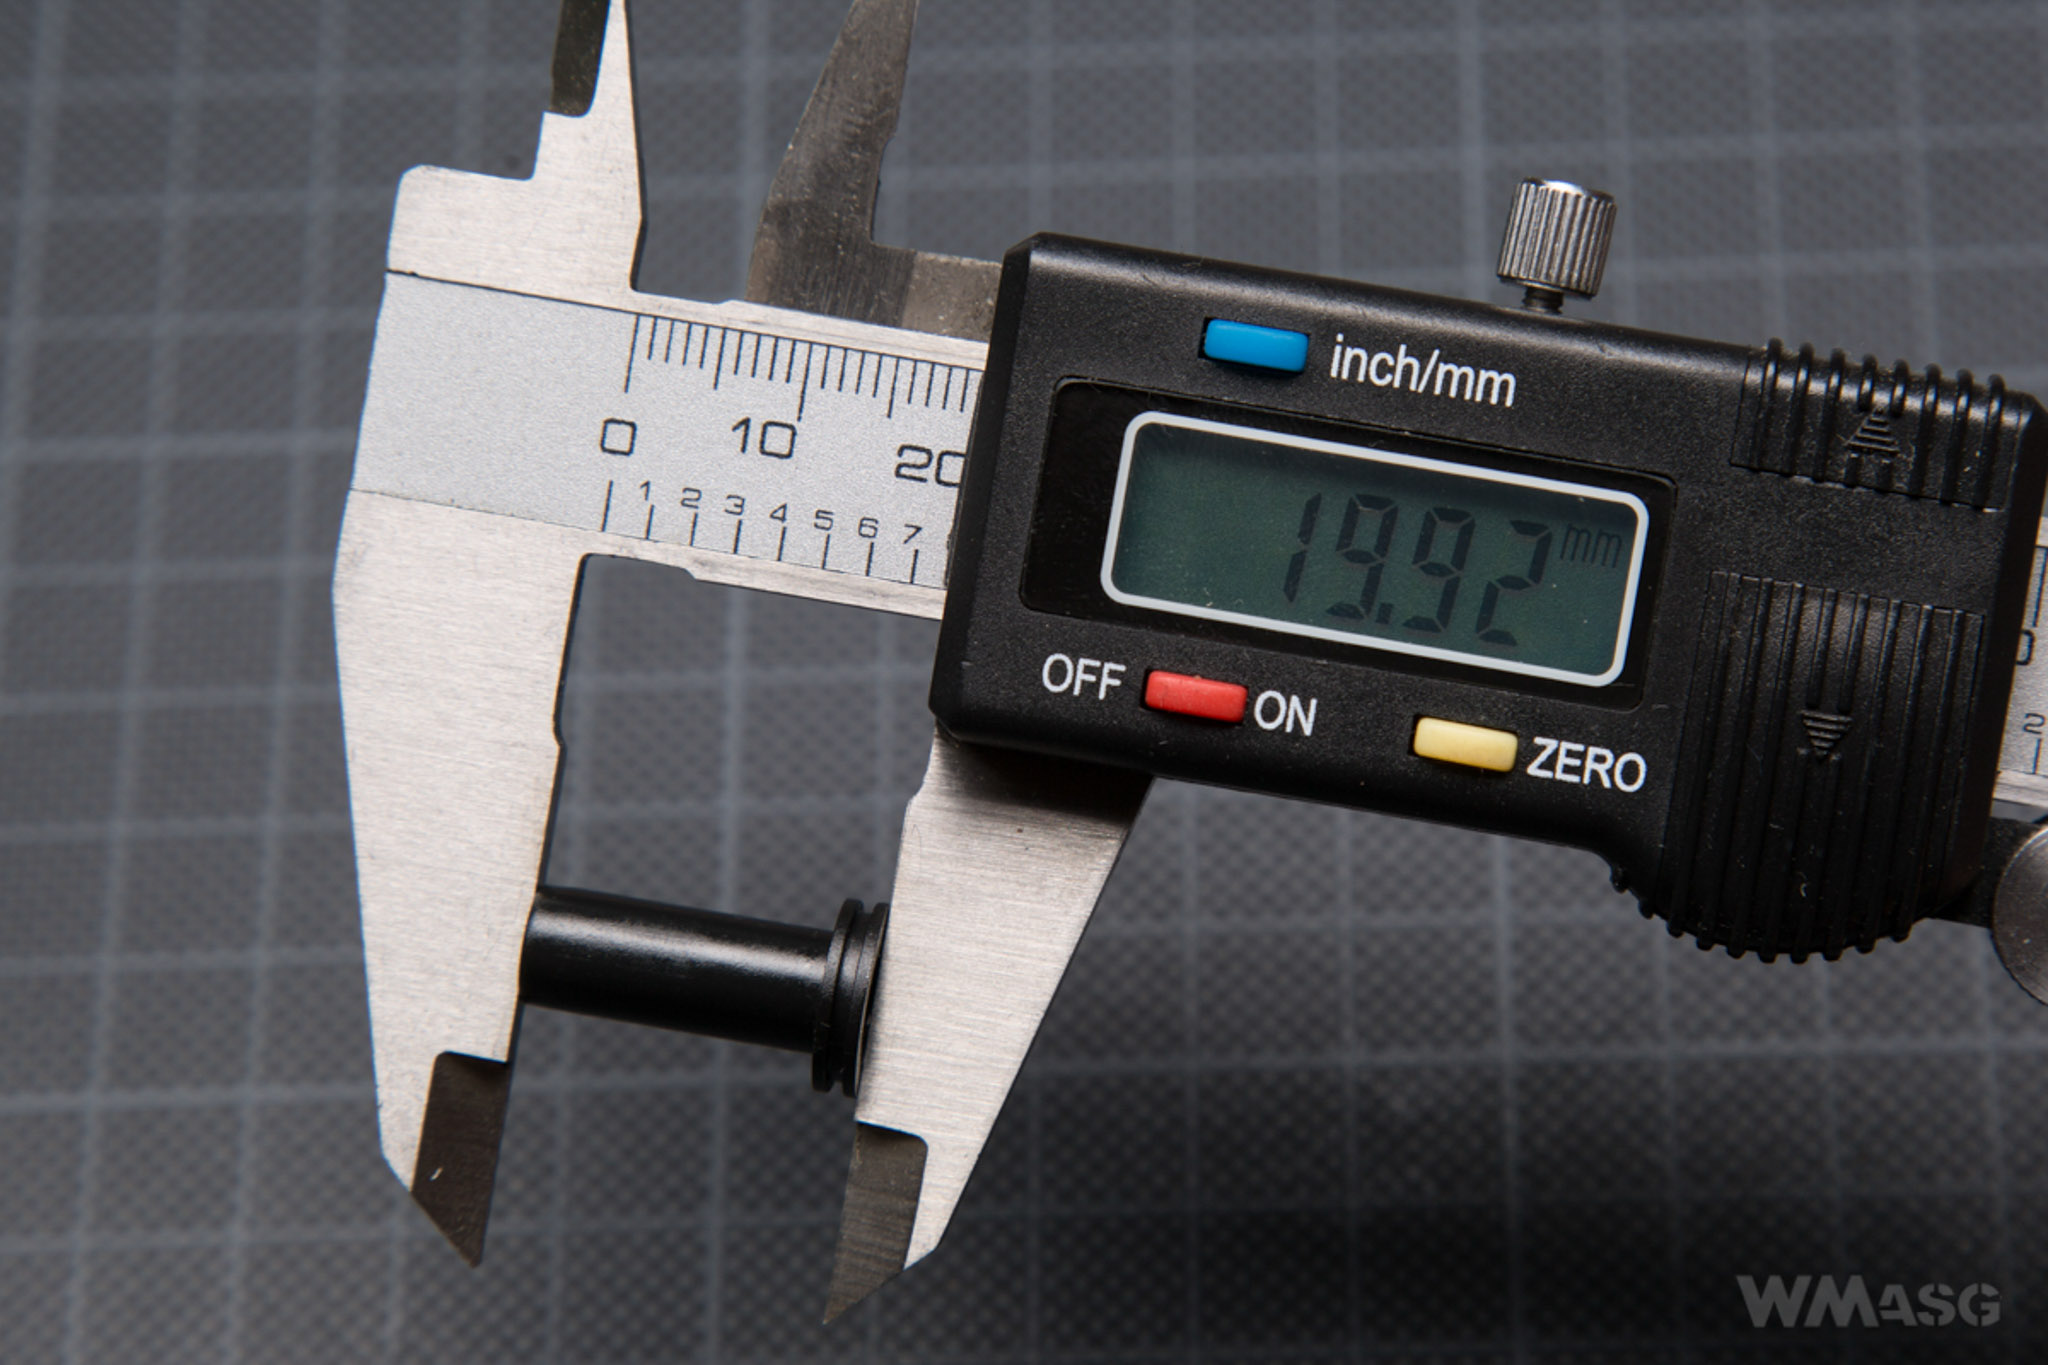
A nozzle used is 19.92 mm long and has an o-ring for increased seal.
A piston is different from the ones used in ICS blowback replicas. It is made very precisely from a sturdy looking material. It has eight steel teeth.
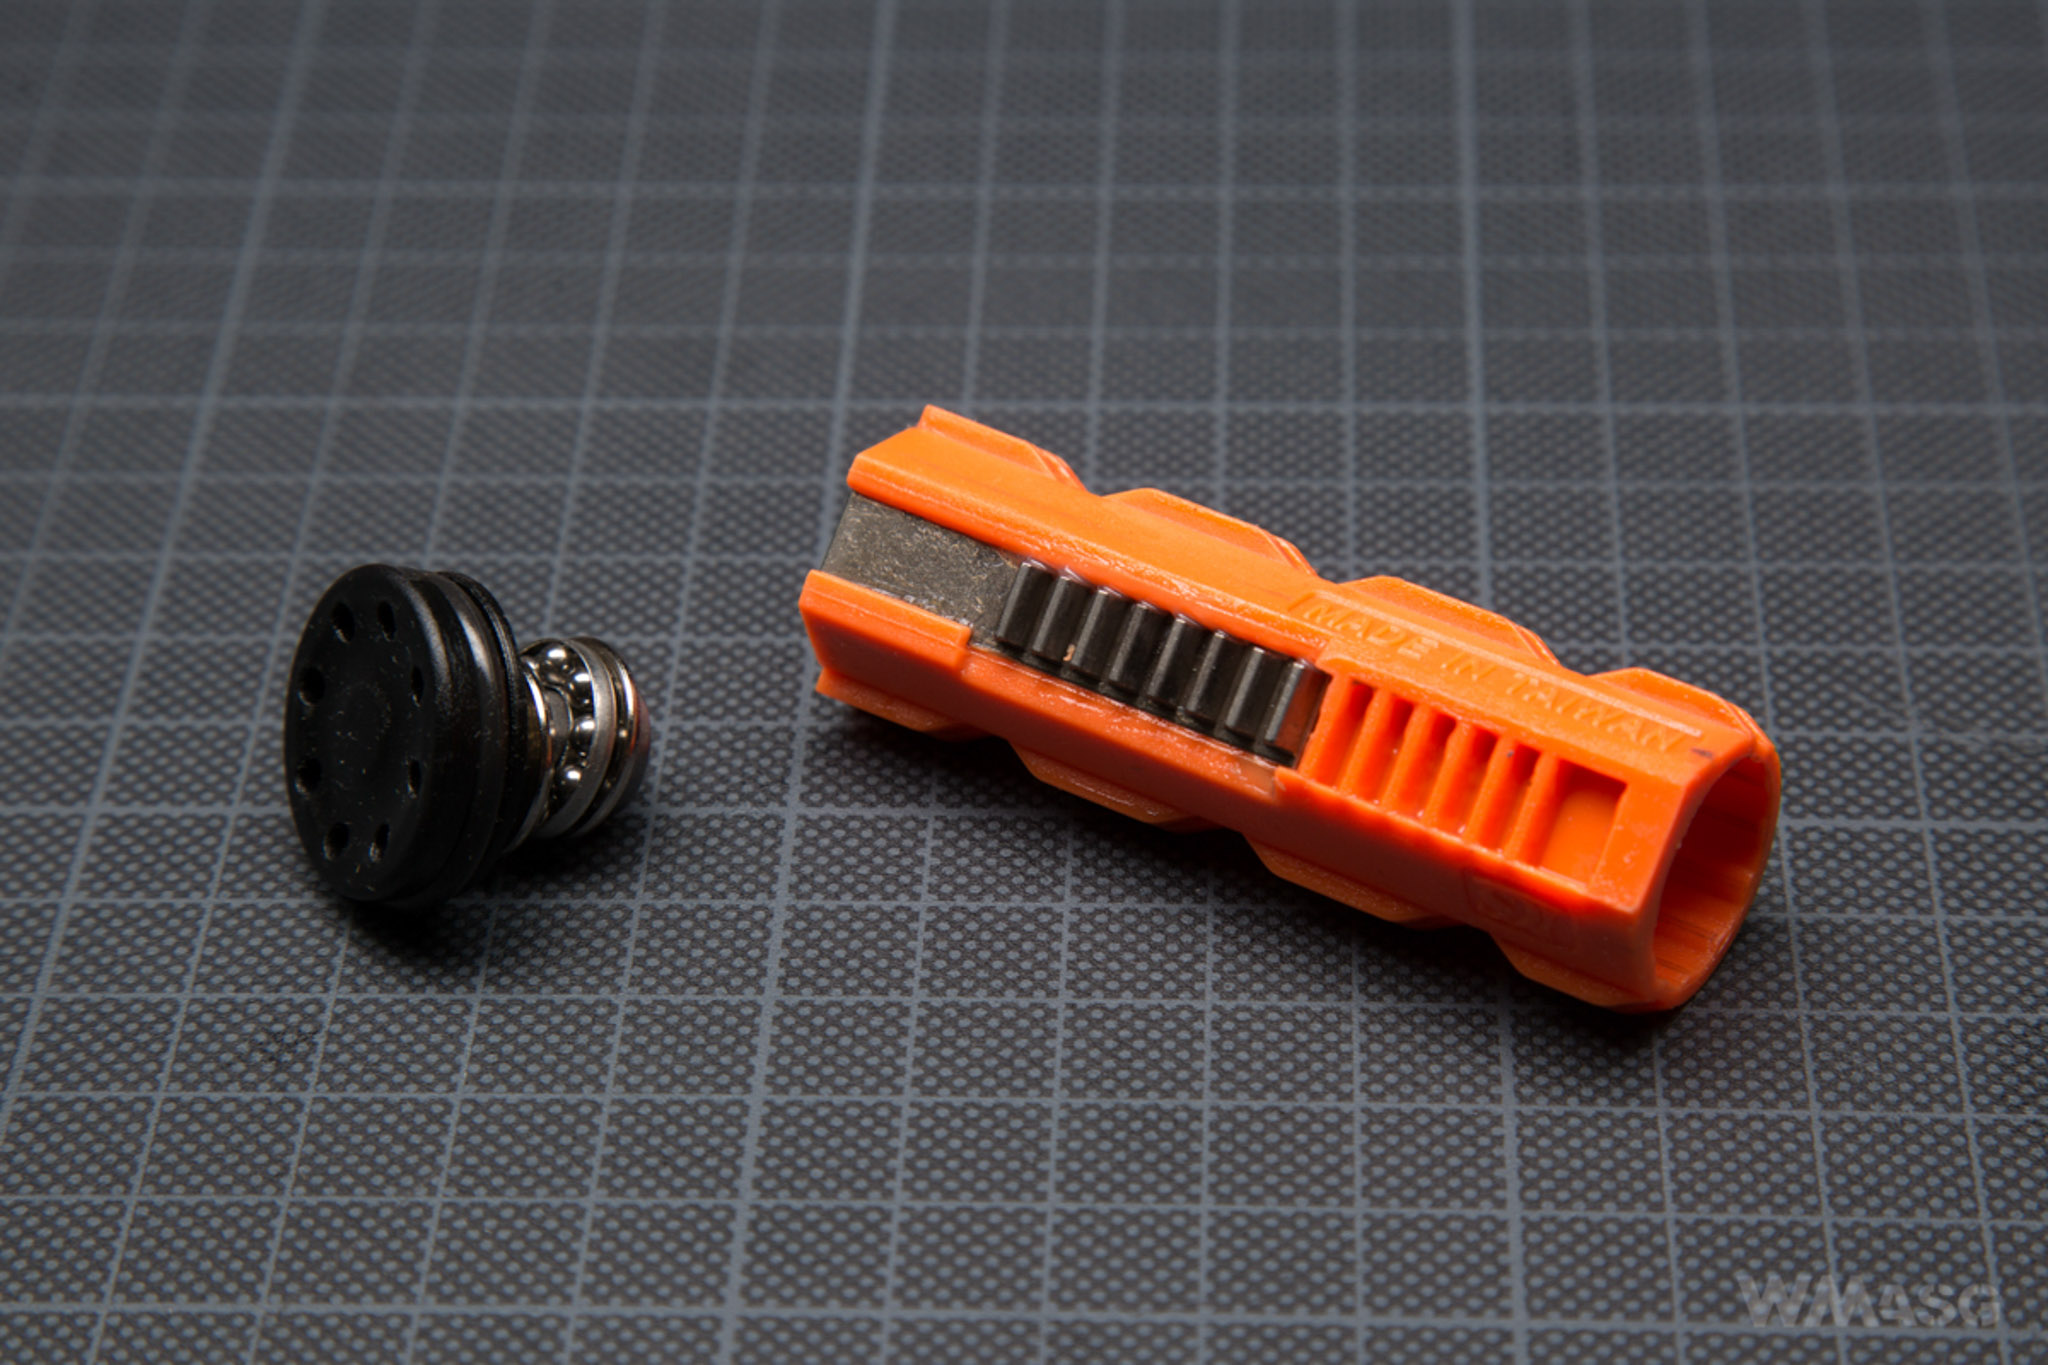
The piston head is made of plastic, is flat and has 8 ventilating holes and a ball bearing.
The spring is non-linear and according to the specification is an M120 type. The guide is made of plastic, has no bearing and is of the V2 gearbox standard. It is externally stabilized with a screw.

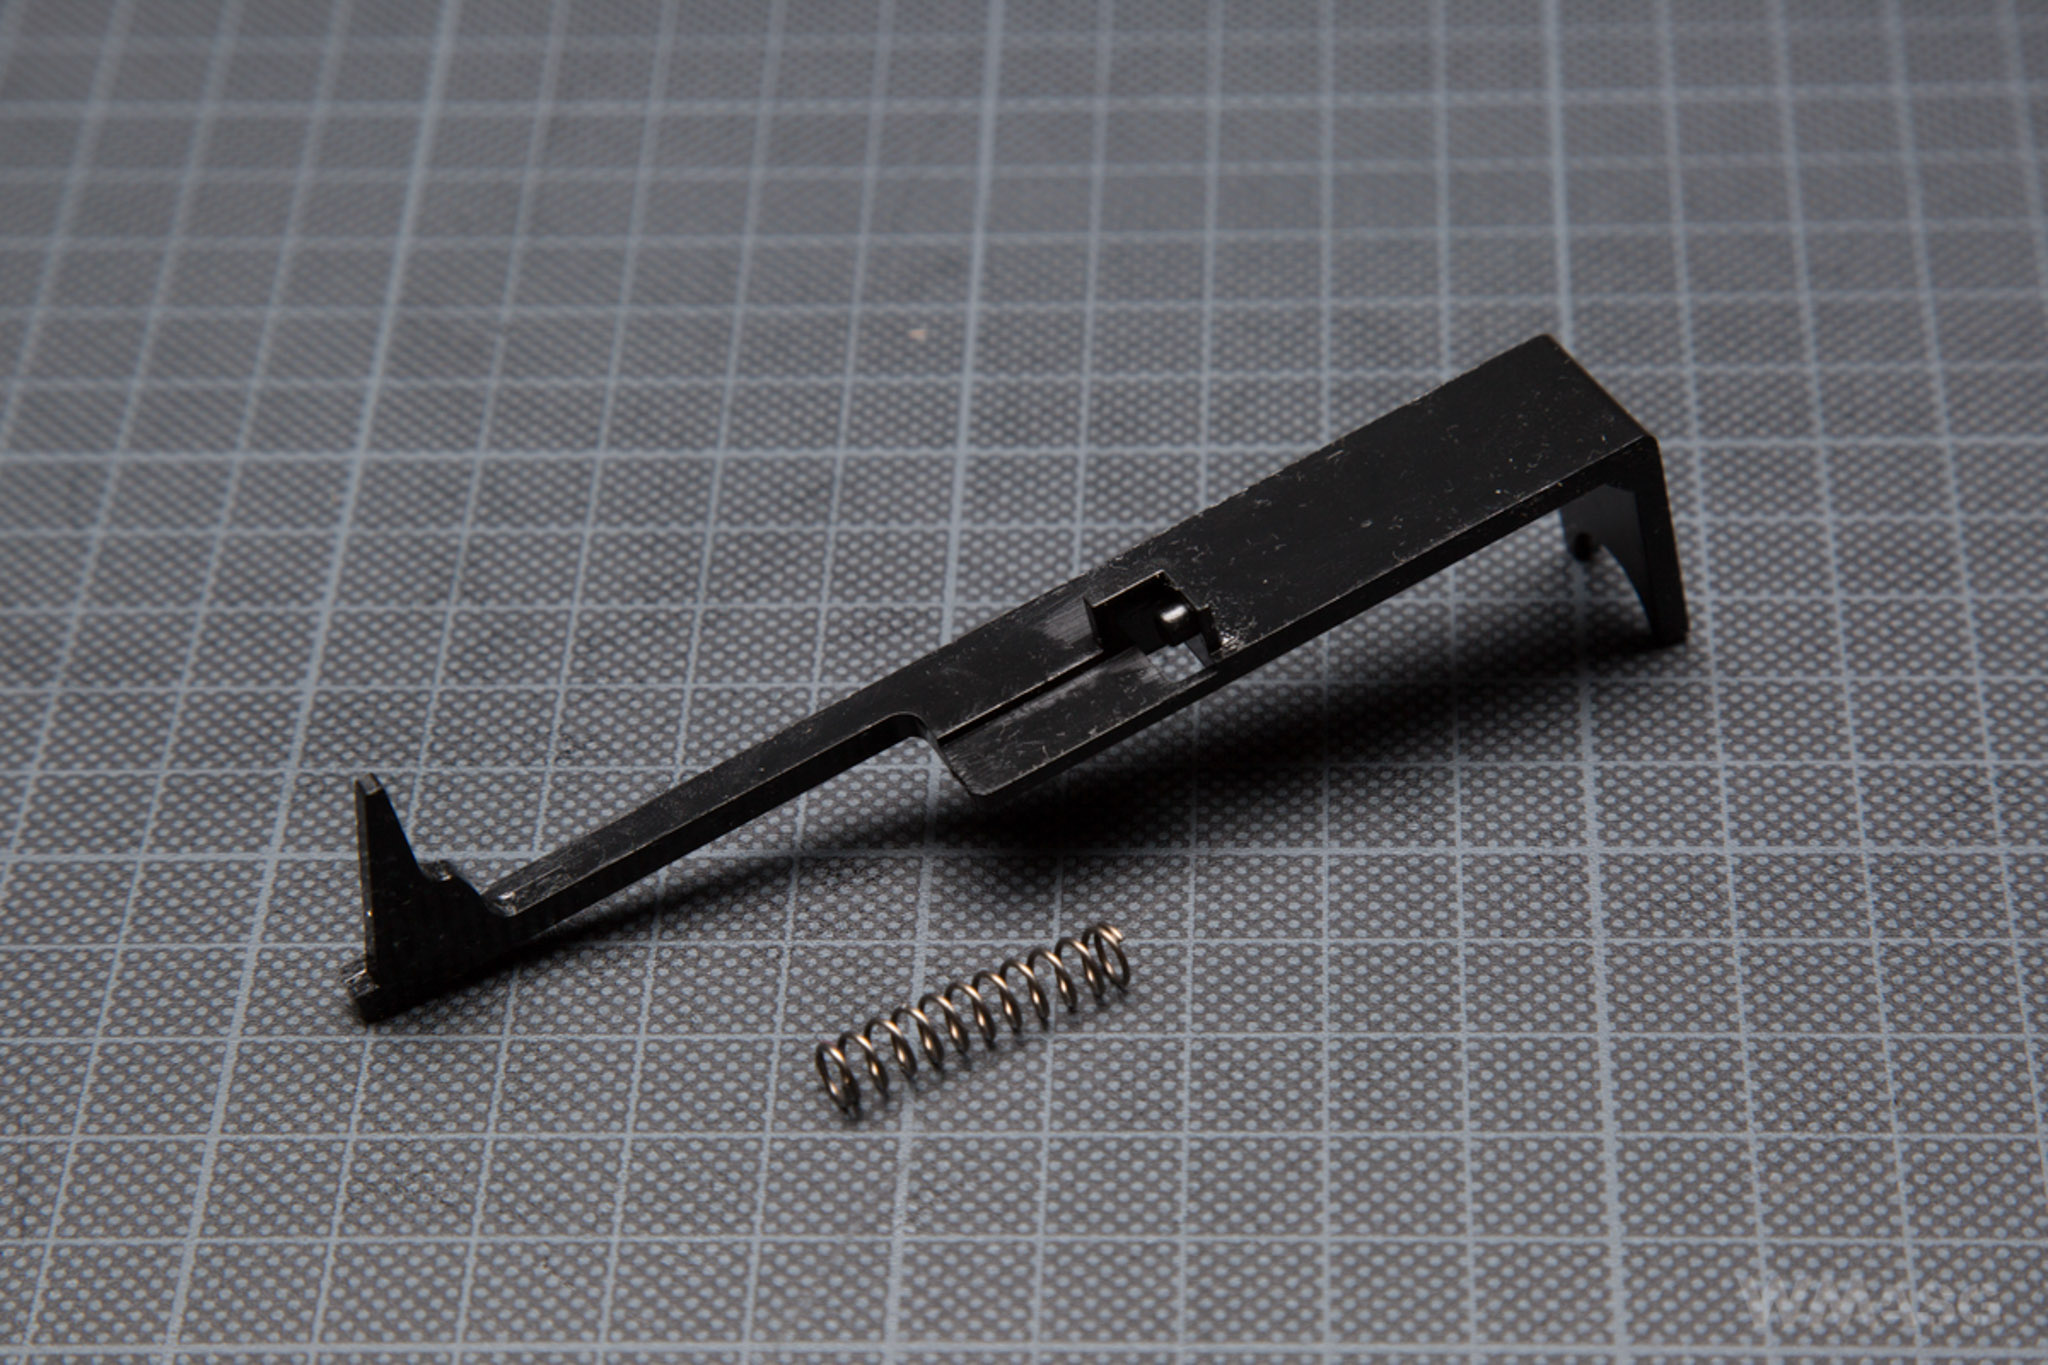
The tappet plate is non-standard.
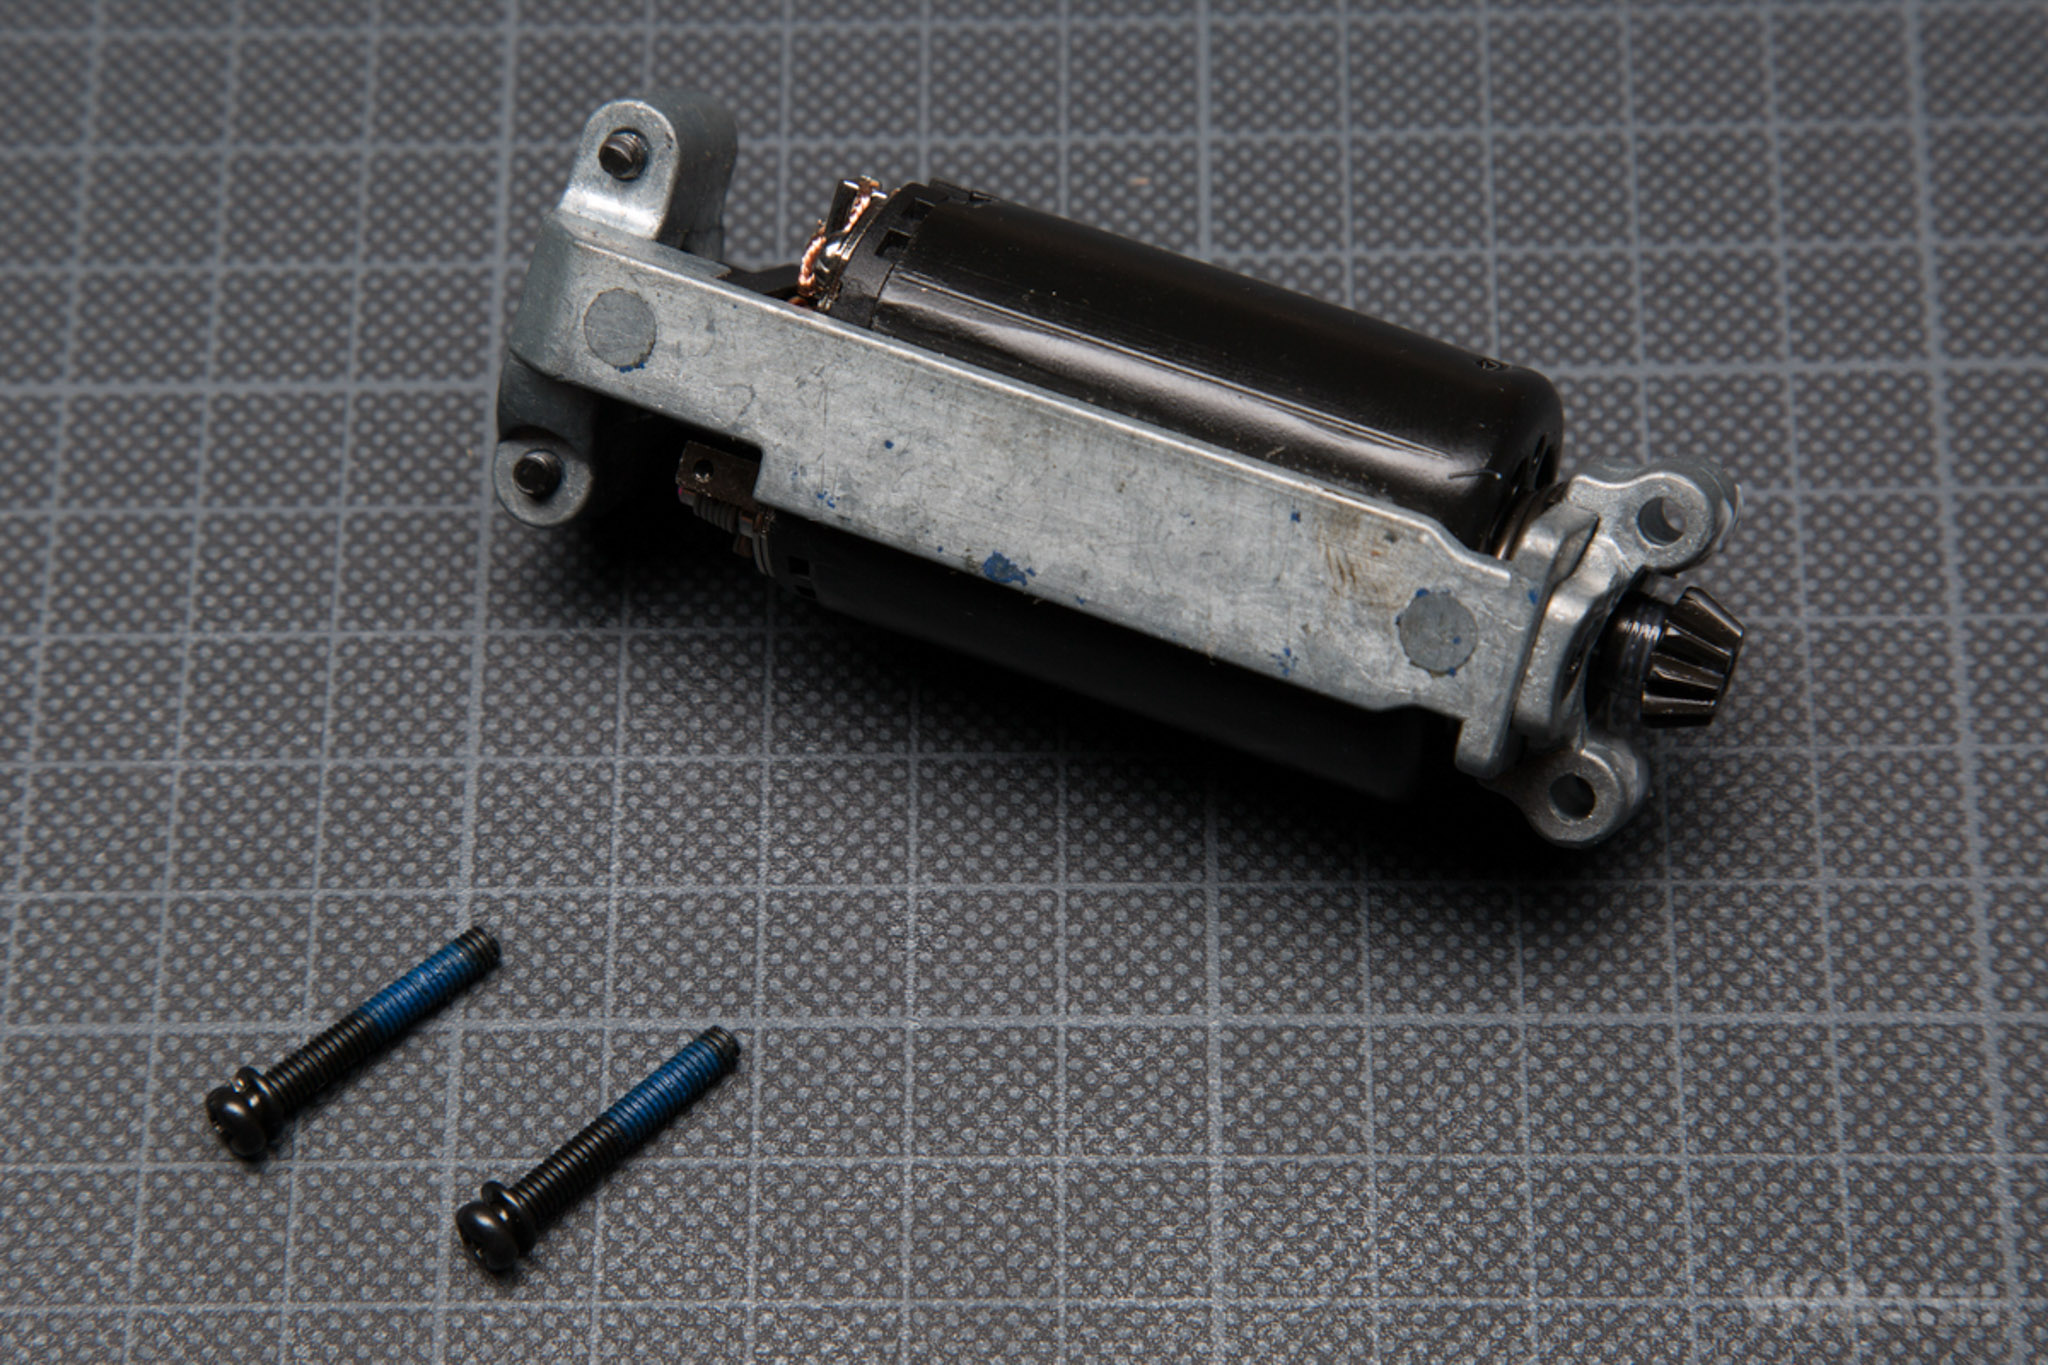
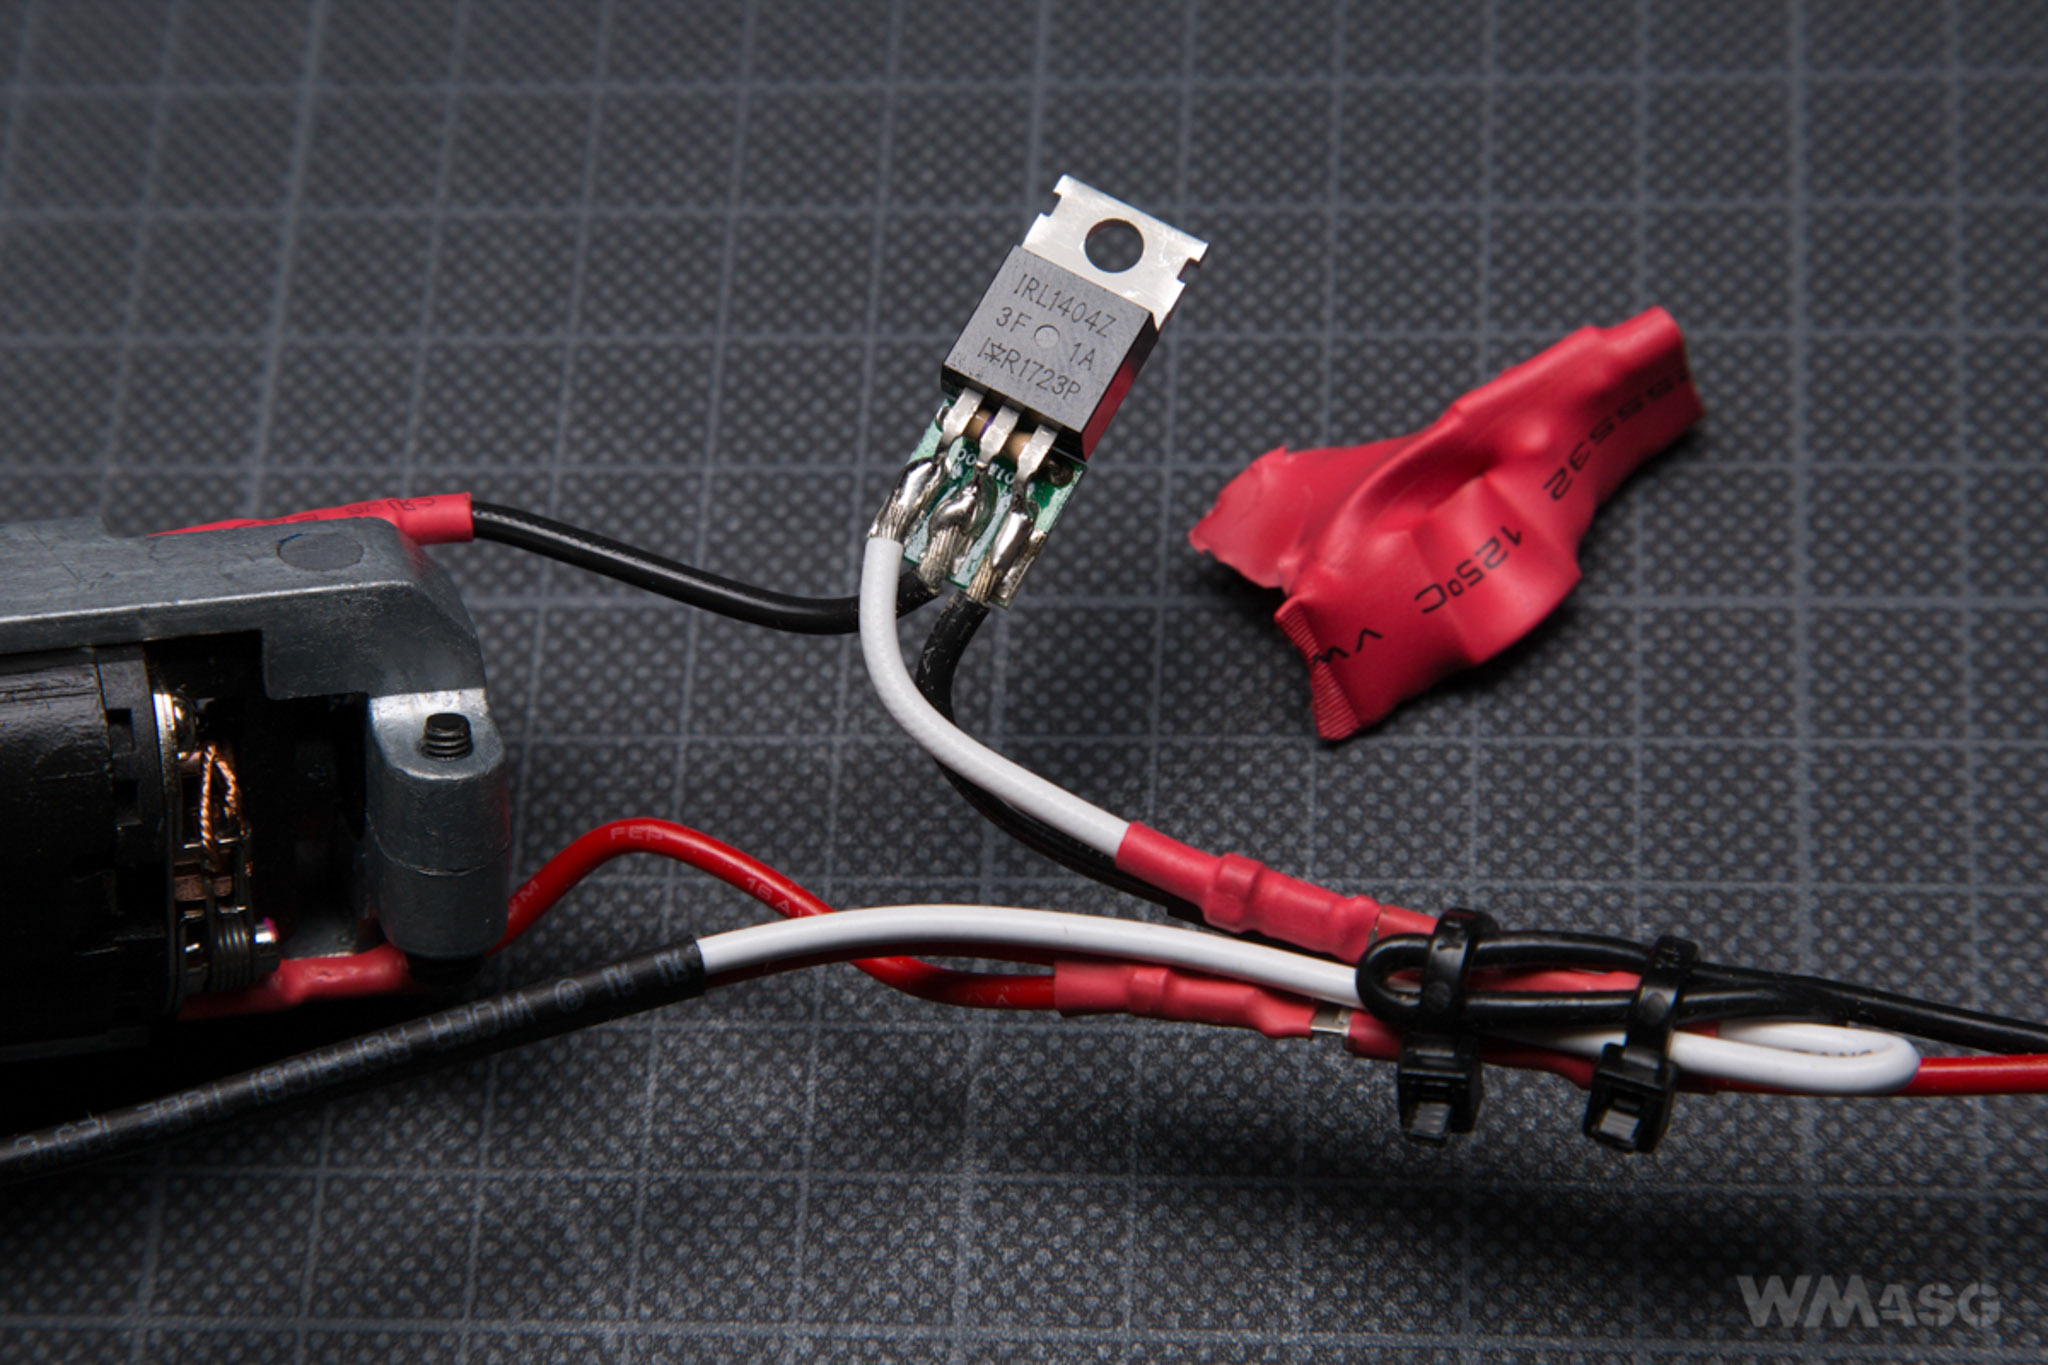
A short type motor with relatively strong magnets is installed. According to the information from the manufacturer, it is a Turbo 3000 engine. It has no markings.
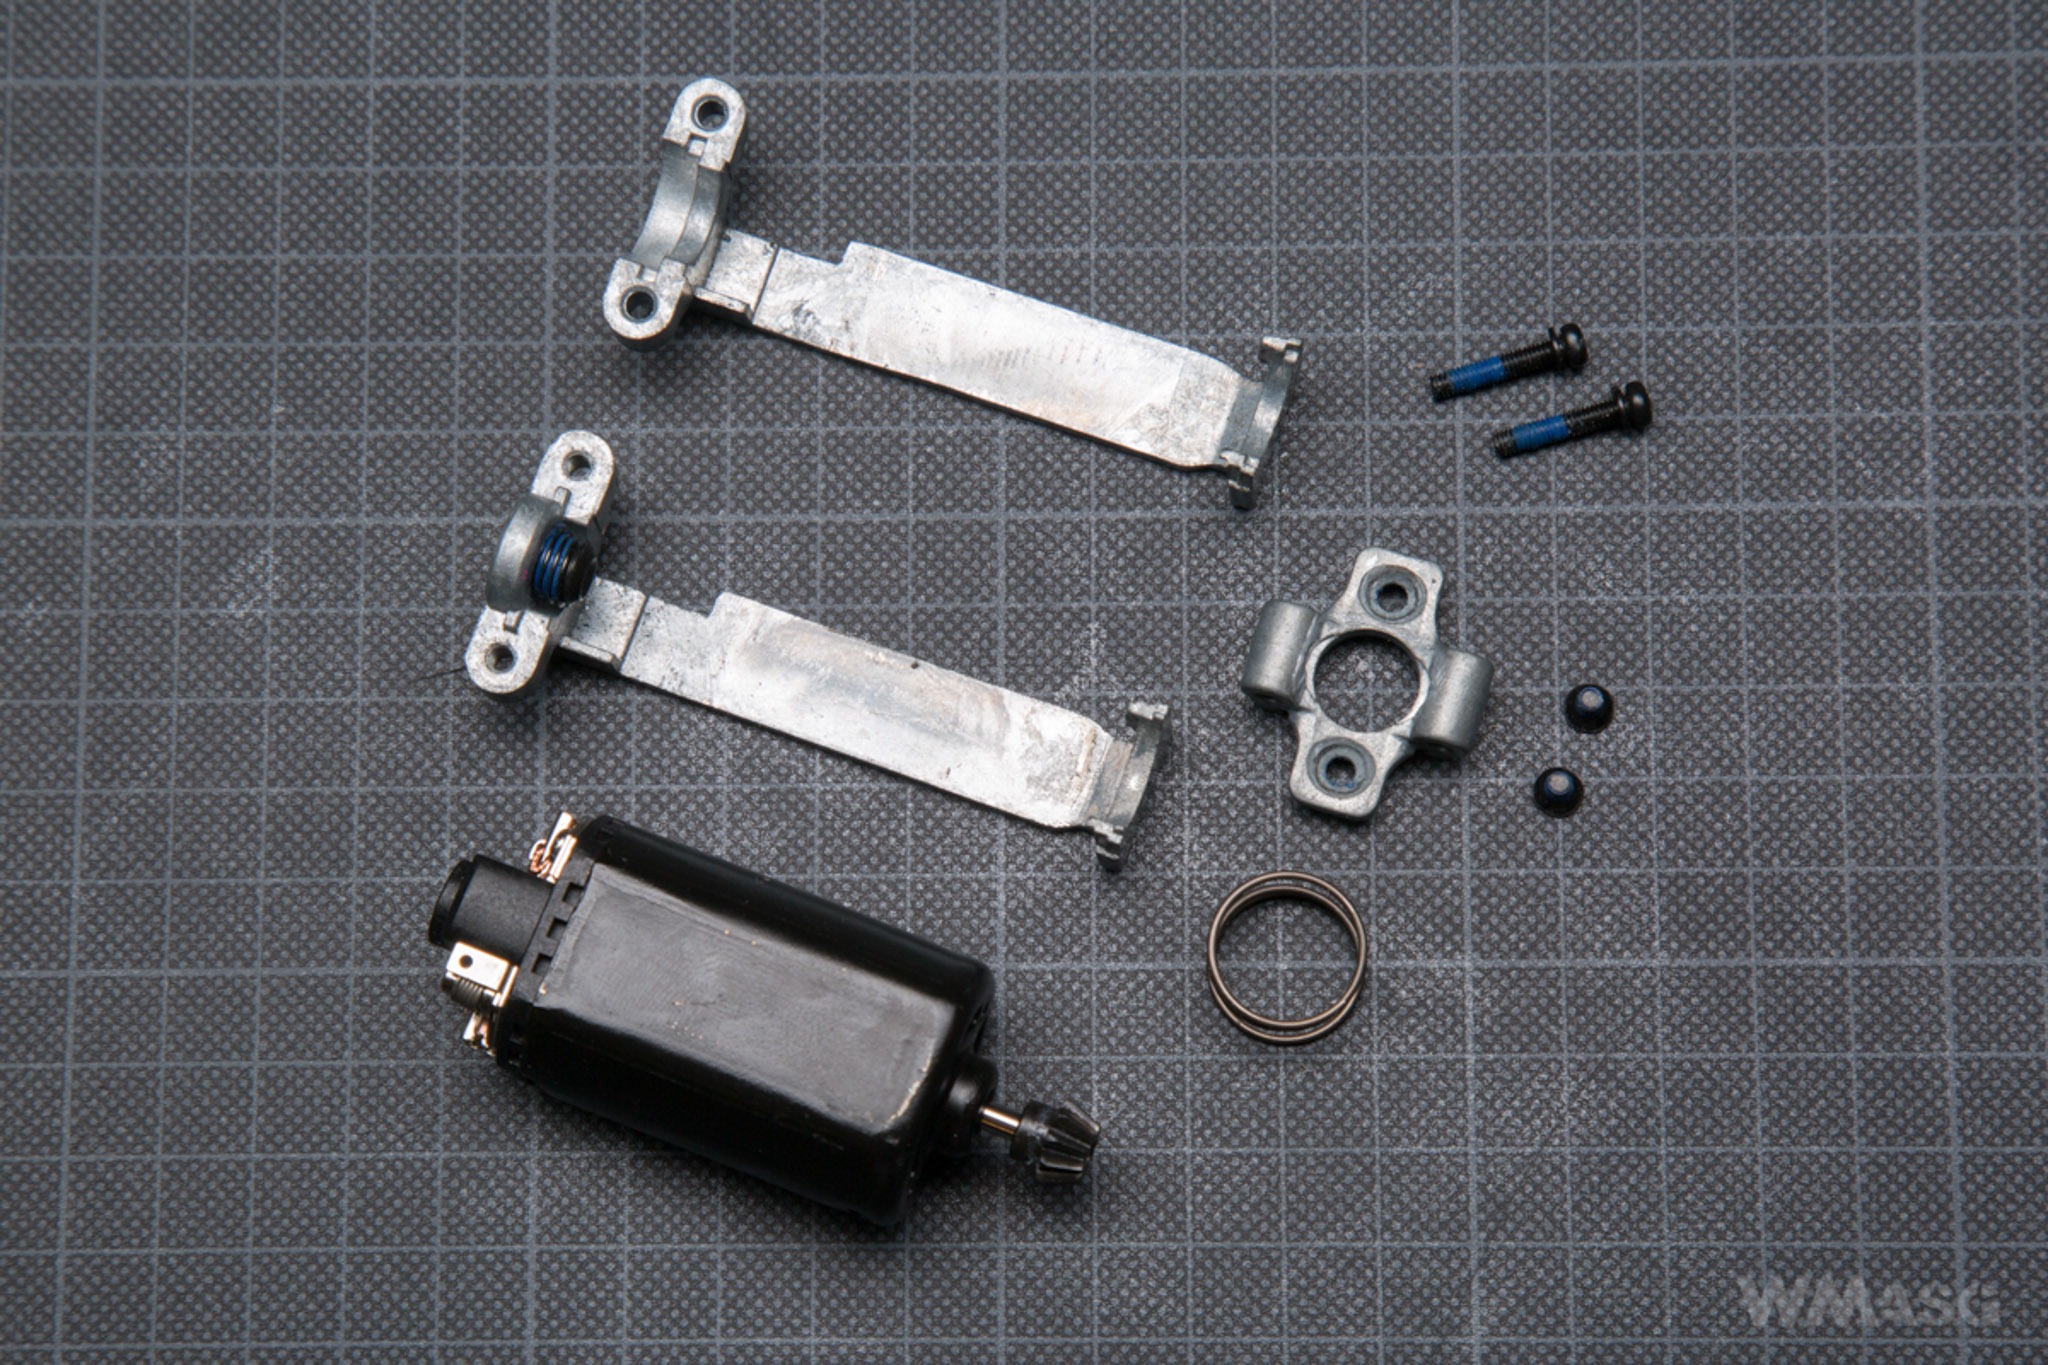
The motor frame is dedicated. The adjustment of the motor's position is done with a hex wrench but only after removing the gearbox from the stock.

The trogger switch is non-standard. The cables are rigid and encased in hard insulation. Contrary to the information and photos from the advertising leaflet, these are not 16AWG cables. The ones used in the replica do not have any markings. A simple MOSFET is built into the system.
The inner barrel and Hop-Up chamber
The inner barrel is 610 mm long, black and made of aluminum. It resembles the Madbull's Black Python barrels. It has no markings. ICS does not give the inner diameter of the barrel. The Hop-Up chamber is made of plastic. The adjustment is smooth and is done by rotating the ring around the barrel's axis.
The Hop-Up bucking used in the replica is standard.
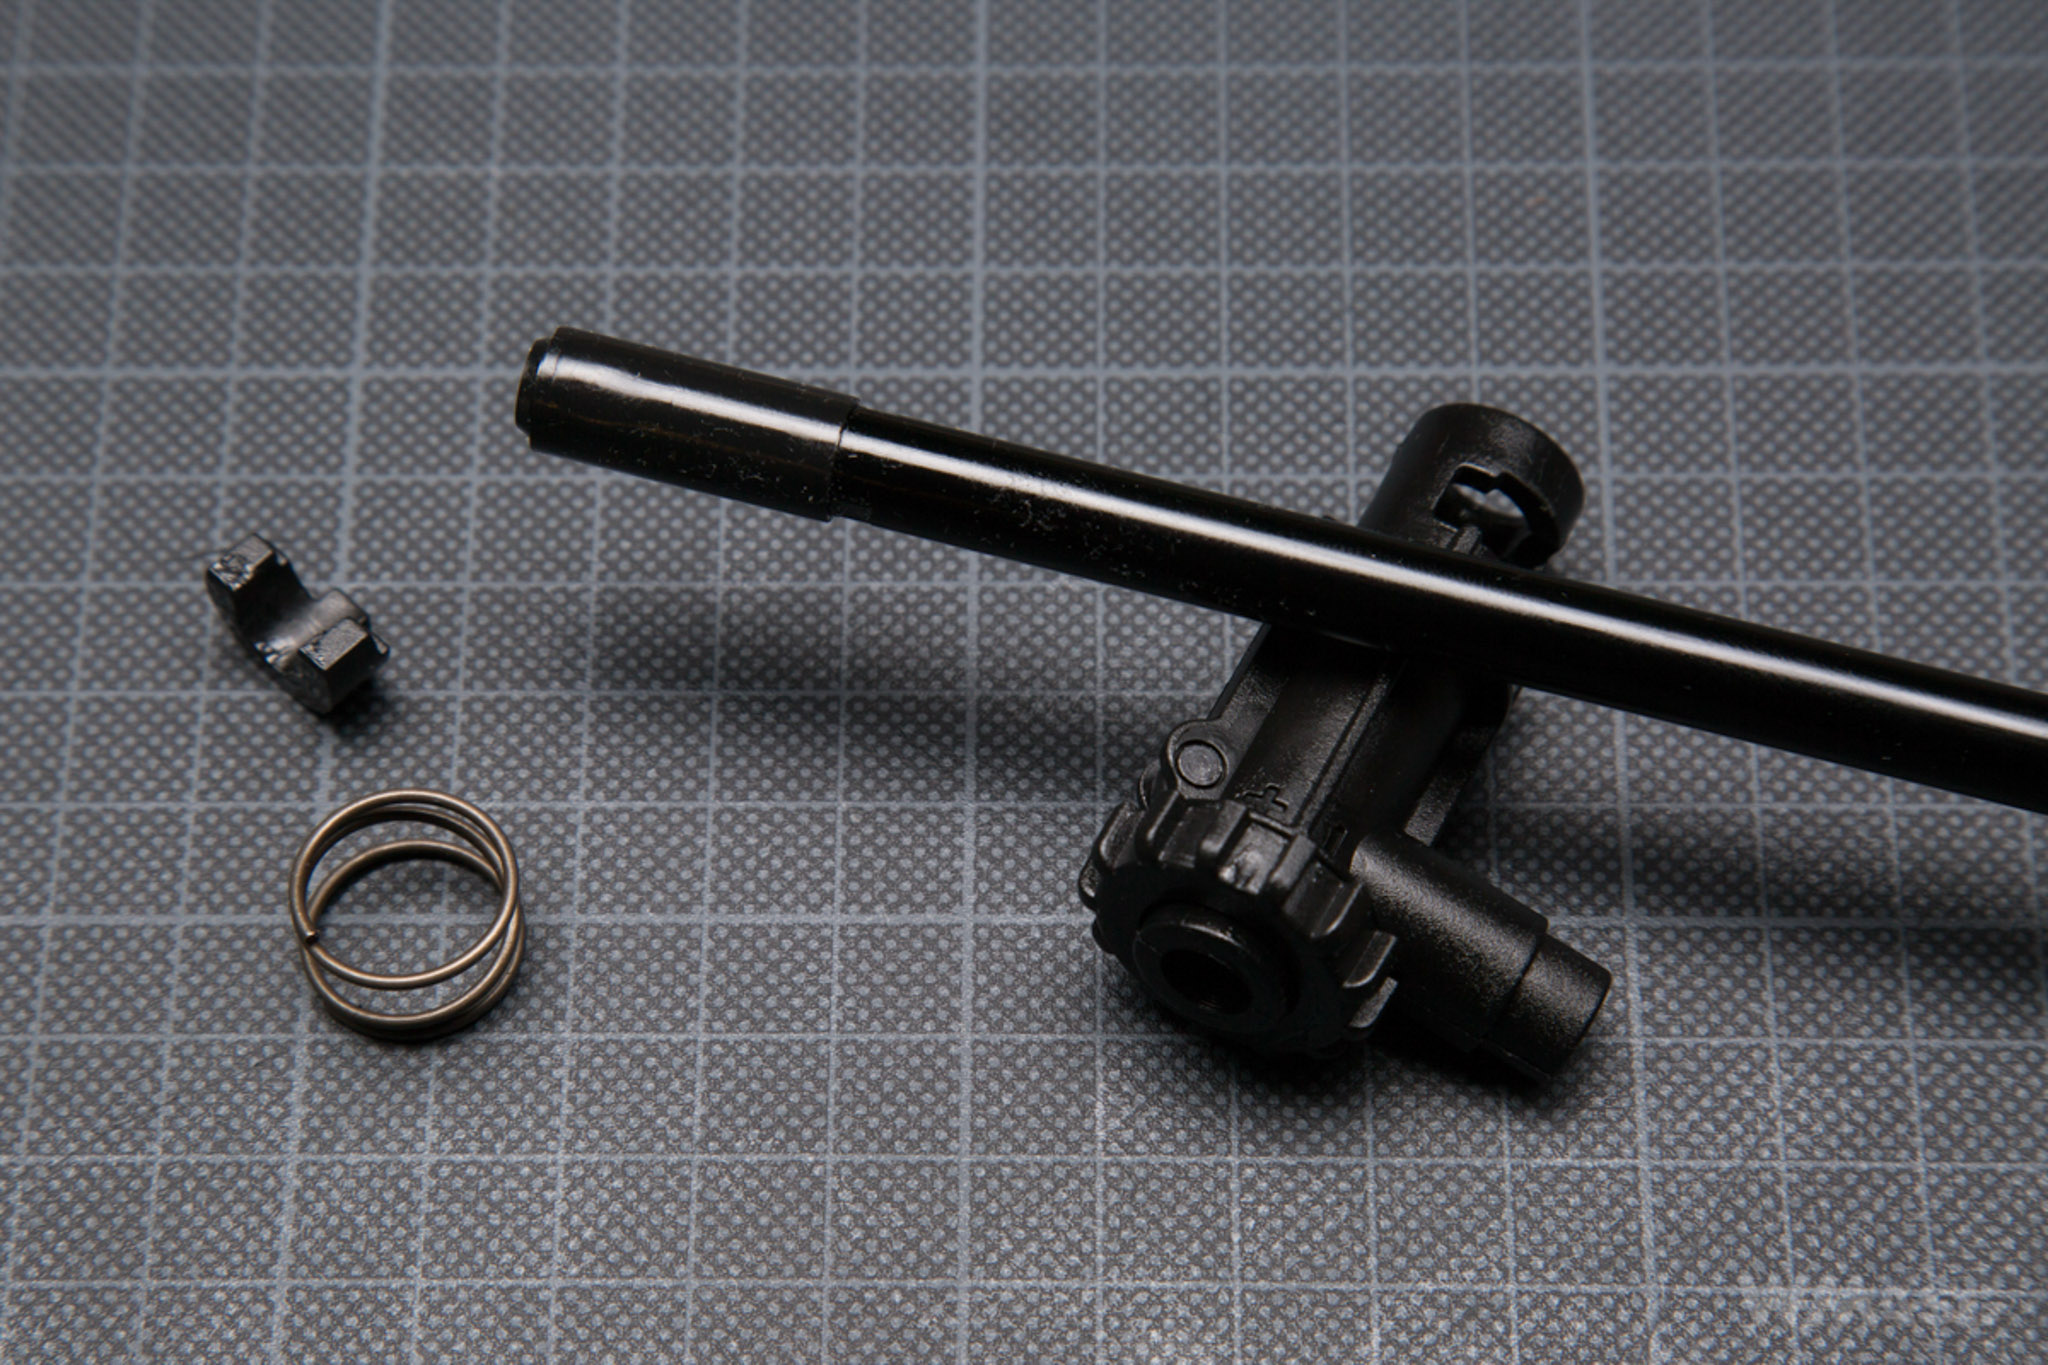
The chamber is pressed against the gearbox with a large spring.
Measurement of muzzle velocity and target shooting test
The tests were carried out on our own enclosed shooting range, at an ambient temperature of 26ºC, the Hop-Up was set to zero. The measurements were made with the XCORTECH X3500 chronograph using Nurpol 0.2 g BBs.
The muzzle velocity measurement results:
1. 446,9
2. 445,0
3. 449,1
4. 448,2
5. 446,4
6. 451,2
7. 448,0
8. 444,7
9. 448,6
10. 453,4
Average: 448.15 fps. The rifle is single fire only.
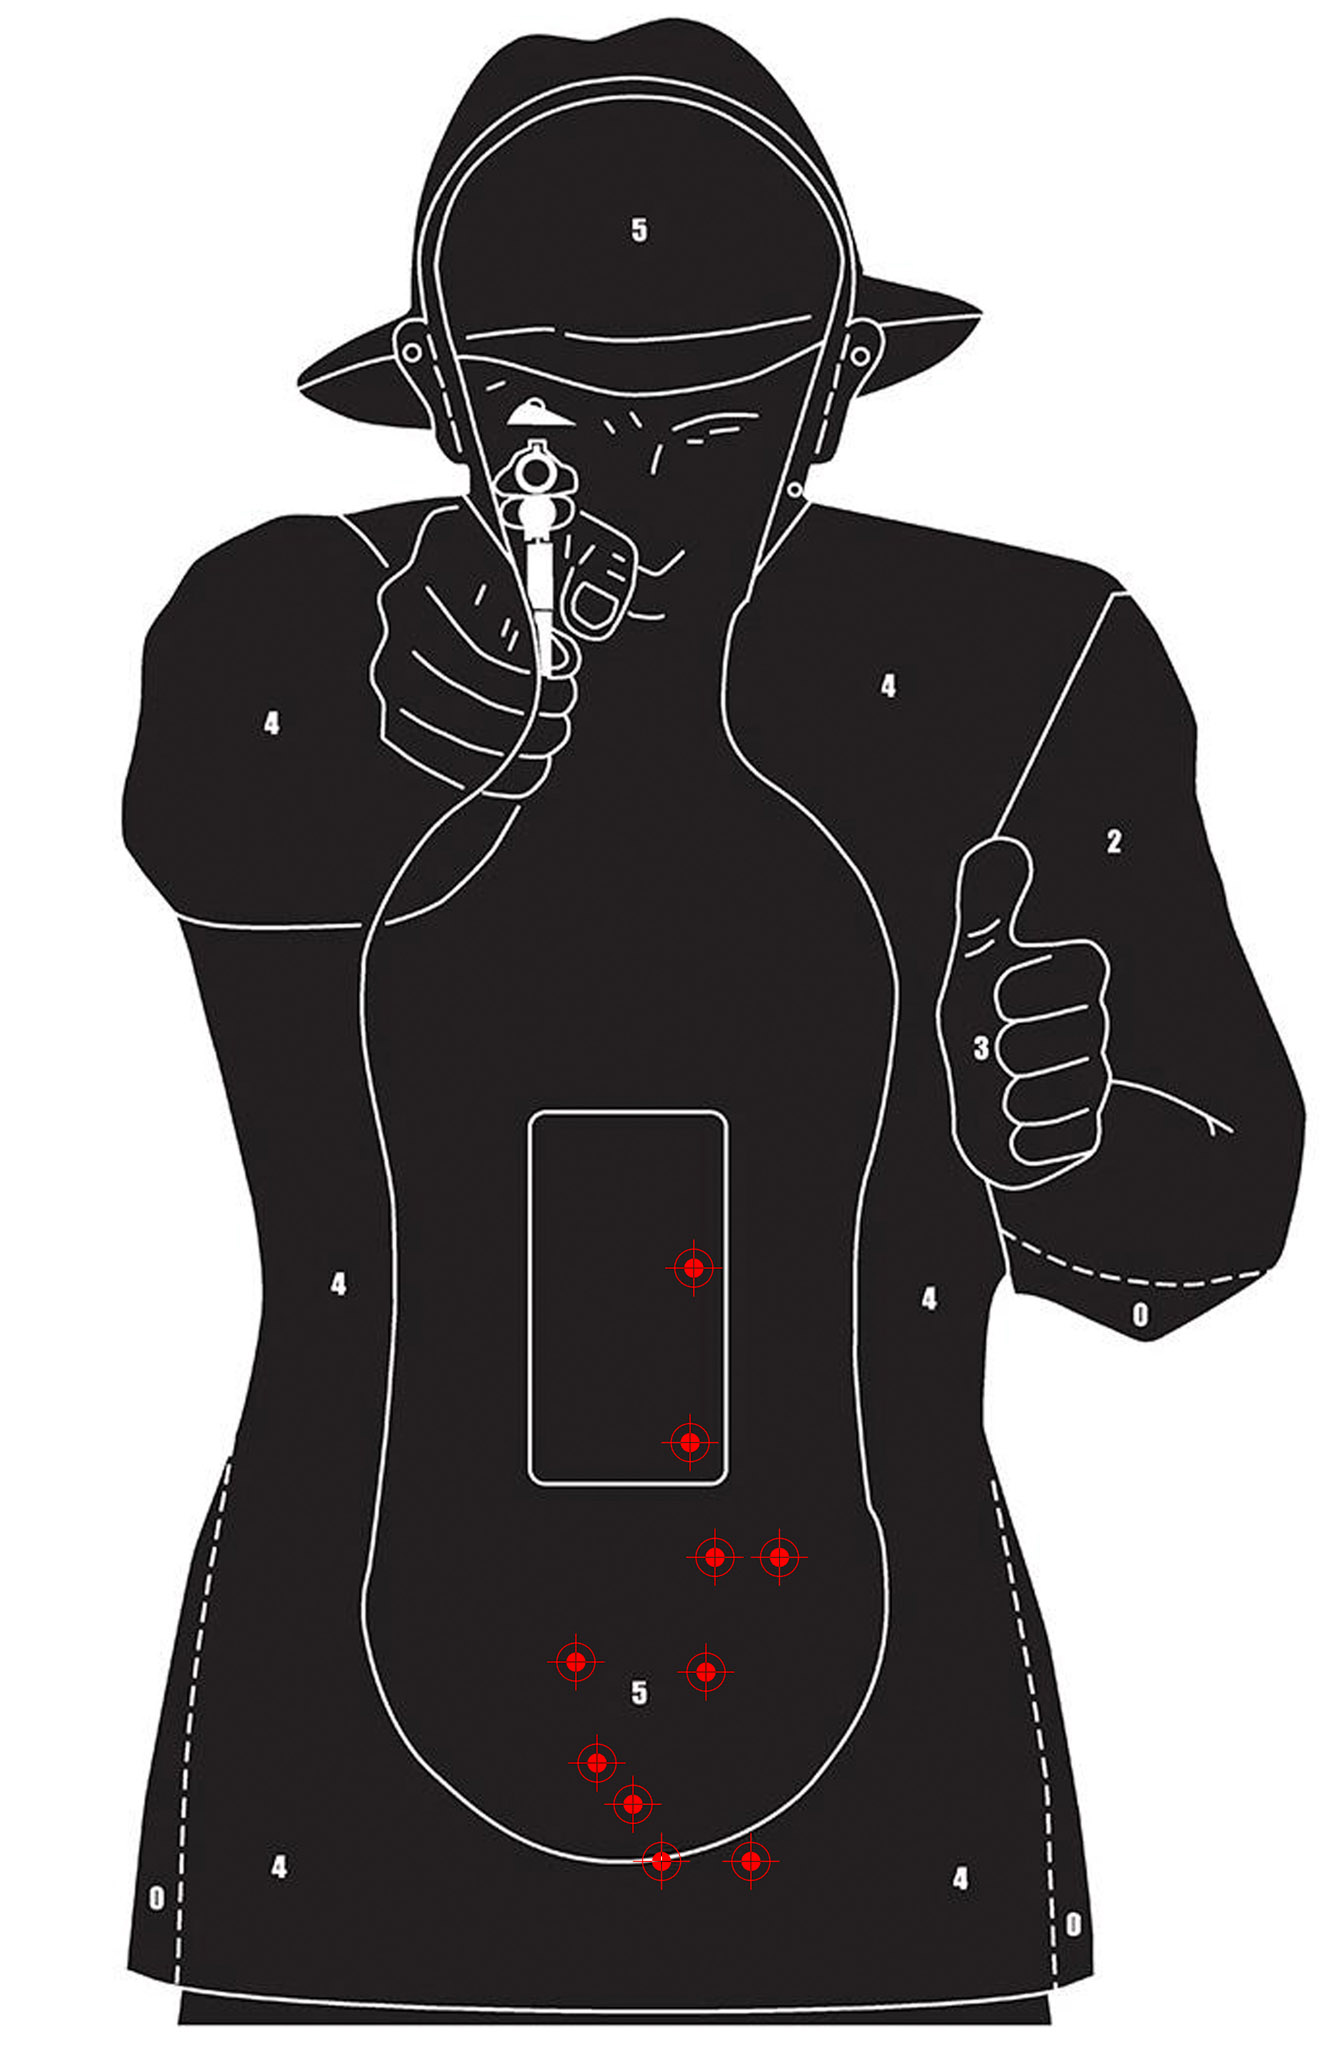
Target shooting test
We used biodegradable 0.25 g BBs by Nuprol for this test. The distance from the target was 25 m. The shooting was done from the K-Zone shooting rest. 10 shots were fired from a replica pulled straight out of the box. We did not adjust the sights. All shots hit the target, the largest distance between BBs - 20 cm.
When writing about the parts of the set, I mentioned, among other things, a separate manual describing how to unlock the trigger. What it means that on occasions the trigger may become blocked (it will become hard), which will make it impossible to fire a shot. The manual explains how to deal with this situation. In short: remove the trigger and the trigger guard and move the slider to which you now have access to. During several-days of testing and field trials during the W-Army event in 2018, the trigger has not been blocked a single time.
Summary
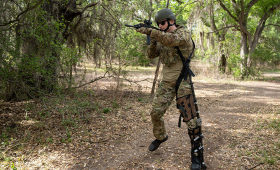
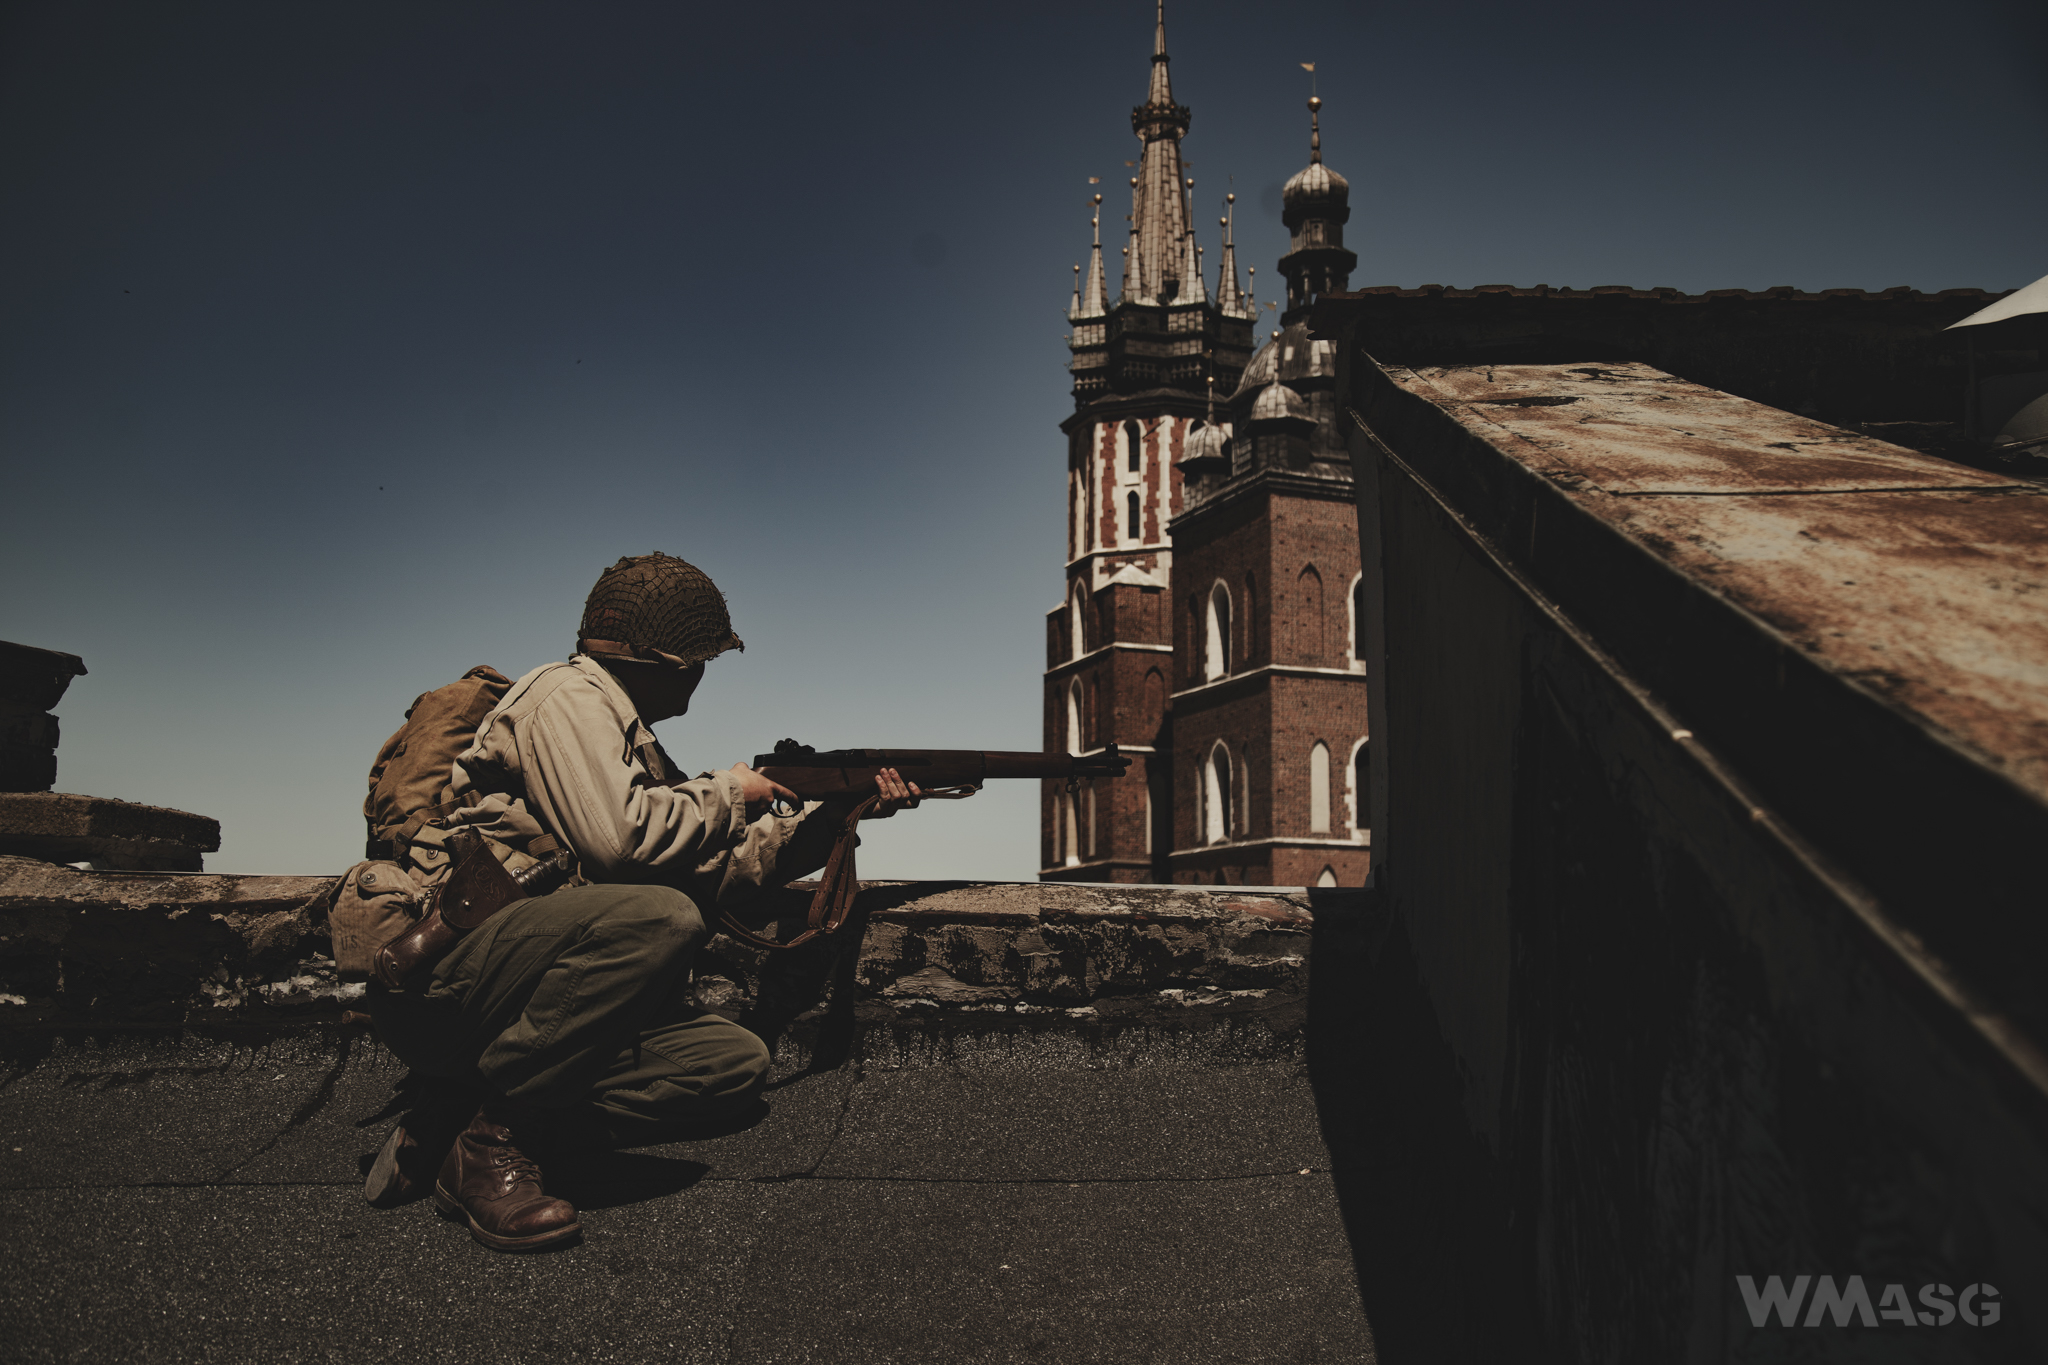
At the beginning of this review I wrote that M1 Garand is a replica not only for reenactments. Why? Let's put aside for a moment all the obvious limitations of the replica that result directly from the limits of the real firearm (the period and technology in which it was designed and produced). And then we have a single-shot rifle with a barrel length of 610 mm and a muzzle velocity of 450 fps straight from the box. And, to top it off, a replica that few other regular airsoft players might have.

We would like to thank Trojan from GRH 2nd Rangers for his invaluable help in making the photo shoot possible!