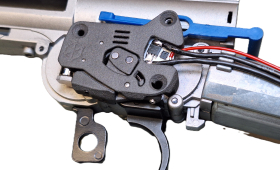
This short manual regards Katana WE installation in VFC HK 416. The aim of the project was to maintain 100% reversibility of the operation, what includes none or minimal incursion into replica’s construction.
Stage one
It is rather easy to find similar maunals on the Internet. However, they share one common flaw. Adding the Katana set to HK 416 "breaks" the replica, because upper reciver ends up with bereaved lock. After that you find yourself in point of no return - Katana or new receiver.
I decided to use typical broken V2 gearbox, that can be found basically in any place, where airsoft players live. Initially, I wanted to use G&P gearbox, bought at WMASG consignment. Unfortunately, according to Polish Post sloppiness, the gearbox stuck somewhere out there for 4 days. I am rather hasty person, so I used "Chinese" gearbox I had found in my own supplies. Undoubtedly, it's greatest advantage was possesing holes and mounting for bolt catch. However, it wasn't broken. And still - it is "Chinese".
If you made it through this a bit too long and probably boring introduction, please make yourself familiar with the foto reportage of the installation. Standard V2 gearbox lets to carry Katana cylinder from beneath, exactly as it looks like with standard solution. It is possible only when Katana cylinder got similar diameter as standard cylinder. Photos from measurements below.
As you can see, the diameter is similar. Thanks to that, the cylinder will snugly fit gearbox slideways, what decrease the number of elements, that may require cutting.
Below you can spot the Prowin Hop Up chamber dedicated for this set. Information about this amendment provided on the Internet emphasize, that this is the only chamber, that allows correct sealing with Katana piston head. I would like to mention, that VFC standard chamber fits here as well.
Katana cylinder is equipped with rails designed to fit slideways inside the upper receiver. Described VFC does not possess anything like that. Creating them is too complicated without milling machine. That's why you need to be brutal and remove rails from the cylinder. I used one of the Dremel polishing devices.
Grinding both rails guarantees the cylinder will swiftly slide inside the upper receiver. In this point you must be really careful, not to set the trap for future You. The rail must be totally removed. There may not be a single trace of it. Who cares if you fit your cylinder inside, if you failed to connect both parts of the receiver?
When the cylinder fits there barely, it means you failed. You need to achieve some space between inner side of the upper receiver and outer side of the cylinder.
Photo below shows the cylinder with completely removed rails. As it occured after trials, the problem with connecting two parts of the receiver still existed. I found out, that the main suspect was the spring guide. It's diameter was wider than cylinder's in the widest spot.
Here you can see a girnded upper guideway of the cylinder. For unknown reason this guideway is asymetrical. Due to that, the cylinder is curved left by some degrees, when entering the upper receiver. It means the device should be grinded again. This time exactly 2 mm should be fine. Of course girnd the right side looking from the perspective of the spring guide.
Additionaly, I polished the spring guide on each side. It wasn't neccessary. Just esthetics.
Below you can take a look at two photos of the "shell chamber". Before you start working over this part, I strongly suggest you removing bolt handle replica, so eventual damage can be avoided.
On that moment I had some serious doubts, if the "ear" of the cylinder fits with the wole for the rear pin. The length of Prowin chamber and Katana cylinder guarantees perfect and tight fit. At least in the case of VFC HK 416.
As you can see, both holes are in the same axis.
Below you can see the montage of both parts of the receiver with Prowin chamber and Katana cylinder installed.
Here the first stage of work is done. Total time devoted for it takes about 3 hours. The amendment is very easy, even intuitive for a person possesing intermediate experience with repairing AEG replicas.
Stage two
In the next stage it is needed to mold V2 gearbox, so it can cooperate wih Katana cylinder. As I have mentioned before, G&P gearbox was selected. Unfortunately, Polish Post failed me and I was forced to use items in my vicinity.
While selecting your gearbox to be used for the amendment, I suggest you considering not only the fact of having broken gearbox. It is also worth to wonder how much effort you need to put in it to achieve your goal.
I marked red lines of cut. Folks experienced in AEG repairs and customization should now know I made a mistake when I selected this specific gearbox. Back then I wasn't aware of what awaits me further.
Below already cut, almost ready gearbox.
Longly expected moment - testing how cylinder fits the gearbox.
Does it fit? No!

He got up and left the room, smashing the door...
The gearbox is "full" there, where the rear pin should go through. The is no place, where cylinder can get attached. All of the space marked red must be milled. Just for the outlook I checked, how the cylinder fits the gearbox at another angle.
It fits well. My morale sky-rocketed high and I started milling "the nest".
Seventeen shields for Dremel polisher later.
I was really fed up with this day. My hands were swollen, lungs filled with ZnAl dust, bathroom was dirty, broken polisher shields lying in the tube. The last thing I did (apart from cleaning) was final matching the cylinder with gearbox - voila!
Now you should put attention for the position of sector gear with accordance to the polished hole in the cylinder. Placing of these elements is crucial for correct work of piston and gear. It must be matched really precisely. In case if it wasn't done correctly, you would need to polish the cylinder in the sector gear nest.
In this place, the second stage is successfully closed.
Stage three
The next stage is filling the gearbox with bearings and installing ASCU.
Installing ASCU demanded removing some outstanding parts in the gearbox. I will not develop this topic, cause it is not directly connected with Katana conversion.
I recommend using original VFC selctor plate for ASCU. It will ensure the correct work of the whole set.
When the new part is places, you can mount motor and grip. It is the best time for checking gears' shimming and motor regulations.
After regulating and checking everything, the mechanism responsible for release the bolt impostor can be placed.
Now we can place gearbox to lower receiver and check if both parts match each other.
Beware the illusion visible on the photo. It looks as if cylinder was placed a bit higher on the piston side. It is fault of lenses used for making the photo. Normally everything is placed parallely according to lower receiver.
I haven't mentioned anything about gears so far. If you intend to use standard gears for this set, remember about removig 3 first pistonal teeth. Katana system is so called "short stroke", increasing your ROF. Due to that, piston got less teeth than typical solution - 13. For making it work fine, sector gear needs 13 teeth as well.
Final assembly of the replica.
As I didn't remove the "ears" in the upper receiver, so in order to assemble the replica, this particular element needs to be inserted to stock guide casting, preserving some angle. Next, you need to "lie" the upper receiver on lower part and push the pins inside. Assembling the replica shouldn't cause you any trouble.
If front pins does not fit holes, the carriage of the cylinder in the mechbox is minimally too high. You shouldn't use too much strength to place it. Instead, take Dremel polisher once more and grind it gently once more, unless you want to damage something expensive and important.
Final effect.
To sum it up - replica shoots.
V0 at the red cylinder is 390 FPS +/- 2 FPS with ROF 24 bbs/sec. That's what I expected.
The amendment is time-consuming due to numerous fittings. It totally took around 9 hours. In case of G&P gearbox, that wouldn't need to be "sculptured" to fit the cylinder, it took approximately 6-7 hours.
Is it worth? I think it it. Very. In the outcome we got the replica of highest possible quality with inside as close to PTW as possible. The cost of it is actually just anything you spent for the cylinder (buying new gearbox is just and option) and your work.
Personally, I encourage you to do it and wish you good luck.
Cheers,


